Salta al contenuto principale

Hover-1 Horizon Wheel/Motor Replacement

Cosa ti serve

  1. Hover-1 Horizon Wheel/Motor Replacement, Base Plate: passo 1, immagine 1 di 2 Hover-1 Horizon Wheel/Motor Replacement, Base Plate: passo 1, immagine 2 di 2
    • Remove the six 12mm Phillips #2 screws holding the base plate.

  2. Hover-1 Horizon Wheel/Motor Replacement: passo 2, immagine 1 di 2 Hover-1 Horizon Wheel/Motor Replacement: passo 2, immagine 2 di 2
    • Remove the two 11mm Phillips #1 screws that hold the base plate to the body.

  3. Hover-1 Horizon Wheel/Motor Replacement: passo 3, immagine 1 di 3 Hover-1 Horizon Wheel/Motor Replacement: passo 3, immagine 2 di 3 Hover-1 Horizon Wheel/Motor Replacement: passo 3, immagine 3 di 3
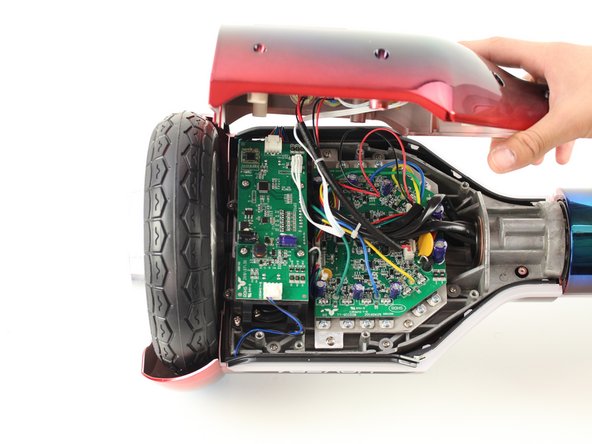
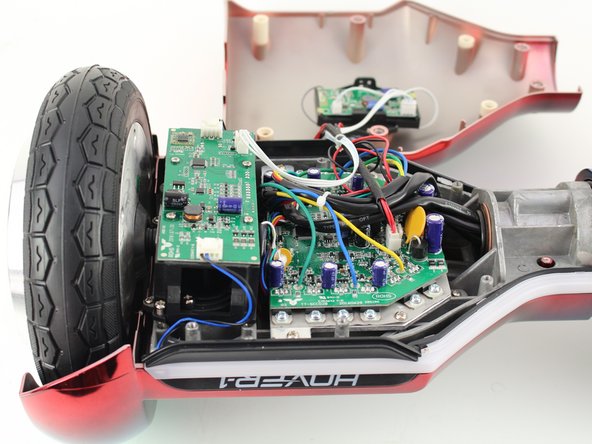
    • Remove the base plate by lifting it up.

    • The base plate is connected to the body with wires. The wires are long enough to set the base plate to the side.

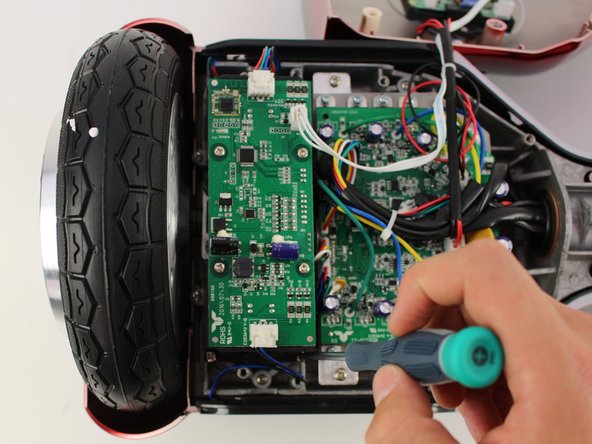
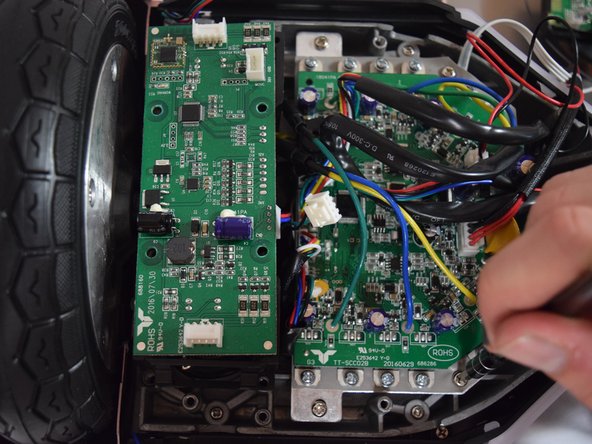
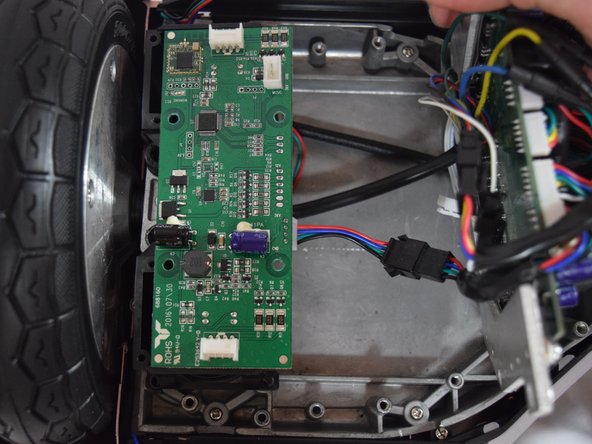
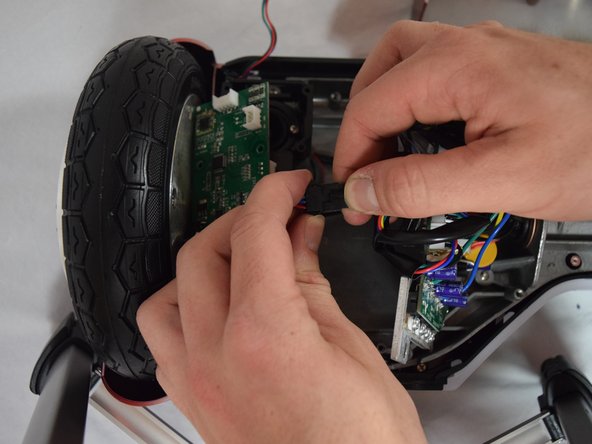
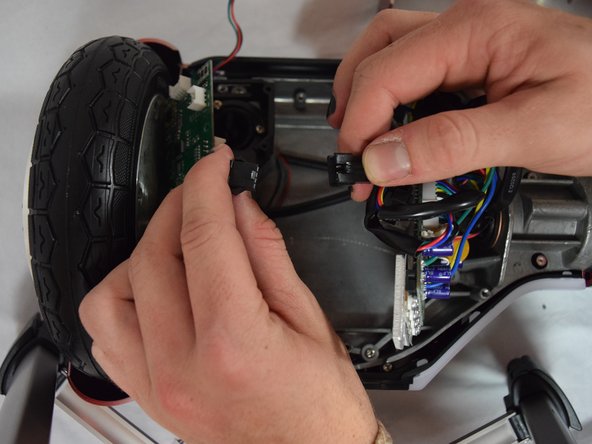
  4. Hover-1 Horizon Wheel/Motor Replacement, Left Gyroscope Sensor Board: passo 4, immagine 1 di 3 Hover-1 Horizon Wheel/Motor Replacement, Left Gyroscope Sensor Board: passo 4, immagine 2 di 3 Hover-1 Horizon Wheel/Motor Replacement, Left Gyroscope Sensor Board: passo 4, immagine 3 di 3
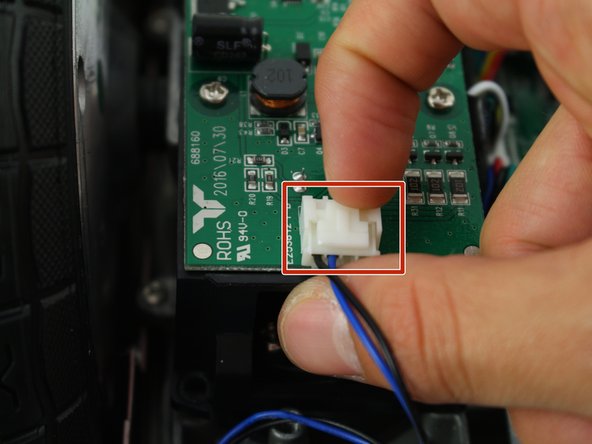
    • Remove the two connectors on either side of the board by lifting the tab and pulling out.

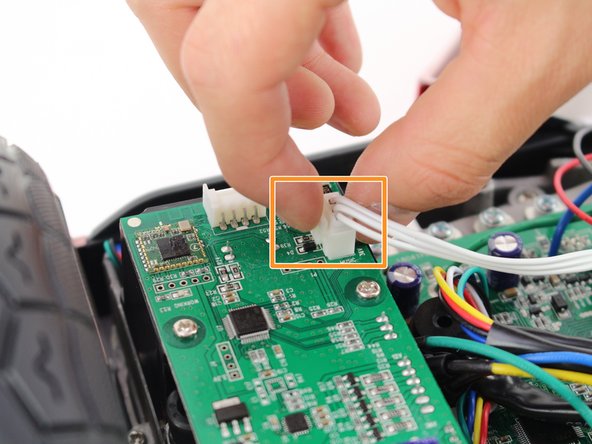
    • Remove the connector in the middle of the board by squeezing the tab and pulling up.

  5. Hover-1 Horizon Wheel/Motor Replacement: passo 5, immagine 1 di 2 Hover-1 Horizon Wheel/Motor Replacement: passo 5, immagine 2 di 2
    • Remove the four 11mm Phillips #1 screws that hold the cover on.

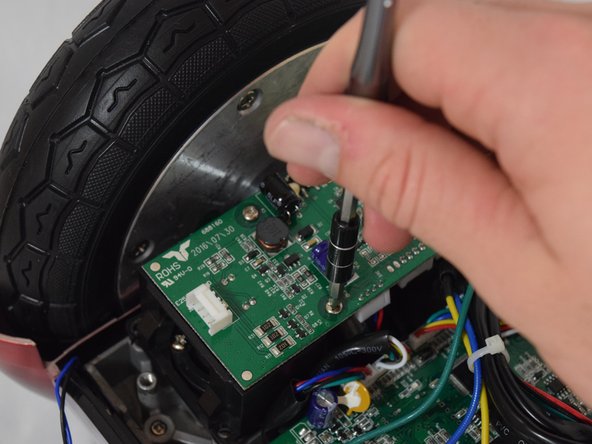
  6. Hover-1 Horizon Wheel/Motor Replacement: passo 6, immagine 1 di 3 Hover-1 Horizon Wheel/Motor Replacement: passo 6, immagine 2 di 3 Hover-1 Horizon Wheel/Motor Replacement: passo 6, immagine 3 di 3
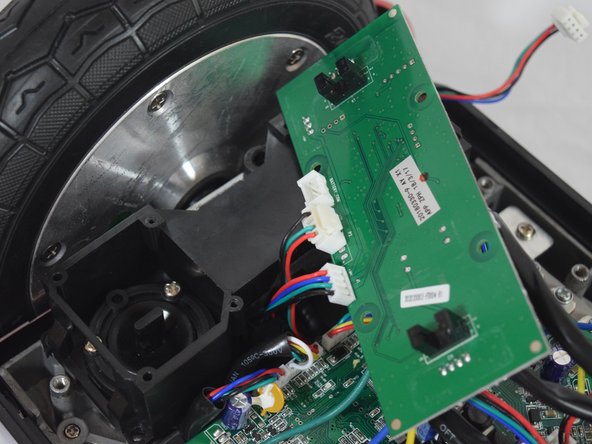
    • Remove the four 11mm Phillips #1 screws that attach the gyroscope board to the mount.

    • Lift the board to reveal the connections on the bottom.

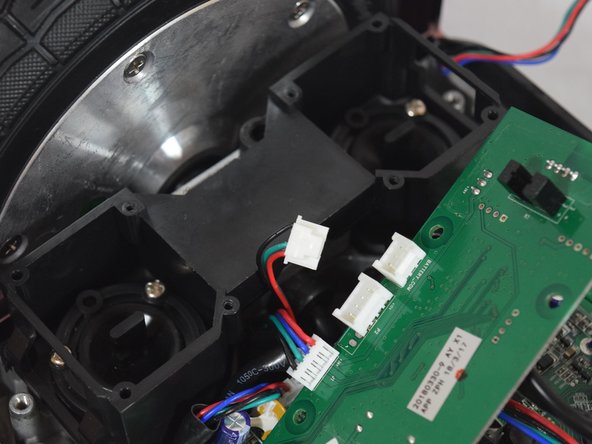
  7. Hover-1 Horizon Wheel/Motor Replacement: passo 7, immagine 1 di 2 Hover-1 Horizon Wheel/Motor Replacement: passo 7, immagine 2 di 2
    • Remove the middle connector by squeezing the top of the tab and pulling up.

  8. Hover-1 Horizon Wheel/Motor Replacement: passo 8, immagine 1 di 3 Hover-1 Horizon Wheel/Motor Replacement: passo 8, immagine 2 di 3 Hover-1 Horizon Wheel/Motor Replacement: passo 8, immagine 3 di 3
    • Remove the four 12mm Phillips #2 screws that hold the motherboard to the base.

    • Pull the motherboard away from the gyroscope by grabbing it with two hands and pulling it to the right .

  9. Hover-1 Horizon Wheel/Motor Replacement: passo 9, immagine 1 di 3 Hover-1 Horizon Wheel/Motor Replacement: passo 9, immagine 2 di 3 Hover-1 Horizon Wheel/Motor Replacement: passo 9, immagine 3 di 3
    • Unclip the black connector by squeezing both sides and pulling them apart.

  10. Hover-1 Horizon Wheel/Motor Replacement, Wheel/Motor: passo 10, immagine 1 di 3 Hover-1 Horizon Wheel/Motor Replacement, Wheel/Motor: passo 10, immagine 2 di 3 Hover-1 Horizon Wheel/Motor Replacement, Wheel/Motor: passo 10, immagine 3 di 3
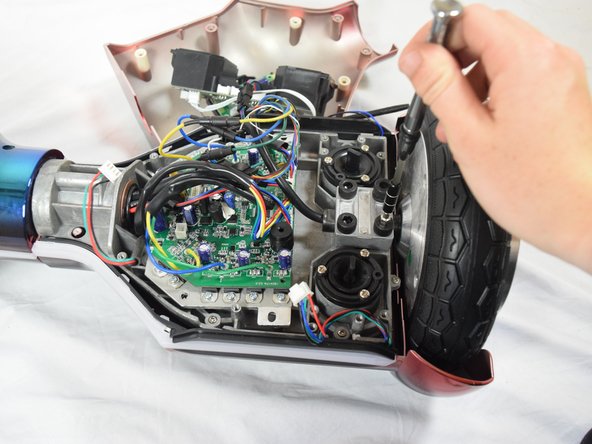
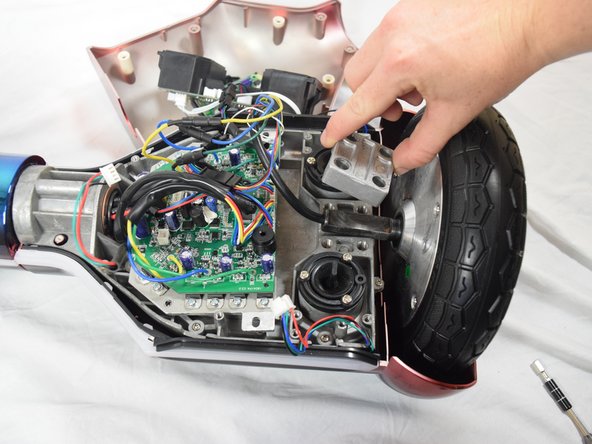
    • Remove the four 30mm Hex #6 screws.

    • Lift away the silver bracket and set it to the side.

  11. Hover-1 Horizon Wheel/Motor Replacement: passo 11, immagine 1 di 3 Hover-1 Horizon Wheel/Motor Replacement: passo 11, immagine 2 di 3 Hover-1 Horizon Wheel/Motor Replacement: passo 11, immagine 3 di 3
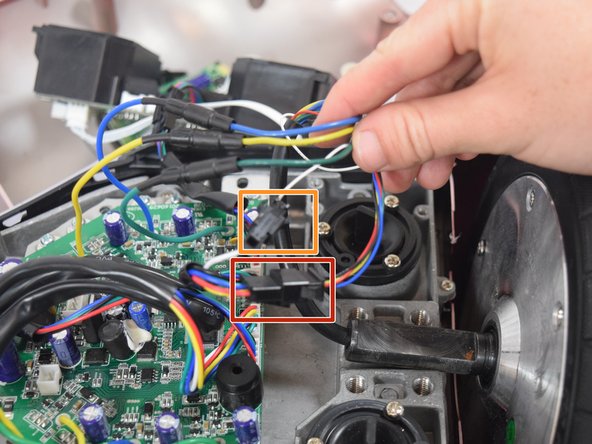
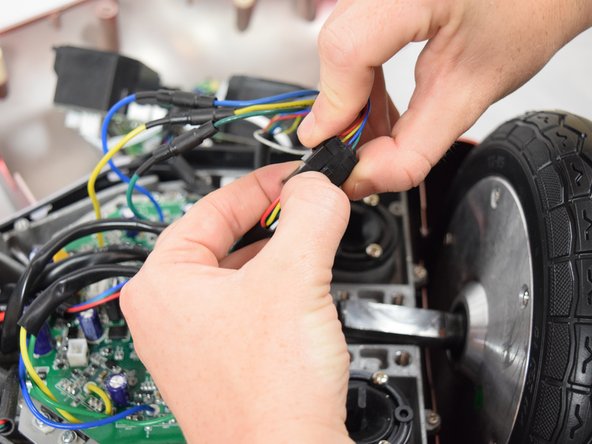
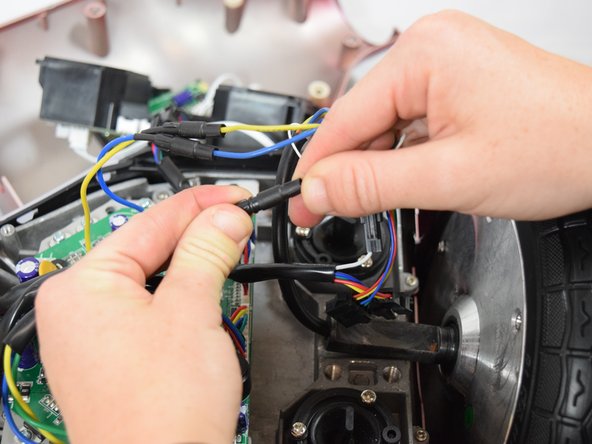
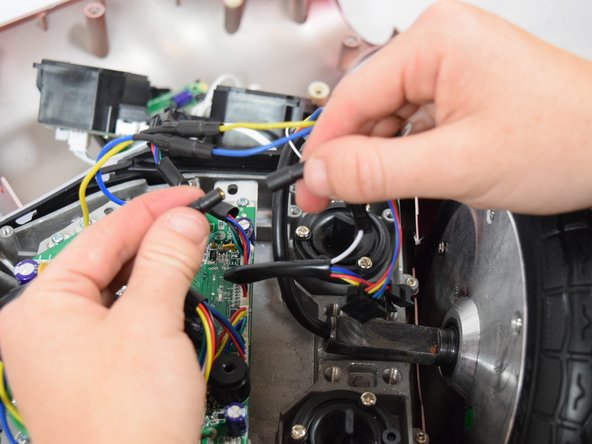
    • Disconnect the first clip by squeezing the latch that hold the clips together while pulling apart.

    • Disconnect the second clip by squeezing the tab while pulling the clip apart.

  12. Hover-1 Horizon Wheel/Motor Replacement: passo 12, immagine 1 di 3 Hover-1 Horizon Wheel/Motor Replacement: passo 12, immagine 2 di 3 Hover-1 Horizon Wheel/Motor Replacement: passo 12, immagine 3 di 3
    • Detach the remaining three connections by pulling them apart.

  13. Hover-1 Horizon Wheel/Motor Replacement: passo 13, immagine 1 di 2 Hover-1 Horizon Wheel/Motor Replacement: passo 13, immagine 2 di 2
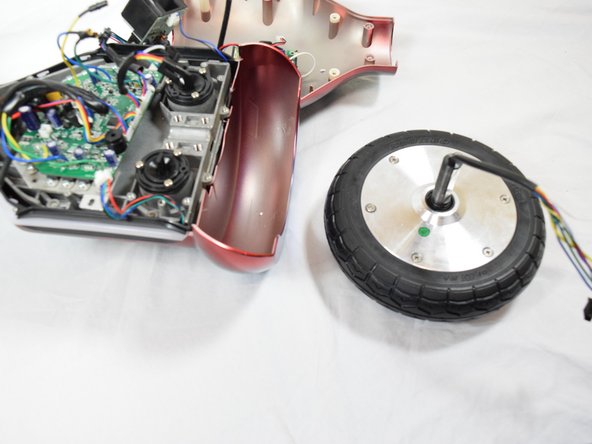
    • Remove the wheel by lifting it away from the base with both hands.

Conclusione

To reassemble your device, follow these instructions in reverse order.

Un'altra persona ha completato questa guida.

Casey Winans

Membro da: 10/08/18

324 Reputazione

2 Guide realizzate

Team

Cal Poly, Team S13-G6, White Fall 2018 Membro di Cal Poly, Team S13-G6, White Fall 2018

CPSU-WHITE-F18S13G6

4 Membri

6 Guide realizzate

0 Commenti

Aggiungi Commento

Visualizza Statistiche:

Ultime 24 Ore: 0

Ultimi 7 Giorni: 1

Ultimi 30 Giorni: 4

Tutti i Tempi: 491