Salta al contenuto principale

Hott T725-8G Motherboard Replacement

Cosa ti serve

  1. Hott T725-8G Motherboard Replacement, Motherboard: passo 1, immagine 1 di 1
    • Carefully remove the black electrical tape connecting the motherboard to the ribbon wire.

  2. Hott T725-8G Motherboard Replacement: passo 2, immagine 1 di 3 Hott T725-8G Motherboard Replacement: passo 2, immagine 2 di 3 Hott T725-8G Motherboard Replacement: passo 2, immagine 3 di 3
    • Squeeze both sides of the protector over the ribbon wire to release it.

    • Use the tweezers to gently remove the ribbon wire from the holder.

    • Repeat steps for all three ribbon wires shown.

  3. Hott T725-8G Motherboard Replacement: passo 3, immagine 1 di 3 Hott T725-8G Motherboard Replacement: passo 3, immagine 2 di 3 Hott T725-8G Motherboard Replacement: passo 3, immagine 3 di 3
    • Use the #000 Phillips screw driver to remove all three 2.2mm screws attached to the mother board.

Conclusione

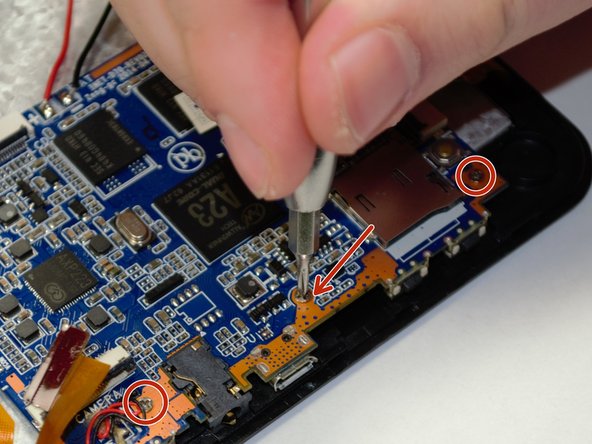
You are now able to remove the motherboard.

To reassemble your device, follow these instructions in reverse order.

Un'altra persona ha completato questa guida.

Jason Dorsey

Membro da: 10/20/16

127 Reputazione

1 Guida realizzata

Team

UMass Dartmouth, Team 6-2, Martin Fall 2016 Membro di UMass Dartmouth, Team 6-2, Martin Fall 2016

UMASSD-MARTIN-F16S6G2

3 Membri

11 Guide realizzate

0 Commenti

Aggiungi Commento

Visualizza Statistiche:

Ultime 24 Ore: 0

Ultimi 7 Giorni: 1

Ultimi 30 Giorni: 2

Tutti i Tempi: 221