Salta al contenuto principale

Hoover T-Series WindTunnel Pet UH30310 Motor Replacement

Cosa ti serve

  1. Hoover T-Series WindTunnel Pet UH30310 Motor Replacement, Motor: passo 1, immagine 1 di 1
    • Depress the hose-release tab.

  2. Hoover T-Series WindTunnel Pet UH30310 Motor Replacement: passo 2, immagine 1 di 1
    • Next, remove the hose from the connector, near the top of the vacuum's rear. This can be achieved by twisting and then pulling down.

  3. Hoover T-Series WindTunnel Pet UH30310 Motor Replacement: passo 3, immagine 1 di 1
    • Use a Phillips #1 screwdriver to remove the two screws on the part holding the hose to the back of the vacuum.

  4. Hoover T-Series WindTunnel Pet UH30310 Motor Replacement: passo 4, immagine 1 di 1
    • Use a Phillips #1 screwdriver to remove the two screws that secure the hose-release tab.

  5. Hoover T-Series WindTunnel Pet UH30310 Motor Replacement: passo 5, immagine 1 di 1
    • Use a Phillips #1 screwdriver to remove the two screws on the top of the vacuum holding the tab on the left of the vacuum.

  6. Hoover T-Series WindTunnel Pet UH30310 Motor Replacement: passo 6, immagine 1 di 2 Hoover T-Series WindTunnel Pet UH30310 Motor Replacement: passo 6, immagine 2 di 2
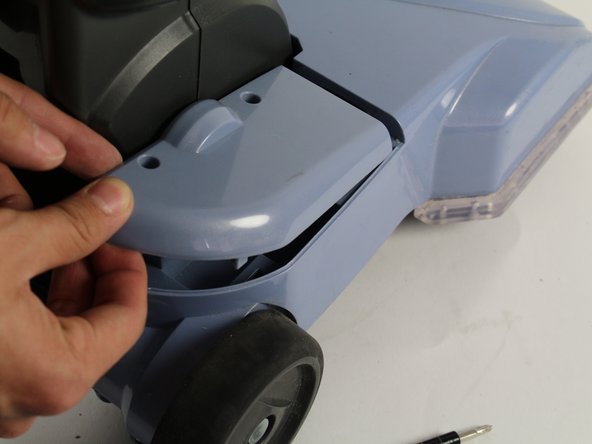
    • Use a Phillips #1 screwdriver to remove the two screws on the top of the vacuum head holding down the tab on the right.

    • To remove the tab, slide backwards and then pull up. There is a tab holding the piece down so use force if necessary.

  7. Hoover T-Series WindTunnel Pet UH30310 Motor Replacement: passo 7, immagine 1 di 2 Hoover T-Series WindTunnel Pet UH30310 Motor Replacement: passo 7, immagine 2 di 2
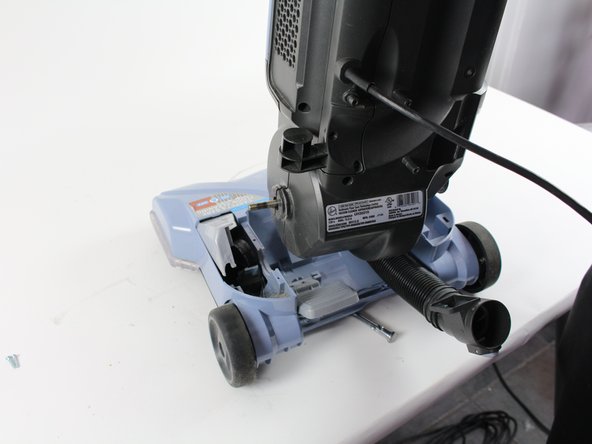
    • Slide the belt off of the metal rod on the left of the vacuum shaft. Pull the vacuum up and it should easily separate into two pieces.

  8. Hoover T-Series WindTunnel Pet UH30310 Motor Replacement: passo 8, immagine 1 di 3 Hoover T-Series WindTunnel Pet UH30310 Motor Replacement: passo 8, immagine 2 di 3 Hoover T-Series WindTunnel Pet UH30310 Motor Replacement: passo 8, immagine 3 di 3
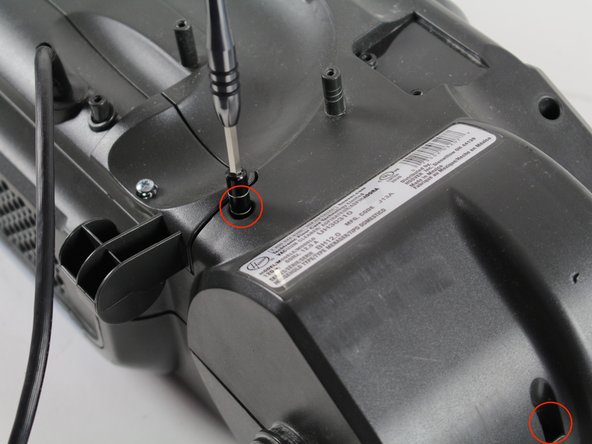
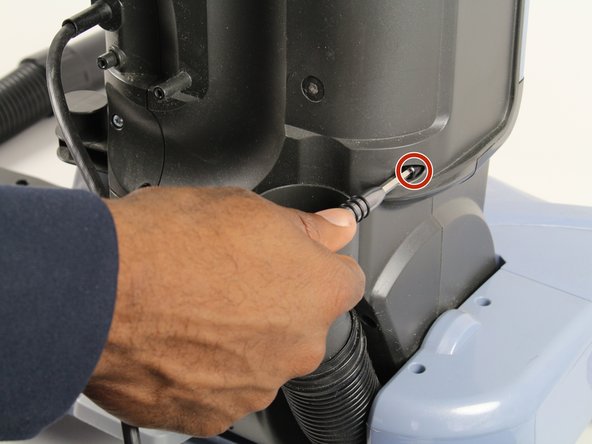
    • Use a Phillips #1 screwdriver to remove the 6 screws on the back and bottom of the vacuum shaft.

  9. Hoover T-Series WindTunnel Pet UH30310 Motor Replacement: passo 9, immagine 1 di 1
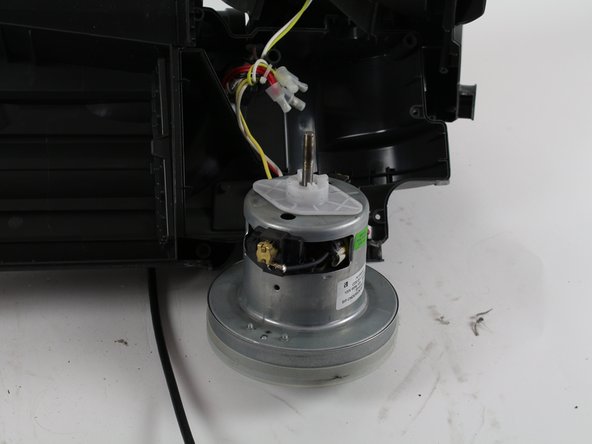
    • The top of the motor casing should then fold open, revealing the motor.

  10. Hoover T-Series WindTunnel Pet UH30310 Motor Replacement: passo 10, immagine 1 di 2 Hoover T-Series WindTunnel Pet UH30310 Motor Replacement: passo 10, immagine 2 di 2
    • The motor can now be accessed for replacement or repair

Conclusione

To reassemble your device, follow these instructions in reverse order.

Altre 2 persone hanno completato questa guida.

Team

Cal Poly, Team S12-G4, Banghart Winter 2018 Membro di Cal Poly, Team S12-G4, Banghart Winter 2018

CPSU-BANGHART-W18S12G4

5 Membri

9 Guide realizzate

0 Commenti

Aggiungi Commento

Visualizza Statistiche:

Ultime 24 Ore: 0

Ultimi 7 Giorni: 2

Ultimi 30 Giorni: 9

Tutti i Tempi: 890