Salta al contenuto principale

Hoover Presto 2-in-1 Cordless Stick Charger Replacement

Cosa ti serve

  1. Hoover Presto 2-in-1 Cordless Stick Charger Replacement, Charger Electronic Module: passo 1, immagine 1 di 3 Hoover Presto 2-in-1 Cordless Stick Charger Replacement, Charger Electronic Module: passo 1, immagine 2 di 3 Hoover Presto 2-in-1 Cordless Stick Charger Replacement, Charger Electronic Module: passo 1, immagine 3 di 3
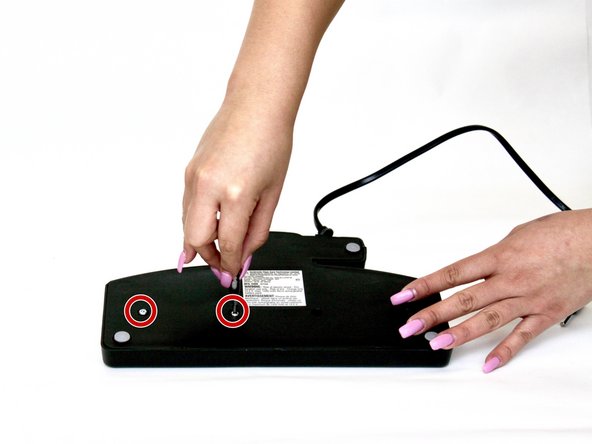
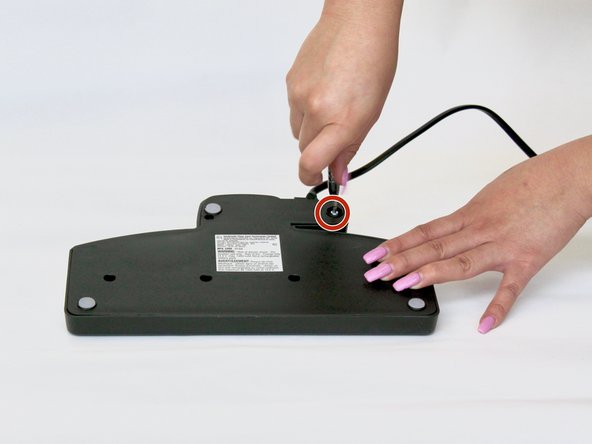
    • Using a firm grip, gently pull the standing charger away from the floor charger attachment

  2. Hoover Presto 2-in-1 Cordless Stick Charger Replacement: passo 2, immagine 1 di 2 Hoover Presto 2-in-1 Cordless Stick Charger Replacement: passo 2, immagine 2 di 2
    • Flip the floor charger over so the screws and sticker are facing you

    • Using a PH #1 screw driver, remove the two 18mm screws on the right hand side of the floor charger

  3. Hoover Presto 2-in-1 Cordless Stick Charger Replacement: passo 3, immagine 1 di 2 Hoover Presto 2-in-1 Cordless Stick Charger Replacement: passo 3, immagine 2 di 2
    • Using a PH #2 screw driver, remove the three 18mm screws on floor charger.

  4. Hoover Presto 2-in-1 Cordless Stick Charger Replacement: passo 4, immagine 1 di 2 Hoover Presto 2-in-1 Cordless Stick Charger Replacement: passo 4, immagine 2 di 2
    • Using the metal spudger tool, gently lift up the plastic cover in the upper right hand corner of the floor attachment to uncover a hidden screw

    • Remove the 18mm screw in the upper right hand corner with a PH #1 screw driver

  5. Hoover Presto 2-in-1 Cordless Stick Charger Replacement: passo 5, immagine 1 di 2 Hoover Presto 2-in-1 Cordless Stick Charger Replacement: passo 5, immagine 2 di 2
    • Using the metal spudger, gently pry open the two halves of the floor charger

    • Once you have made a larger enough gap between the two halves, use your hands and gently pull the rest of the floor charger apart

  6. Hoover Presto 2-in-1 Cordless Stick Charger Replacement: passo 6, immagine 1 di 1
    • Unscrew the two 18mm screws on either side of the white battery cover with a PH #1 screw driver

  7. Hoover Presto 2-in-1 Cordless Stick Charger Replacement: passo 7, immagine 1 di 2 Hoover Presto 2-in-1 Cordless Stick Charger Replacement: passo 7, immagine 2 di 2
    • Using your hands, gently pull apart the two halves of the white battery cover to get to the battery

Conclusione

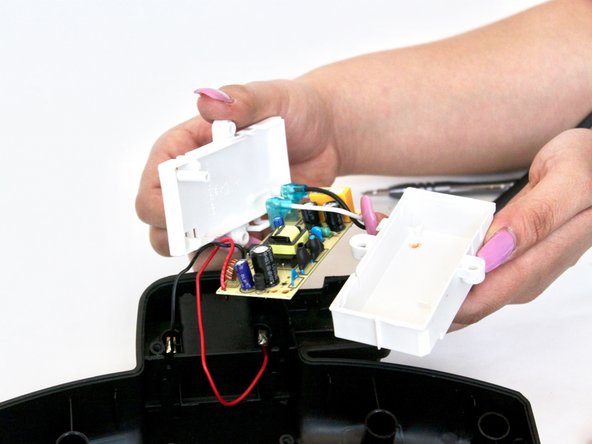
To reassemble your device, follow these instructions in reverse order.

Un'altra persona ha completato questa guida.

katia zubieta

Membro da: 09/11/17

437 Reputazione

4 Guide realizzate

Team

4 Commenti

La pila dónde la puedo encontrar

alejandro rodriguez - Replica

De la aspiradora Hoover presto 2 un 1

alejandro rodriguez - Replica

I followed the directions above and got it opened. There was no battery inside. What do I do???? This is for the Hoover Presto 2in1. Thank you.

silvmarg - Replica

Where does one buy the replacement battery?

mytikikitty - Replica

Aggiungi Commento

Visualizza Statistiche:

Ultime 24 Ore: 5

Ultimi 7 Giorni: 5

Ultimi 30 Giorni: 22

Tutti i Tempi: 6,076