Salta al contenuto principale

Honeywell Fan Plug Replacement

Cosa ti serve

  1. Honeywell Fan  Plug Replacement, Plug: passo 1, immagine 1 di 2 Honeywell Fan  Plug Replacement, Plug: passo 1, immagine 2 di 2
    • Make sure to unplug the Fan.

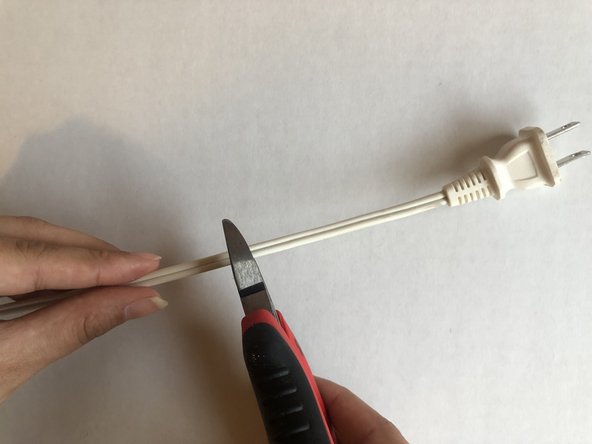
    • Cut off the old damaged plug from the fan using a pair of wire cutters.

  2. Honeywell Fan  Plug Replacement: passo 2, immagine 1 di 2 Honeywell Fan  Plug Replacement: passo 2, immagine 2 di 2
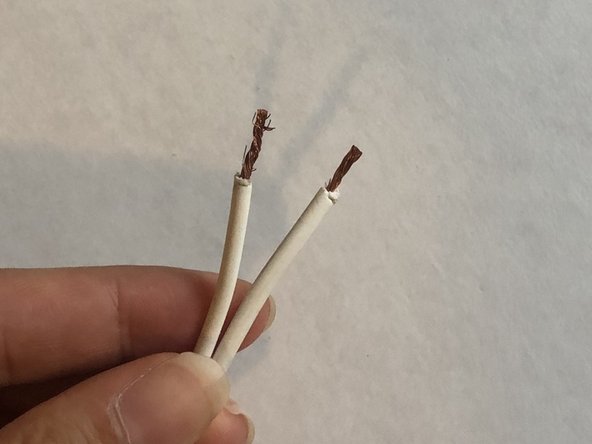
    • Separate the wires by pulling them apart.

    • The hot wire has smooth insulation.

    • The neutral wire has small ridges in the insulation.

  3. Honeywell Fan  Plug Replacement: passo 3, immagine 1 di 2 Honeywell Fan  Plug Replacement: passo 3, immagine 2 di 2
    • Measure 3/4" inch of the wire.

    • Strip 3/4" of the insulation to expose the copper wire.

  4. Honeywell Fan  Plug Replacement: passo 4, immagine 1 di 2 Honeywell Fan  Plug Replacement: passo 4, immagine 2 di 2
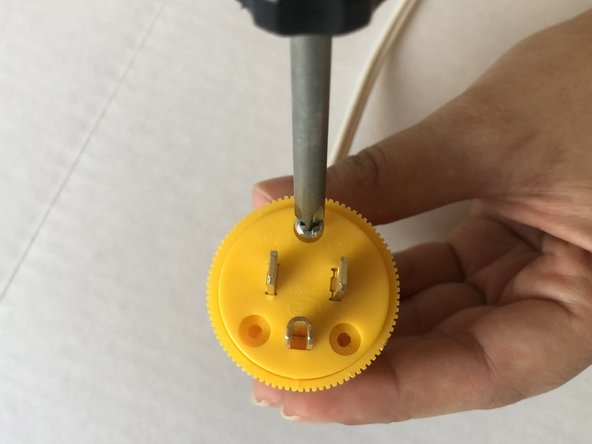
    • Open the new plug by loosening the screws with a Phillips #0 screwdriver.

    • The silver screw is the neutral wire connection.

    • The brass screw is the hot wire connection.

    • The two different connections must be determined to wire the new plug correctly.

  5. Honeywell Fan  Plug Replacement: passo 5, immagine 1 di 2 Honeywell Fan  Plug Replacement: passo 5, immagine 2 di 2
    • Twist the ends of the copper wires.

    • Twisting the wires will ensure safety while screwing the wires and reliable connection.

    • Insert the twisted wires to each of the screws.

    • The hot wire will be connected to the brass screw and has smooth insulation.

    • The neutral wire will be connected to silver screw and has small ridged insulation.

  6. Honeywell Fan  Plug Replacement: passo 6, immagine 1 di 3 Honeywell Fan  Plug Replacement: passo 6, immagine 2 di 3 Honeywell Fan  Plug Replacement: passo 6, immagine 3 di 3
    • Tighten each of the screws with a Phillips #0 screwdriver.

    • Close the cover of the plug.

    • Tighten the exterior screws of the plug with a Phillips #0 screwdriver to close the plug.

Conclusione

To reassemble your device, follow these instructions in reverse order.

Un'altra persona ha completato questa guida.

Anmol Brar

Membro da: 04/29/20

160 Reputazione

1 Guida realizzata

Team

0Commenti sulla guida

Aggiungi Commento

Visualizza Statistiche:

Ultime 24 Ore: 1

Ultimi 7 Giorni: 8

Ultimi 30 Giorni: 61

Tutti i Tempi: 4,833