Salta al contenuto principale
Unisciti alla Community delle riparazioni - Crea un account

Honda civic 2019 Trunk Strut Replacement

Cosa ti serve

    1. Honda civic 2019 Trunk Strut Replacement, Trunk Strut: passo 1, immagine 1 di 1
      • Open the trunk and use an object like a pole or a broomstick to securely prop it open. You may prefer to have another person hold the trunk open while making the repair. Hazard: If not properly supported, the trunk may fall during the repair causing potential injury.

      Chiedi a FixBot

      Aggiungi Commento

    2. Honda civic 2019 Trunk Strut Replacement: passo 2, immagine 1 di 1
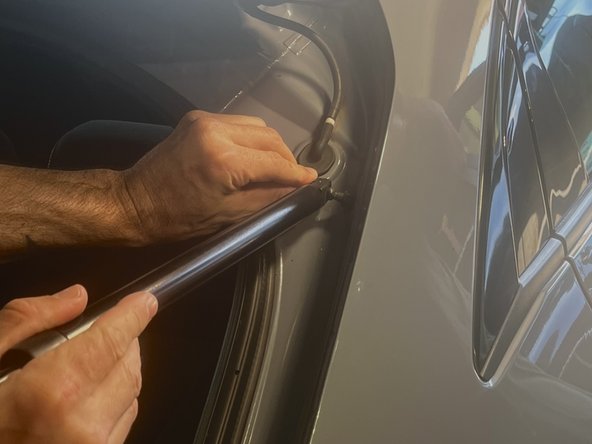
      • Locate the trunk strut on the far-left side of the trunk. Wedge a flat-head screwdriver below the small ring at the top of the strut. Use the screwdriver as a lever to pop out this ring, loosening the connection between the strut and the car.

      Chiedi a FixBot

      Aggiungi Commento

    3. Honda civic 2019 Trunk Strut Replacement: passo 3, immagine 1 di 1
      • Pull the top of the strut horizontally until it is removed from the ball joint.

      Chiedi a FixBot

      Aggiungi Commento

    4. Honda civic 2019 Trunk Strut Replacement: passo 4, immagine 1 di 1
      • Locate the other ring at the bottom of this same strut. Use a flat-head screwdriver to again pry up the ring.

      Chiedi a FixBot

      Aggiungi Commento

    5. Honda civic 2019 Trunk Strut Replacement: passo 5, immagine 1 di 1
      • Pull the bottom of the strut horizontally until it is removed from the ball joint.

      Chiedi a FixBot

      Aggiungi Commento

    6. Honda civic 2019 Trunk Strut Replacement: passo 6, immagine 1 di 1
      • Now that the left trunk strut is fully detached from the car body, install the new trunk strut by pushing the sockets of the strut into the ball joints where the old strut was removed.

      Chiedi a FixBot

      Aggiungi Commento

    7. Honda civic 2019 Trunk Strut Replacement: passo 7, immagine 1 di 2 Honda civic 2019 Trunk Strut Replacement: passo 7, immagine 2 di 2
      • Repeat Steps 2-6 for the right trunk strut. Make sure that the left trunk strut has been fully replaced before detaching the right trunk strut.

      Chiedi a FixBot

      Aggiungi Commento

Conclusione

To reassemble your device, follow these instructions in reverse order.

Annulla: non ho completato questa guida.

Peyton Batte

Membro da: 11/28/23

145 Reputazione

Una guida realizzata

0Commenti sulla guida

Aggiungi Commento

Visualizza statistiche:

Ultime 24 ore: 1

Ultimi 7 giorni: 15

Ultimi 30 giorni: 69

Tutti i Tempi: 1,429