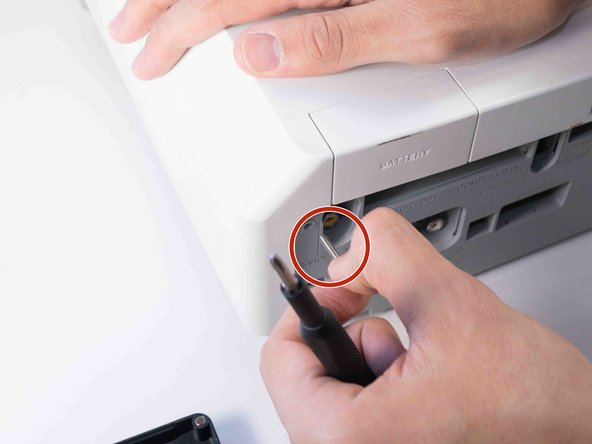
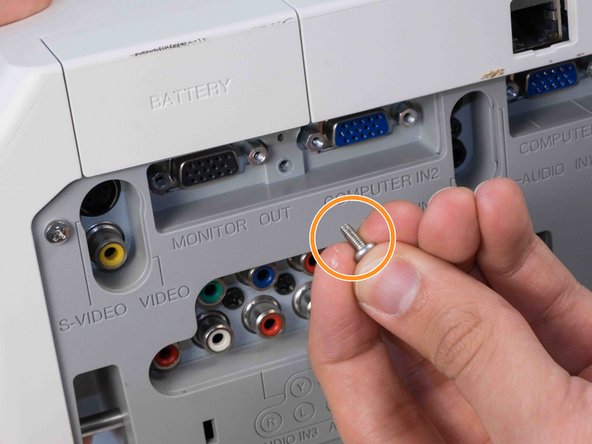
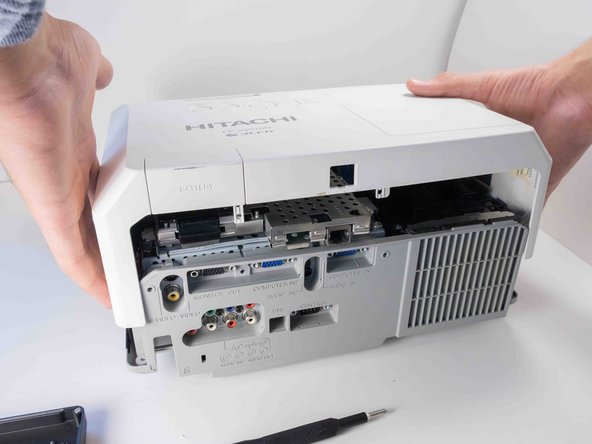
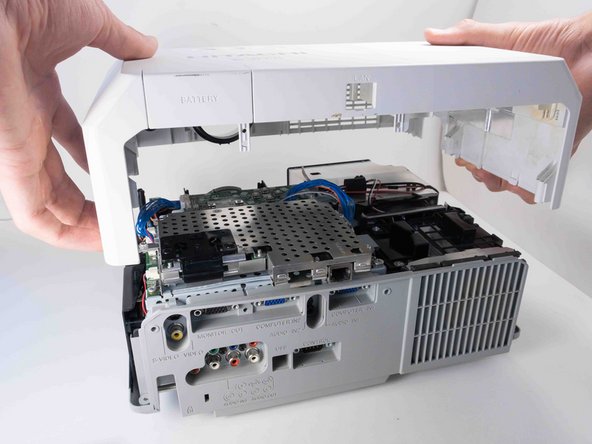
Salta al contenuto principale

Hitachi CP-X2010N Top Panel Replacement

Cosa ti serve

  1. Hitachi CP-X2010N Top Panel Replacement, Top Panel: passo 1, immagine 1 di 3 Hitachi CP-X2010N Top Panel Replacement, Top Panel: passo 1, immagine 2 di 3 Hitachi CP-X2010N Top Panel Replacement, Top Panel: passo 1, immagine 3 di 3
    • Flip the projector upside down to expose the screws on the underside.

  2. Hitachi CP-X2010N Top Panel Replacement: passo 2, immagine 1 di 3 Hitachi CP-X2010N Top Panel Replacement: passo 2, immagine 2 di 3 Hitachi CP-X2010N Top Panel Replacement: passo 2, immagine 3 di 3
    • Use a Phillips #2 screwdriver to remove eight black 14 mm screws holding the top panel to the main projector body.

  3. Hitachi CP-X2010N Top Panel Replacement: passo 3, immagine 1 di 1
    • Flip projector right side up and orient it so you are facing the rear panel.

  4. Hitachi CP-X2010N Top Panel Replacement: passo 4, immagine 1 di 3 Hitachi CP-X2010N Top Panel Replacement: passo 4, immagine 2 di 3 Hitachi CP-X2010N Top Panel Replacement: passo 4, immagine 3 di 3
    • Use a Phillips #2 screwdriver to remove two silver 22 mm long screws.

    • Use a Phillips #2 screwdriver to remove the short silver 10 mm screw.

  5. Hitachi CP-X2010N Top Panel Replacement: passo 5, immagine 1 di 3 Hitachi CP-X2010N Top Panel Replacement: passo 5, immagine 2 di 3 Hitachi CP-X2010N Top Panel Replacement: passo 5, immagine 3 di 3
    • Carefully lift the top panel from the body of the projector, making sure it doesn't catch on anything.

    • Remove the panel from the body of the projector.

Conclusione

To reassemble your device, follow these instructions in reverse order.

Altre 3 persone hanno completato questa guida.

0 Commenti

Aggiungi Commento

Visualizza Statistiche:

Ultime 24 Ore: 0

Ultimi 7 Giorni: 0

Ultimi 30 Giorni: 3

Tutti i Tempi: 124