Salta al contenuto principale

Hisense Sero 7 Pro GPS Antenna Replacement

Cosa ti serve

  1. Hisense Sero 7 Pro  GPS Antenna Replacement, GPS Antenna: passo 1, immagine 1 di 2 Hisense Sero 7 Pro  GPS Antenna Replacement, GPS Antenna: passo 1, immagine 2 di 2
    • Turn tablet off before disassembling it.

    • Use caution when handling device if screen is cracked.

    • Using a plastic opening tool, pry open the back cover from the tablet.

    • An extra set of hands may be required.

  2. Hisense Sero 7 Pro  GPS Antenna Replacement: passo 2, immagine 1 di 2 Hisense Sero 7 Pro  GPS Antenna Replacement: passo 2, immagine 2 di 2
    • Pull the Wi-Fi antenna directly upwards to remove it from the motherboard.

    • Be gentle when disconnecting the antenna because it may damage the part it is attached to.

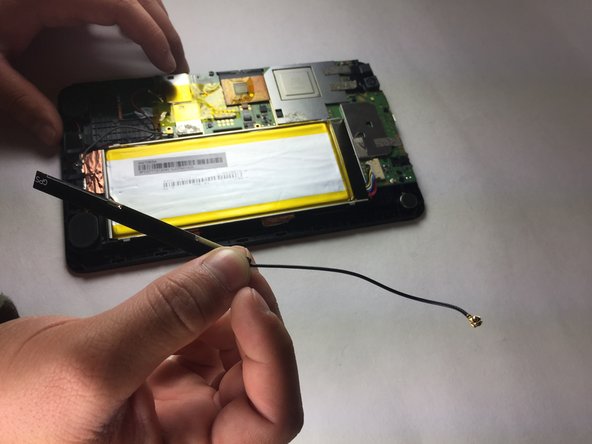
  3. Hisense Sero 7 Pro  GPS Antenna Replacement: passo 3, immagine 1 di 2 Hisense Sero 7 Pro  GPS Antenna Replacement: passo 3, immagine 2 di 2
    • Insert a metal or nylon spudger on the edge of the GPS satellite and begin separating it from the adhesive.

    • Slowly peel the GPS from left to right as the GPS is clammy.

Conclusione

To reassemble your device, follow these instructions in reverse order.

Team

Texas Tech, Team 38-2, Bennett Fall 2016 Membro di Texas Tech, Team 38-2, Bennett Fall 2016

TTU-BENNETT-F16S38G2

4 Membri

6 Guide realizzate

0 Commenti

Aggiungi Commento

Visualizza Statistiche:

Ultime 24 Ore: 1

Ultimi 7 Giorni: 3

Ultimi 30 Giorni: 11

Tutti i Tempi: 283