Salta al contenuto principale

Hipstreet Titan 2 HD Speaker Replacement

Cosa ti serve

  1. Hipstreet Titan 2 HD Speaker Replacement, Rear Case: passo 1, immagine 1 di 1
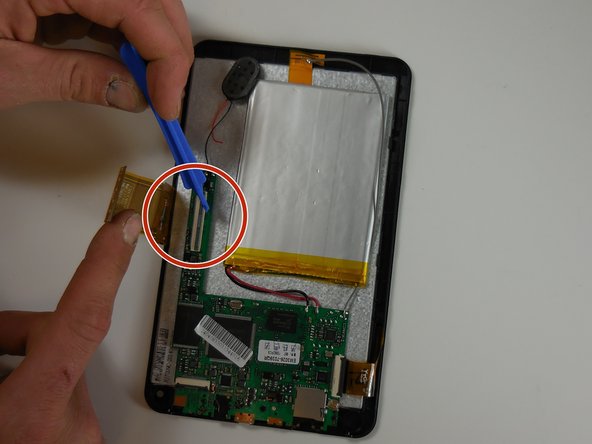
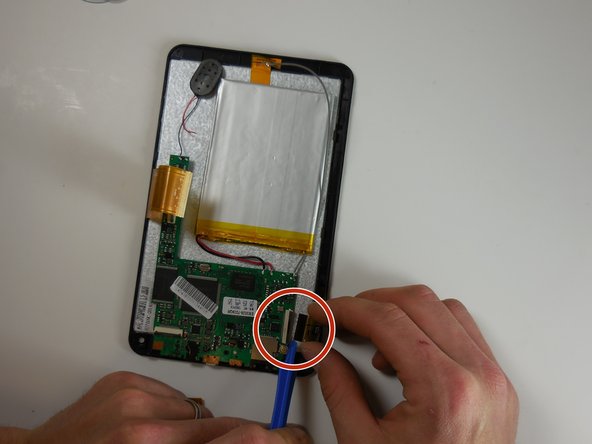
    • Using the PH#00 screwdriver, remove the two 0.145 inch Phillips head screws.

    • The screws are located on the bottom face of the device, near the power and volume controls.

  2. Hipstreet Titan 2 HD Speaker Replacement: passo 2, immagine 1 di 1
    • Place the small suction cup on your screen.

    • Moisturize the bottom of the suction cup to ensure a proper seal.

    • If the screen is cracked, the suction cup may not seal correctly; too much pressure may crack or damage the screen.

  3. Hipstreet Titan 2 HD Speaker Replacement: passo 3, immagine 1 di 1
    • Insert the plastic opening tool between the screen cover and rear cover of the tablet.

    • Grasp the small suction cup.

  4. Hipstreet Titan 2 HD Speaker Replacement: passo 4, immagine 1 di 2 Hipstreet Titan 2 HD Speaker Replacement: passo 4, immagine 2 di 2
    • Slide the plastic opening tool along device edge to separate the screen cover from the rear cover.

    • Pull upward on the small suction cup handle while sliding the opening tool.

    • When sliding the plastic opening tool, avoid sliding the tool too far into the cover. This could damage the speaker connector on the back cover.

  5. Hipstreet Titan 2 HD Speaker Replacement: passo 5, immagine 1 di 2 Hipstreet Titan 2 HD Speaker Replacement: passo 5, immagine 2 di 2
    • Use the plastic opening tool to remove the speaker from the rear cover.

    • The speaker is held in place with adhesive and is easily removed.

    • Do not pull on the speaker wires. This could damage the soldering connections.

  6. Hipstreet Titan 2 HD Speaker Replacement: passo 6, immagine 1 di 1
    • Once the speaker is disconnected, the cover removal is complete.

  7. Hipstreet Titan 2 HD Speaker Replacement, Speaker: passo 7, immagine 1 di 1
    • Remove the black placement tape.

  8. Hipstreet Titan 2 HD Speaker Replacement: passo 8, immagine 1 di 1
    • Using a #PH000 screwdriver, remove the three 0.145in circuit board placement screws.

  9. Hipstreet Titan 2 HD Speaker Replacement: passo 9, immagine 1 di 3 Hipstreet Titan 2 HD Speaker Replacement: passo 9, immagine 2 di 3 Hipstreet Titan 2 HD Speaker Replacement: passo 9, immagine 3 di 3
    • Lift the hinge locks on the three ribbon connectors and disconnect the ribbon connectors.

  10. Hipstreet Titan 2 HD Speaker Replacement: passo 10, immagine 1 di 1
    • Identify the two soldered connectors for the speaker.

  11. Hipstreet Titan 2 HD Speaker Replacement: passo 11, immagine 1 di 1
    • Using a solder removal tool, remove the speaker soldered connectors.

    • Solder the new speaker wire connections to circuit board.

    • First solder the red wire on the left, then the black wire on the right.

    • Solder can burn you. Use caution.

Conclusione

To reassemble your device, follow these instructions in reverse order.

Altre 2 persone hanno completato questa guida.

Jeffrey

Membro da: 03/11/15

766 Reputazione

5 Guide realizzate

Team

0 Commenti

Aggiungi Commento

Visualizza Statistiche:

Ultime 24 Ore: 0

Ultimi 7 Giorni: 0

Ultimi 30 Giorni: 0

Tutti i Tempi: 304