Salta al contenuto principale

Heyday Wireless Speaker 8125 Motherboard Replacement

Cosa ti serve

  1. Heyday Wireless Speaker 8125 Motherboard Replacement, Grille: passo 1, immagine 1 di 3 Heyday Wireless Speaker 8125 Motherboard Replacement, Grille: passo 1, immagine 2 di 3 Heyday Wireless Speaker 8125 Motherboard Replacement, Grille: passo 1, immagine 3 di 3
    • Orient the speaker so that it is sitting upright.

    • Use your nondominant hand to hold the speaker in place while you firmly push the plastic spudger into the seam between the device wall and the grille.

    • Push down with the plastic spudger and lift the grill until you feel it separate from the speaker.

    • Gently remove it from the top of the device.

  2. Heyday Wireless Speaker 8125 Motherboard Replacement, Black Plastic Cover: passo 2, immagine 1 di 2 Heyday Wireless Speaker 8125 Motherboard Replacement, Black Plastic Cover: passo 2, immagine 2 di 2
    Attrezzo utilizzato in questo passaggio:
    Tweezers
    $4.99
    Compra
    • Use tweezers to remove the four black rubber screw covers.

    • Use a Phillips screwdriver to remove four 8.9 mm screws underneath the screw covers.

    • Once all four screws are out, gently pull the black cover out using your hands or use a spudger to pry it out.

    • The cover is attached to the motherboard beneath by the speaker cable. Don't yank the cover from the device. You will need to detach the connector from the socket before removing it entirely.

  3. Heyday Wireless Speaker 8125 Motherboard Replacement, Motherboard: passo 3, immagine 1 di 3 Heyday Wireless Speaker 8125 Motherboard Replacement, Motherboard: passo 3, immagine 2 di 3 Heyday Wireless Speaker 8125 Motherboard Replacement, Motherboard: passo 3, immagine 3 di 3
    • Use a Phillips screwdriver to remove four 6.6 mm screws from the motherboard.

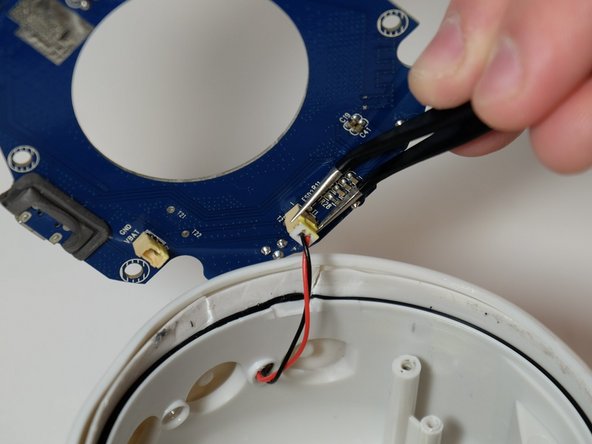
    • Lift the motherboard out of the speaker gently.

    • It's attached below by a couple of cables, so don't pull it out.

  4. Heyday Wireless Speaker 8125 Motherboard Replacement: passo 4, immagine 1 di 2 Heyday Wireless Speaker 8125 Motherboard Replacement: passo 4, immagine 2 di 2
    • Pull each cable away from the connector in the same direction that the individual wires are running.

    • Pull evenly on the full width of the cable so that no individual wires are overly strained.

    • Remove the motherboard from the device.

Conclusione

To reassemble your device, follow these instructions in reverse order.

Sarah Westberg

Membro da: 03/11/19

23.318 Reputazione

70 Guide realizzate

Team

iFixit Membro di iFixit

Staff

136 Membri

17.392 Guide realizzate

0 Commenti

Aggiungi Commento

Visualizza Statistiche:

Ultime 24 Ore: 0

Ultimi 7 Giorni: 0

Ultimi 30 Giorni: 6

Tutti i Tempi: 63