Salta al contenuto principale
Hard Drive Replacement Guide

Hard Drive Replacement Guide

Steven Park

Steven Park e 4 altri collaboratori

Ultimo aggiornamento il April 27, 2019

5 minuti
Facile

Introduzione

Vai al passo 1

This guide is for replacing the hard drive on a Gateway LT2104u Laptop.

Cosa ti serve

Strumenti

  1. Hard Drive Replacement Guide, Hard Drive: passo 1, immagine 1 di 1
    • Use a Phillips #0 screwdriver to loosen the screws.

    • The screws are designed to remain in the panel.

  2. Hard Drive Replacement Guide: passo 2, immagine 1 di 3 Hard Drive Replacement Guide: passo 2, immagine 2 di 3 Hard Drive Replacement Guide: passo 2, immagine 3 di 3
    • To open the panel, use a plastic opening tool or your finger.

    • If there is difficulty opening the panel, than the screws may not be lose enough.

  3. Hard Drive Replacement Guide: passo 3, immagine 1 di 2 Hard Drive Replacement Guide: passo 3, immagine 2 di 2
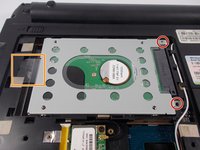
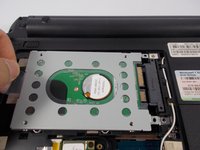
    • Use the Phillips #0 screwdriver to unscrew the two 5mm screws.

    • Remove the hard drive by using your fingers to pull firmly on the clear tab.

  4. Hard Drive Replacement Guide: passo 4, immagine 1 di 1
    • You have successfully removed the hard drive from the laptop.

Conclusione

To reassemble your device, follow these instructions in reverse order.

Steven Park

Membro da: 03/09/16

420 Reputazione

3 Guide realizzate

Team

0Commenti sulla guida

Aggiungi Commento

Visualizza Statistiche:

Ultime 24 Ore: 0

Ultimi 7 Giorni: 3

Ultimi 30 Giorni: 14

Tutti i Tempi: 787