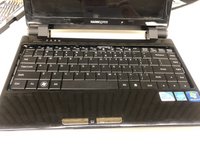
Salta al contenuto principale

Hannspree SN12E2 IO Board Replacement

Cosa ti serve

  1. Hannspree SN12E2 IO Board Replacement, Battery: passo 1, immagine 1 di 1
    • Unplug and power off your laptop.

  2. Hannspree SN12E2 IO Board Replacement: passo 2, immagine 1 di 1
    • Close your laptop .

    • Place your laptop face down on a flat surface.

  3. Hannspree SN12E2 IO Board Replacement: passo 3, immagine 1 di 3 Hannspree SN12E2 IO Board Replacement: passo 3, immagine 2 di 3 Hannspree SN12E2 IO Board Replacement: passo 3, immagine 3 di 3
    • Unlatch the lock on the top right of your laptop first.

    • You will need to pull on the lock on the left side and remove the battery at the same time

    • The left lock is a spring lock and needs constant pressure applied in order to stay open.

  4. Hannspree SN12E2 IO Board Replacement, Touchpad Plane/Keyboard: passo 4, immagine 1 di 1
    • Remove all the 5mm PH0 screws on the back cover

  5. Hannspree SN12E2 IO Board Replacement: passo 5, immagine 1 di 3 Hannspree SN12E2 IO Board Replacement: passo 5, immagine 2 di 3 Hannspree SN12E2 IO Board Replacement: passo 5, immagine 3 di 3
    • Gently pry the case apart starting at the lower right corner using the small spudger

    • Move around the case gently prying until the touchpad plane is free from the rest of the case

  6. Hannspree SN12E2 IO Board Replacement: passo 6, immagine 1 di 2 Hannspree SN12E2 IO Board Replacement: passo 6, immagine 2 di 2
    • Gently lift up on the touchpad portion of the touchpad plane

    • Unplug the ZIFF connector by pulling gently on the black retaining blade and removing the white flat flex cable

    • Pull the touchpad away from the rest of the case

  7. Hannspree SN12E2 IO Board Replacement: passo 7, immagine 1 di 1
    • Gently lift up on the loose keyboard to expose the ZIFF connector.

    • Unplug the keyboard ZIFF following the same instructions as the touchpad ZIFF

  8. Hannspree SN12E2 IO Board Replacement, Hard Drive Access Door: passo 8, immagine 1 di 1
    • Remove the three 3mm Phillips #0 screws.

  9. Hannspree SN12E2 IO Board Replacement: passo 9, immagine 1 di 1
    • Gently pull on the access panel to remove it.

  10. Hannspree SN12E2 IO Board Replacement, Hard Drive: passo 10, immagine 1 di 1
    • Remove the four 4mm Phillips #0 retaining screws.

    • The hard drive caddy is the large piece of metal with black circles.

  11. Hannspree SN12E2 IO Board Replacement: passo 11, immagine 1 di 1
    • Next, lift up the hard drive and pull towards you. Lift up the end of the hard drive that is not plugged into the computer.

  12. Hannspree SN12E2 IO Board Replacement: passo 12, immagine 1 di 2 Hannspree SN12E2 IO Board Replacement: passo 12, immagine 2 di 2
    • Slide your hard drive out of the metal piece by unscrewing the sides.

  13. Hannspree SN12E2 IO Board Replacement, IO Board: passo 13, immagine 1 di 1
    • Remove the three 3mm PH0 screws holding the IO board to the case.

  14. Hannspree SN12E2 IO Board Replacement: passo 14, immagine 1 di 3 Hannspree SN12E2 IO Board Replacement: passo 14, immagine 2 di 3 Hannspree SN12E2 IO Board Replacement: passo 14, immagine 3 di 3
    • Unplug the three JST connectors connecting the IO board to the motherboard.

    • For each connector, remove by gently pulling parallel to the connector housing until the connector becomes undone

    • When replacing the connectors ensure that they are oriented correctly. The housing is keyed to prevent the connectors from being plugged in backwards.

  15. Hannspree SN12E2 IO Board Replacement: passo 15, immagine 1 di 1
    • Remove IO Board by gently tilting it toward the outer edge of the case.

Conclusione

To reassemble your device, follow these instructions in reverse order.

jacob

Membro da: 03/25/19

150 Reputazione

1 Guida realizzata

Team

0 Commenti

Aggiungi Commento

Visualizza Statistiche:

Ultime 24 Ore: 0

Ultimi 7 Giorni: 1

Ultimi 30 Giorni: 4

Tutti i Tempi: 113