Salta al contenuto principale

Questa guida ha delle modifiche più recenti. Passa all'ultima versione non verificata.

HTC Wizard 200 Vibrator Replacement

Cosa ti serve

  1. HTC Wizard 200 Vibrator Replacement, Battery: passo 1, immagine 1 di 2 HTC Wizard 200 Vibrator Replacement, Battery: passo 1, immagine 2 di 2
    • To expose the battery, remove the outer case with your fingernail.

    • Remove the battery by pulling the black tab.

  2. HTC Wizard 200 Vibrator Replacement, Back Panel: passo 2, immagine 1 di 1
    Attrezzo utilizzato in questo passaggio:
    Spudger
    $3.99
    Compra
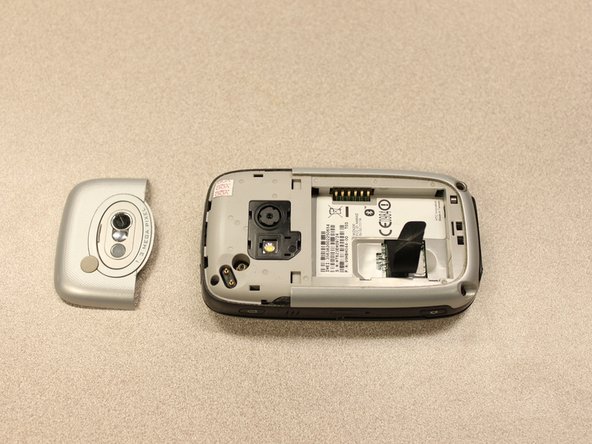
    • Insert the flat end of the spudger into the two notches on the back of the camera cover and pry them up.

  3. HTC Wizard 200 Vibrator Replacement: passo 3, immagine 1 di 2 HTC Wizard 200 Vibrator Replacement: passo 3, immagine 2 di 2
    Attrezzo utilizzato in questo passaggio:
    Spudger
    $3.99
    Compra
    • Work the spudger around the edges of the camera cover until it comes off.

  4. HTC Wizard 200 Vibrator Replacement: passo 4, immagine 1 di 2 HTC Wizard 200 Vibrator Replacement: passo 4, immagine 2 di 2
    Attrezzo utilizzato in questo passaggio:
    T5 Torx Screwdriver
    $5.49
    Compra
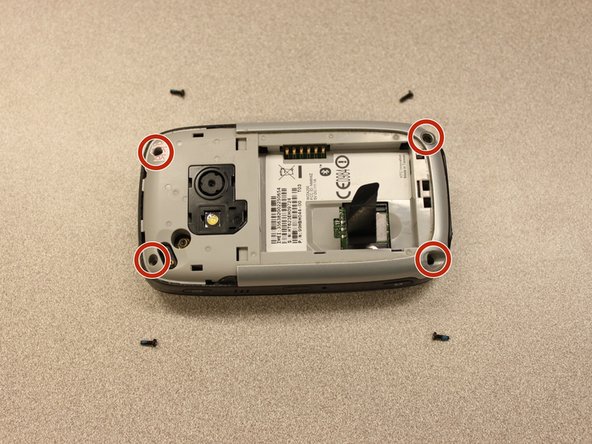
    • Remove the four 6 mm screws with the T5 Torx screwdriver.

    • One of the screws is under the "void" sticker.

  5. HTC Wizard 200 Vibrator Replacement: passo 5, immagine 1 di 3 HTC Wizard 200 Vibrator Replacement: passo 5, immagine 2 di 3 HTC Wizard 200 Vibrator Replacement: passo 5, immagine 3 di 3
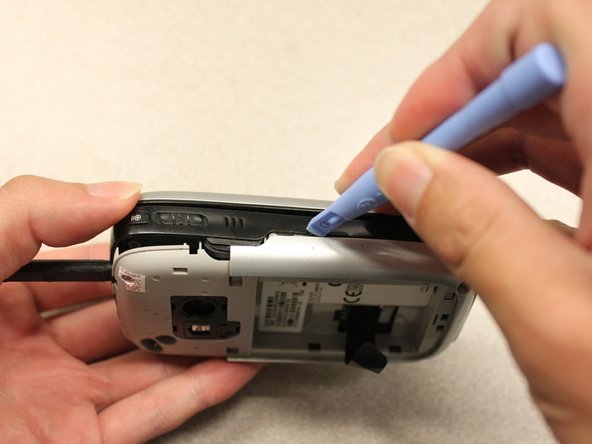
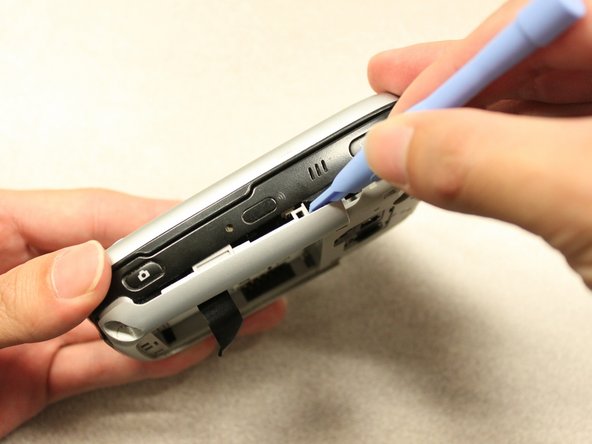
    • Insert the flat end of an iFixit opening tool between the side and inner covers to create a gap.

    • Work the tool around the edges until all the clips release.

  6. HTC Wizard 200 Vibrator Replacement: passo 6, immagine 1 di 2 HTC Wizard 200 Vibrator Replacement: passo 6, immagine 2 di 2
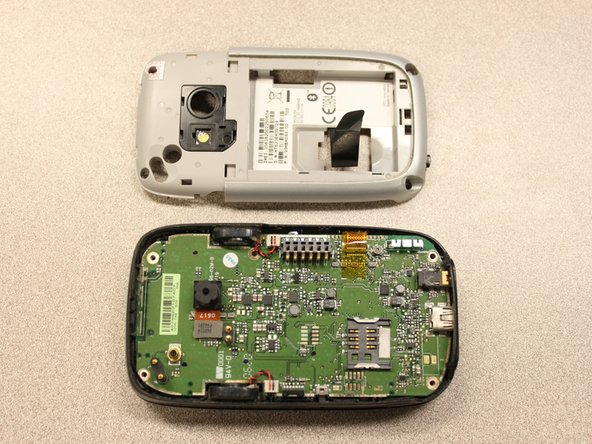
    • Once all the clips are open, remove the inner panel from the phone.

  7. HTC Wizard 200 Vibrator Replacement, Vibrator: passo 7, immagine 1 di 1
    • Use the tweezers to remove the vibrator module.

Conclusione

To reassemble your device, follow these instructions in reverse order.

Kyle Champ

Membro da: 10/03/11

225 Reputazione

12 Guide realizzate

Team

Cal Poly, Team 20-27, Maness Fall 2011 Membro di Cal Poly, Team 20-27, Maness Fall 2011

CPSU-MANESS-F11S20G27

4 Membri

24 Guide realizzate

0 Commenti

Aggiungi Commento

Visualizza Statistiche:

Ultime 24 Ore: 0

Ultimi 7 Giorni: 1

Ultimi 30 Giorni: 1

Tutti i Tempi: 713