Salta al contenuto principale

HTC One X Plus Screen Replacement

Cosa ti serve

  1. HTC One X Plus Screen Replacement, Screen: passo 1, immagine 1 di 1
    • Power off your device.

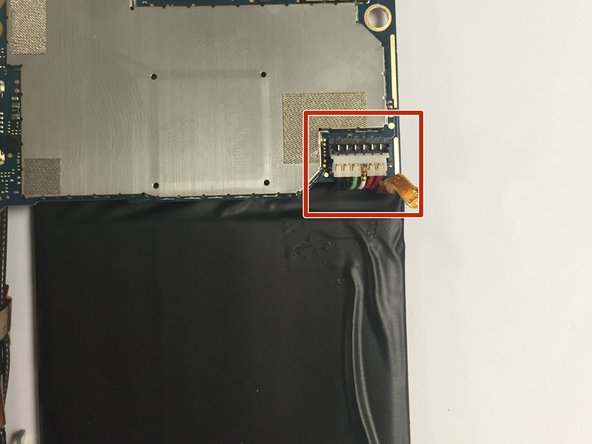
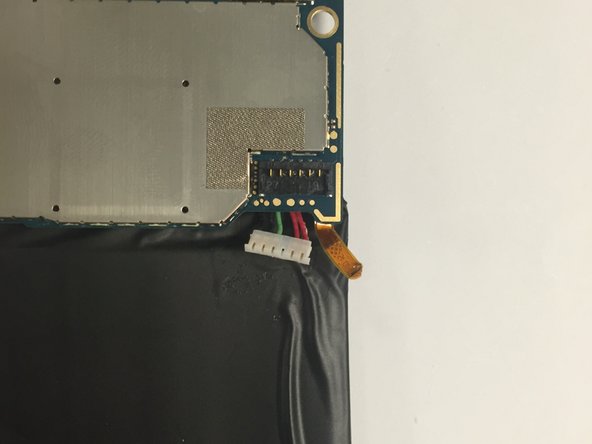
    • Insert a pin, paper clip, or very small piece of metal in the hole next to the micro sim card holder to remove it.

    • The sim card slot is located on the top edge of the device.

  2. HTC One X Plus Screen Replacement: passo 2, immagine 1 di 3 HTC One X Plus Screen Replacement: passo 2, immagine 2 di 3 HTC One X Plus Screen Replacement: passo 2, immagine 3 di 3
    • Using plastic opening tools, pry open the bottom of the device first.

    • You will hear clicking sounds as the sides of the device detach from the screen.

    • Once both sides are detached, use the suction cup tool to remove the screen completely from the black encasing.

  3. HTC One X Plus Screen Replacement: passo 3, immagine 1 di 3 HTC One X Plus Screen Replacement: passo 3, immagine 2 di 3 HTC One X Plus Screen Replacement: passo 3, immagine 3 di 3
    • Remove the five 2.4 mm screws using a Phillips #000 screwdriver.

    • Remove the plastic cover.

  4. HTC One X Plus Screen Replacement: passo 4, immagine 1 di 3 HTC One X Plus Screen Replacement: passo 4, immagine 2 di 3 HTC One X Plus Screen Replacement: passo 4, immagine 3 di 3
    • Use a Phillips #000 screwdriver to remove the two 3.4 mm screws.

    • Remove the PCB board and antenna.

  5. HTC One X Plus Screen Replacement: passo 5, immagine 1 di 2 HTC One X Plus Screen Replacement: passo 5, immagine 2 di 2
    • Use tweezers to disconnect the power button flex cable.

  6. HTC One X Plus Screen Replacement: passo 6, immagine 1 di 3 HTC One X Plus Screen Replacement: passo 6, immagine 2 di 3 HTC One X Plus Screen Replacement: passo 6, immagine 3 di 3
    • Disconnect the battery's six pin connector from the motherboard.

    • Remove the battery by pulling it upwards.

  7. HTC One X Plus Screen Replacement: passo 7, immagine 1 di 1
    • Disconnect the screen from the digitizer.

    • Use a plastic opening tool to gently disconnect the screen from the digitizer.

    • You may have to use heat to loosen adhesive securing the screen.

Conclusione

To reassemble your device, follow these instructions in reverse order.

Jason Melo

Membro da: 08/26/15

483 Reputazione

4 Guide realizzate

Team

USF Tampa, Team 3-3, Eyestone Fall 2015 Membro di USF Tampa, Team 3-3, Eyestone Fall 2015

USFT-EYESTONE-F15S3G3

3 Membri

10 Guide realizzate

Un commento

Man, this did nothing but break my International One X+. There were so many instructions missing.

Garrett Reyman - Replica

Aggiungi Commento

Visualizza Statistiche:

Ultime 24 Ore: 0

Ultimi 7 Giorni: 0

Ultimi 30 Giorni: 3

Tutti i Tempi: 1,841