Questa versione può contenere modifiche errate. Passa all'ultima istantanea verificata.
Cosa ti serve
-
Questo passaggio è privo di traduzione. Aiuta a tradurlo
-
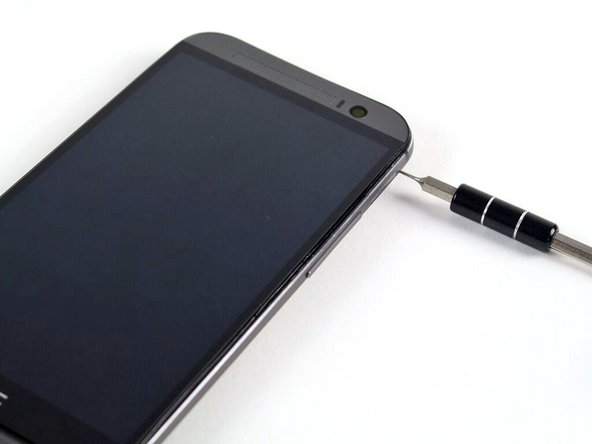
Insert a SIM card eject tool or a paperclip into the small hole in the SIM card tray, located on the upper left hand side of the phone.
-
Press to eject the tray.
-
-
Questo passaggio è privo di traduzione. Aiuta a tradurlo
-
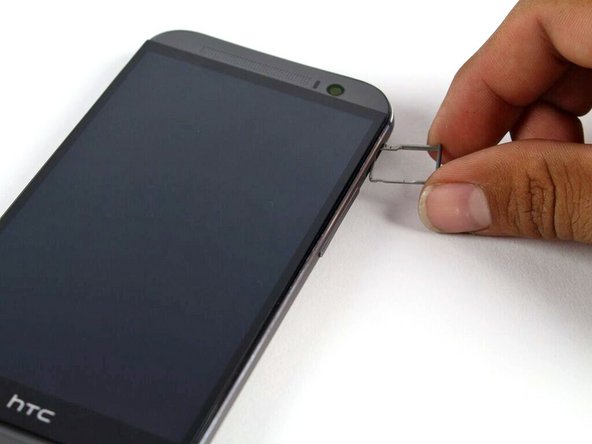
Remove the SIM card tray assembly from the HTC One M8.
-
-
Questo passaggio è privo di traduzione. Aiuta a tradurlo
-
Insert a SIM card eject tool or a paperclip into the small hole in the microSD card tray, located on the upper right hand side of the phone.
-
Press to eject the tray.
-
-
Questo passaggio è privo di traduzione. Aiuta a tradurlo
-
Remove the microSD card tray assembly from the HTC One M8.
-
-
Questo passaggio è privo di traduzione. Aiuta a tradurlo
-
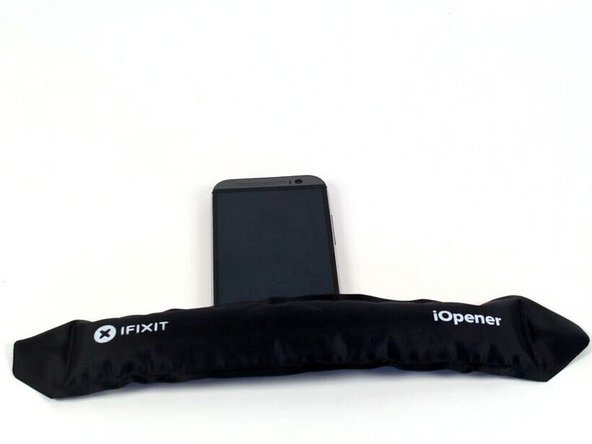
Use an iOpener or heat gun to loosen the adhesive on the upper and lower speaker grilles.
-
-
-
Questo passaggio è privo di traduzione. Aiuta a tradurlo
-
Use a plastic opening tool to gently peel up the lower speaker grille.
-
-
Questo passaggio è privo di traduzione. Aiuta a tradurlo
-
Use a plastic opening tool to gently peel up the upper speaker grille.
-
-
Questo passaggio è privo di traduzione. Aiuta a tradurlo
-
Remove the two silver 3 mm Phillips #00 screws from the top.
-
Remove the four black 4 mm T5 Torx screws from the bottom.
-
-
Questo passaggio è privo di traduzione. Aiuta a tradurlo
-
Work your way around the perimeter of the phone with a spudger and plastic opening picks to free the clips that secure the rear case to the display assembly.
-
-
Questo passaggio è privo di traduzione. Aiuta a tradurlo
-
Remove the two silver 2 mm Phillips #00 screws securing the battery connector to the motherboard.
-
Use a plastic opening tool to gently pry up the battery connector.
-
-
Questo passaggio è privo di traduzione. Aiuta a tradurlo
-
Use a spudger to disconnect the two (four) antenna cables.
-
Use the tip of a spudger to disconnect the seven ZIF connectors.
-
Use a pair of tweezers to gently pull the seven ribbon cables free of the connectors.
-
-
Questo passaggio è privo di traduzione. Aiuta a tradurlo
-
Remove three silver 3mm screws using T5 screwdriver.
-
-
Questo passaggio è privo di traduzione. Aiuta a tradurlo
-
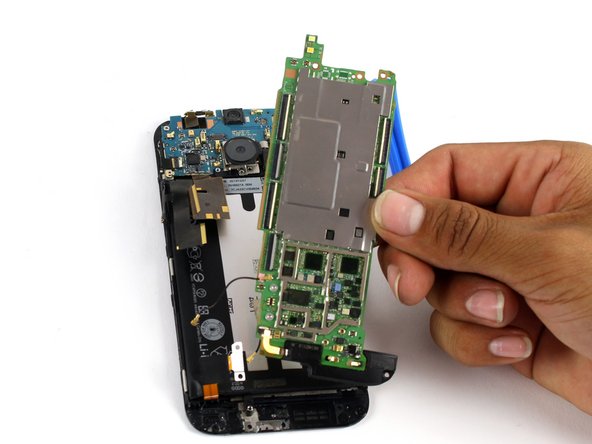
Use an iOpener or a heat gun to loosen up the adhesive securing the motherboard to the display assembly.
-
Use a plastic opening tool to gently pry the motherboard free of the display assembly.
-


Annulla: non ho completato questa guida.
Altre 28 persone hanno completato questa guida.

Team

Cal Poly, Team 5-9, Maness Spring 2015 Membro di Cal Poly, Team 5-9, Maness Spring 2015
CPSU-MANESS-S15S5G9
4 Membri
18 Guide realizzate