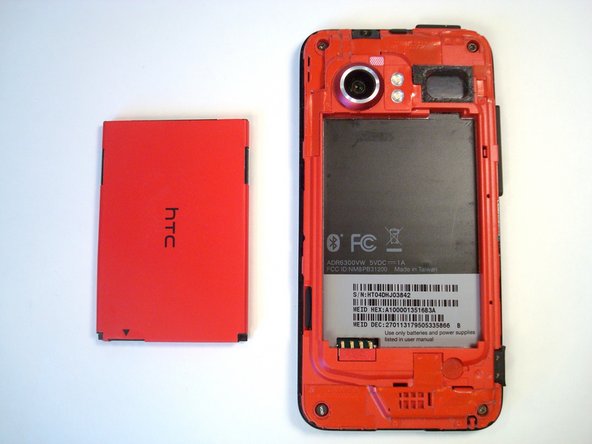
Salta al contenuto principale

HTC Droid Incredible Optical Joystick Replacement

Cosa ti serve

  1. HTC Droid Incredible Optical Joystick Replacement, Battery: passo 1, immagine 1 di 3 HTC Droid Incredible Optical Joystick Replacement, Battery: passo 1, immagine 2 di 3 HTC Droid Incredible Optical Joystick Replacement, Battery: passo 1, immagine 3 di 3
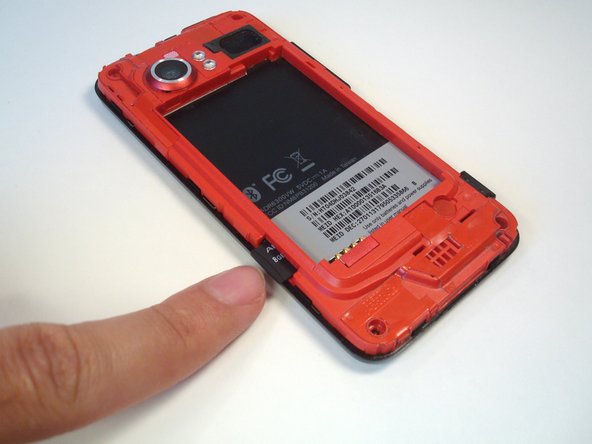
    • Press your thumbnail into the slot between the rear panel and the front case located in the bottom of the phone.

    • Useful tip: a penny or dime works in a pinch if you can't use your thumbnail.

    • Gently pry the rear panel up and away from the phone. You may need to slide your thumb up the crack to separate the rear panel from the front case.

  2. HTC Droid Incredible Optical Joystick Replacement: passo 2, immagine 1 di 1
    • Remove the rear panel from the phone.

  3. HTC Droid Incredible Optical Joystick Replacement: passo 3, immagine 1 di 3 HTC Droid Incredible Optical Joystick Replacement: passo 3, immagine 2 di 3 HTC Droid Incredible Optical Joystick Replacement: passo 3, immagine 3 di 3
    • Insert a fingertip into the gap between the battery and the rear inner frame, located between the battery and the speaker. Slide the battery away from the speaker, widening the gap.

    • Lift the top of the battery up and remove the battery from the rear inner frame.

  4. HTC Droid Incredible Optical Joystick Replacement, MicroSD card: passo 4, immagine 1 di 2 HTC Droid Incredible Optical Joystick Replacement, MicroSD card: passo 4, immagine 2 di 2
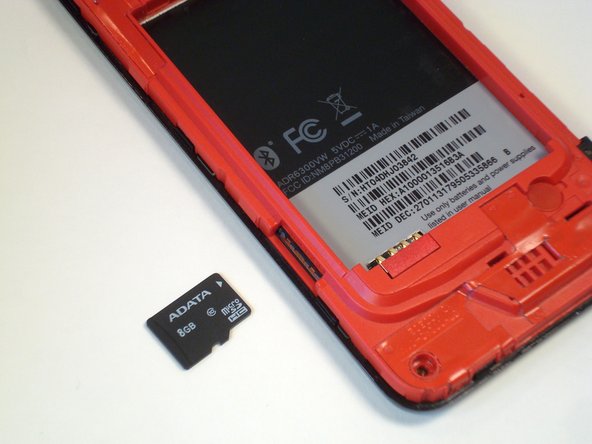
    • Press the MicroSD card further into its slot until it clicks.

    • Release the MicroSD card, and it will pop out slightly.

  5. HTC Droid Incredible Optical Joystick Replacement: passo 5, immagine 1 di 2 HTC Droid Incredible Optical Joystick Replacement: passo 5, immagine 2 di 2
    • Pull the MicroSD card straight out of its slot.

  6. HTC Droid Incredible Optical Joystick Replacement, Rear Inner Frame: passo 6, immagine 1 di 1
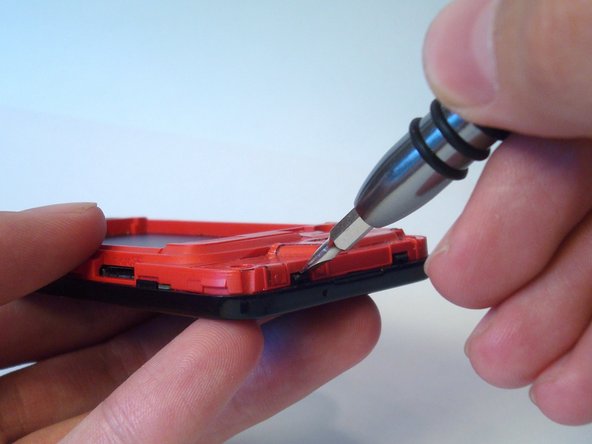
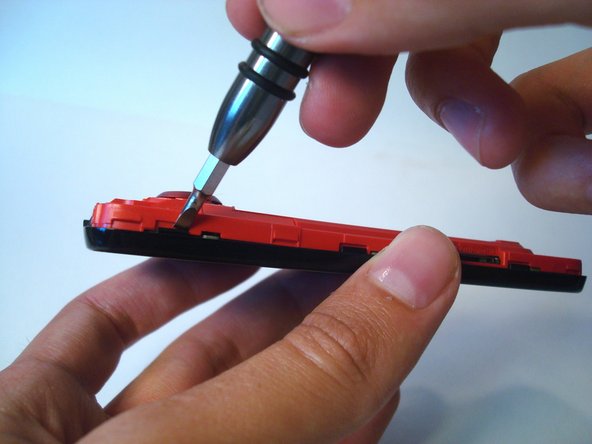
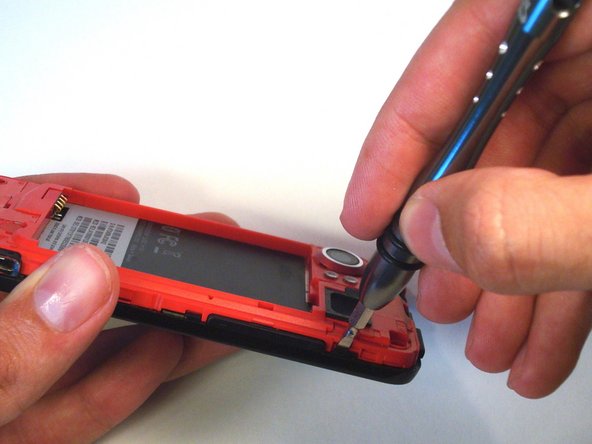
    • Remove four T6 Torx screws securing the rear inner frame to the front case.

  7. HTC Droid Incredible Optical Joystick Replacement: passo 7, immagine 1 di 1
    • The rear inner frame is attached to the front case by nine plastic clips, marked here for reference.

  8. HTC Droid Incredible Optical Joystick Replacement: passo 8, immagine 1 di 2 HTC Droid Incredible Optical Joystick Replacement: passo 8, immagine 2 di 2
    • Starting on the bottom of the phone, gently push in on the (red) rear inner frame behind each black clip with a small flathead screwdriver.

    • Go slow and be gentle, you may have to go back and forth between each side several times to work the rear inner case free.

  9. HTC Droid Incredible Optical Joystick Replacement: passo 9, immagine 1 di 2 HTC Droid Incredible Optical Joystick Replacement: passo 9, immagine 2 di 2
    • Loosen the clips on the side next to the camera using the method described in the previous step.

  10. HTC Droid Incredible Optical Joystick Replacement: passo 10, immagine 1 di 2 HTC Droid Incredible Optical Joystick Replacement: passo 10, immagine 2 di 2
    • Rotate the phone 180 degrees and loosen the three clips on the side by the speaker. Note that the middle clip on this side is smaller than the others.

  11. HTC Droid Incredible Optical Joystick Replacement: passo 11, immagine 1 di 3 HTC Droid Incredible Optical Joystick Replacement: passo 11, immagine 2 di 3 HTC Droid Incredible Optical Joystick Replacement: passo 11, immagine 3 di 3
    • Use the same technique to loosen the clip on the top of the phone.

    • You may need to gently lift the bottom of the rear inner frame to free this clip.

  12. HTC Droid Incredible Optical Joystick Replacement: passo 12, immagine 1 di 2 HTC Droid Incredible Optical Joystick Replacement: passo 12, immagine 2 di 2
    • Remove the rear inner frame.

  13. HTC Droid Incredible Optical Joystick Replacement, Optical Joystick: passo 13, immagine 1 di 1
    • Remove the tape covering the optical joystick ribbon cable.

  14. HTC Droid Incredible Optical Joystick Replacement: passo 14, immagine 1 di 2 HTC Droid Incredible Optical Joystick Replacement: passo 14, immagine 2 di 2
    • Flip the ZIF connector on the optical joystick cable.

    • Lift the optical joystick out of its socket.

    • Use a pair of tweezers to pull the optical joystick ribbon cable straight out of its socket.

  15. HTC Droid Incredible Optical Joystick Replacement: passo 15, immagine 1 di 3 HTC Droid Incredible Optical Joystick Replacement: passo 15, immagine 2 di 3 HTC Droid Incredible Optical Joystick Replacement: passo 15, immagine 3 di 3
    • Remove the optical joystick.

Conclusione

To reassemble your device, follow these instructions in reverse order.

Un'altra persona ha completato questa guida.

Team

iFixit Membro di iFixit

Staff

135 Membri

16.731 Guide realizzate

0 Commenti

Aggiungi Commento

Visualizza Statistiche:

Ultime 24 Ore: 0

Ultimi 7 Giorni: 0

Ultimi 30 Giorni: 0

Tutti i Tempi: 1,418