Salta al contenuto principale

HTC Desire V Button Assembly Replacement

Cosa ti serve

  1. HTC Desire V Button Assembly Replacement, Battery: passo 1, immagine 1 di 3 HTC Desire V Button Assembly Replacement, Battery: passo 1, immagine 2 di 3 HTC Desire V Button Assembly Replacement, Battery: passo 1, immagine 3 di 3
    • Gently pry back cover away from phone.

    • If you are having difficulty you may need to use a Spudger or plastic opener.

  2. HTC Desire V Button Assembly Replacement: passo 2, immagine 1 di 3 HTC Desire V Button Assembly Replacement: passo 2, immagine 2 di 3 HTC Desire V Button Assembly Replacement: passo 2, immagine 3 di 3
    • Lever the battery out from the bottom end first.

    • Do not bend or puncture the battery.

  3. HTC Desire V Button Assembly Replacement, Midframe: passo 3, immagine 1 di 3 HTC Desire V Button Assembly Replacement, Midframe: passo 3, immagine 2 di 3 HTC Desire V Button Assembly Replacement, Midframe: passo 3, immagine 3 di 3
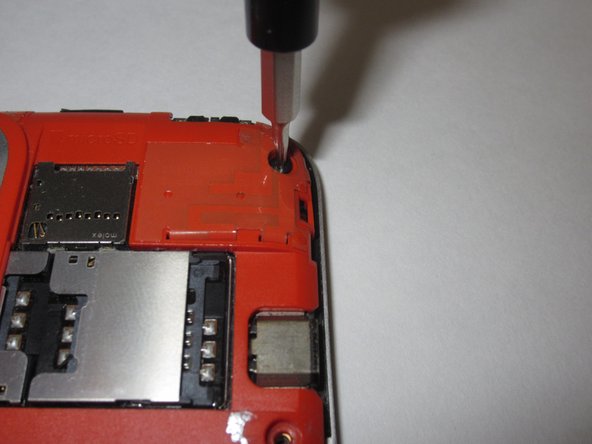
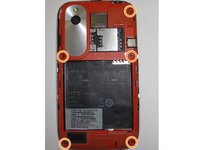
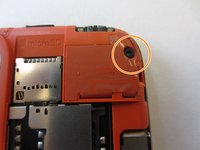
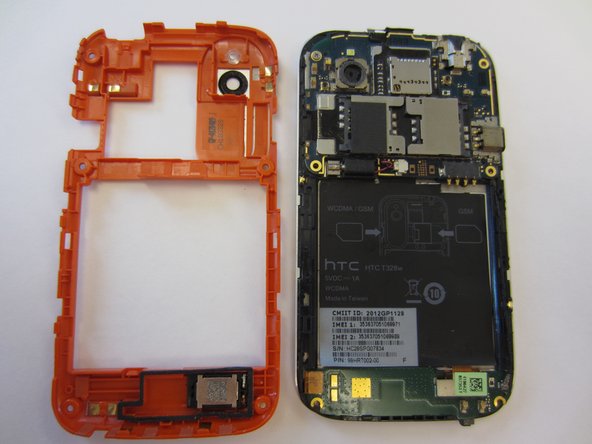
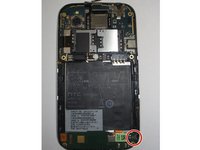
    • Use a Torx T5 screwdriver to unscrew and remove five 3.0 mm screws from the rear frame.

  4. HTC Desire V Button Assembly Replacement: passo 4, immagine 1 di 3 HTC Desire V Button Assembly Replacement: passo 4, immagine 2 di 3 HTC Desire V Button Assembly Replacement: passo 4, immagine 3 di 3
    • Use an opening tool or a spudger to gently remove the rear frame.

  5. HTC Desire V Button Assembly Replacement, Button Assembly: passo 5, immagine 1 di 2 HTC Desire V Button Assembly Replacement, Button Assembly: passo 5, immagine 2 di 2
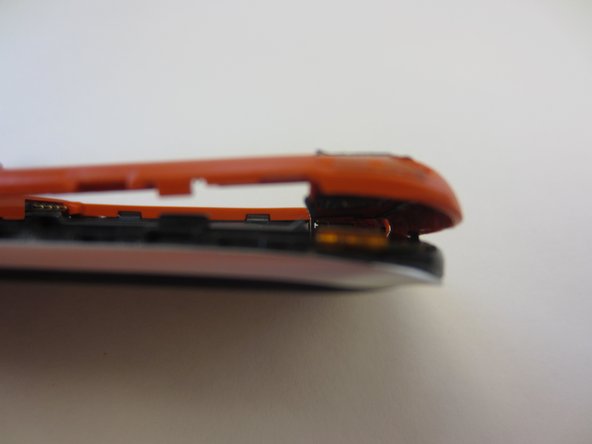
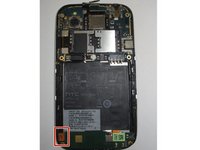
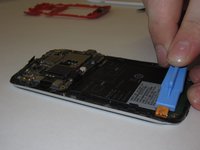
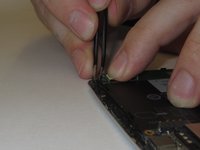
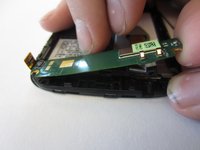
    • Remove the connector on left side of the Navigation board by unplugging/prying the orange ribbon.

  6. HTC Desire V Button Assembly Replacement: passo 6, immagine 1 di 2 HTC Desire V Button Assembly Replacement: passo 6, immagine 2 di 2
    • Gently unplug and remove aerial cable (black antenna) from bottom plug.

  7. HTC Desire V Button Assembly Replacement: passo 7, immagine 1 di 2 HTC Desire V Button Assembly Replacement: passo 7, immagine 2 di 2
    • Nav Board will be stuck down by glue.

    • Pull gently from the right end of the board, being careful of its flexibility.

Conclusione

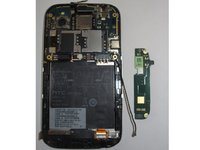
To reassemble your device, follow these instructions in reverse order.

Altre 3 persone hanno completato questa guida.

Team

Clemson, Team 14-3, Shirley Winter 2015 Membro di Clemson, Team 14-3, Shirley Winter 2015

CLEM-SHIRLEY-W15S14G3

6 Membri

18 Guide realizzate

0 Commenti

Aggiungi Commento

Visualizza Statistiche:

Ultime 24 Ore: 0

Ultimi 7 Giorni: 0

Ultimi 30 Giorni: 1

Tutti i Tempi: 304