Questa versione può contenere modifiche errate. Passa all'ultima istantanea verificata.
Cosa ti serve
-
Questo passaggio è privo di traduzione. Aiuta a tradurlo
-
Using a plastic opening tool, take off the back cover of the phone.
-
-
Questo passaggio è privo di traduzione. Aiuta a tradurlo
-
Remove the four black 4mm torx screws using the Torx T5 bit.
-
-
Questo passaggio è privo di traduzione. Aiuta a tradurlo
-
Remove the four silver 5mm torx head screws using the Torx T5 screwdriver.
-
-
-
Questo passaggio è privo di traduzione. Aiuta a tradurlo
-
Remove the two 2.5mm phillips head screws using the Phillips 000 screwdriver.
-
-
Questo passaggio è privo di traduzione. Aiuta a tradurlo
-
Remove the black plastic circuit cover using a plastic opening tool.
-
-
Questo passaggio è privo di traduzione. Aiuta a tradurlo
-
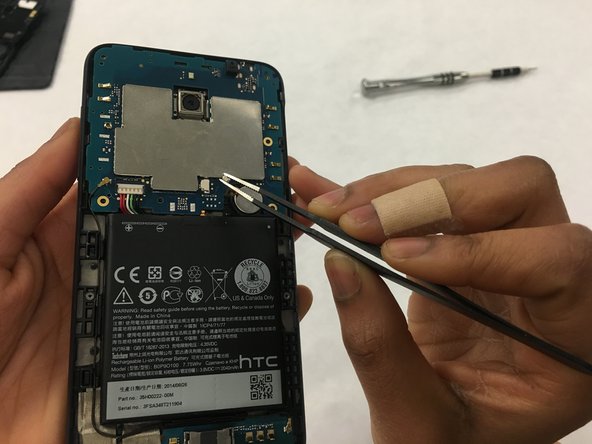
Pull the wire harness from the circuit board that is connected to the vibration motor using a pair of precision tweezers.
-
-
Questo passaggio è privo di traduzione. Aiuta a tradurlo
-
Pry the vibration motor from it's housing using precision tweezers.
-


Team

IUPUI, Team S1-G1, Wilson Spring 2017 Membro di IUPUI, Team S1-G1, Wilson Spring 2017
IUPUI-WILSON-S17S1G1
4 Membri
6 Guide realizzate