Salta al contenuto principale

HTC Desire 510 Touch screen Glass and/or LCD Display

Cosa ti serve

Panoramica Video

  1. HTC Desire 510 Touch screen Glass and/or LCD Display, BATTERY REMOVAL: passo 1, immagine 1 di 3 HTC Desire 510 Touch screen Glass and/or LCD Display, BATTERY REMOVAL: passo 1, immagine 2 di 3 HTC Desire 510 Touch screen Glass and/or LCD Display, BATTERY REMOVAL: passo 1, immagine 3 di 3
    • Switch off the phone, remove the battery and any installed SIM and memory cards.

    • Remove 7x Torx T5 screws.

  2. HTC Desire 510 Touch screen Glass and/or LCD Display, REAR BEZEL REMOVAL: passo 2, immagine 1 di 3 HTC Desire 510 Touch screen Glass and/or LCD Display, REAR BEZEL REMOVAL: passo 2, immagine 2 di 3 HTC Desire 510 Touch screen Glass and/or LCD Display, REAR BEZEL REMOVAL: passo 2, immagine 3 di 3
    • Use a plastic tool to remove the rear bezel.

    • The loudspeaker is on the inner side of the rear bezel.

  3. HTC Desire 510 Touch screen Glass and/or LCD Display, FLEX CABLES DISCONNECTING: passo 3, immagine 1 di 3 HTC Desire 510 Touch screen Glass and/or LCD Display, FLEX CABLES DISCONNECTING: passo 3, immagine 2 di 3 HTC Desire 510 Touch screen Glass and/or LCD Display, FLEX CABLES DISCONNECTING: passo 3, immagine 3 di 3
    • Disconnect the touch screen flex cable.

    • Disconnect the light sensor flex cable.

    • Unstuck the vibra-motor from the middle frame.

    • Remove the coaxial antenna cable from the middle frame.

    • The LCD display flex cable is connected to the bottom side of the board.

  4. HTC Desire 510 Touch screen Glass and/or LCD Display, LOGIC BOARD REMOVAL: passo 4, immagine 1 di 3 HTC Desire 510 Touch screen Glass and/or LCD Display, LOGIC BOARD REMOVAL: passo 4, immagine 2 di 3 HTC Desire 510 Touch screen Glass and/or LCD Display, LOGIC BOARD REMOVAL: passo 4, immagine 3 di 3
    • At the upper left side, the board is held by a plastic locking clip. Use a plastic tool and start the separating from here.

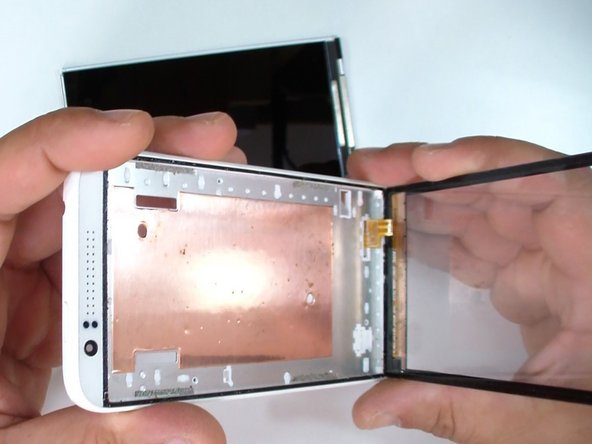
    • Gently disconnect the LCD display flex cable.

    • Now remove the logic board.

  5. HTC Desire 510 Touch screen Glass and/or LCD Display, PREPARATION THE GLASS: passo 5, immagine 1 di 3 HTC Desire 510 Touch screen Glass and/or LCD Display, PREPARATION THE GLASS: passo 5, immagine 2 di 3 HTC Desire 510 Touch screen Glass and/or LCD Display, PREPARATION THE GLASS: passo 5, immagine 3 di 3
    • Put a scotch tape to prevent the glass from scattering.

    • Use a hot gun or hair dryer and warm the glass. This will make the adhesive soften and the separation easier.

  6. HTC Desire 510 Touch screen Glass and/or LCD Display, SEPARATION THE GLASS: passo 6, immagine 1 di 3 HTC Desire 510 Touch screen Glass and/or LCD Display, SEPARATION THE GLASS: passo 6, immagine 2 di 3 HTC Desire 510 Touch screen Glass and/or LCD Display, SEPARATION THE GLASS: passo 6, immagine 3 di 3
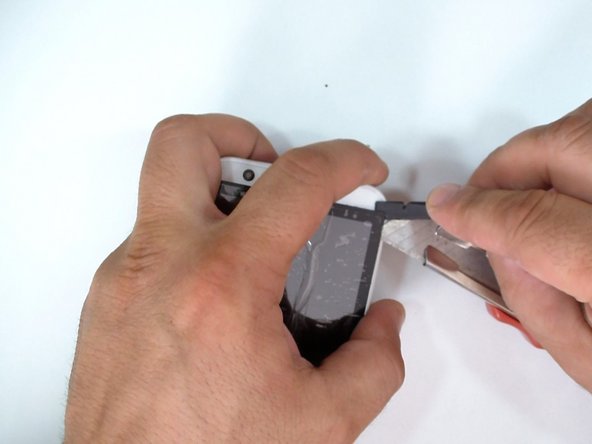
    • Use a cutter and slightly lift the glass in one of the corners. When you make enough room, put a plastic tool.

    • Continue the separating with plastic tools to prevent the middle frame from scratches.

  7. HTC Desire 510 Touch screen Glass and/or LCD Display, SEPARATION THE GLASS (2): passo 7, immagine 1 di 3 HTC Desire 510 Touch screen Glass and/or LCD Display, SEPARATION THE GLASS (2): passo 7, immagine 2 di 3 HTC Desire 510 Touch screen Glass and/or LCD Display, SEPARATION THE GLASS (2): passo 7, immagine 3 di 3
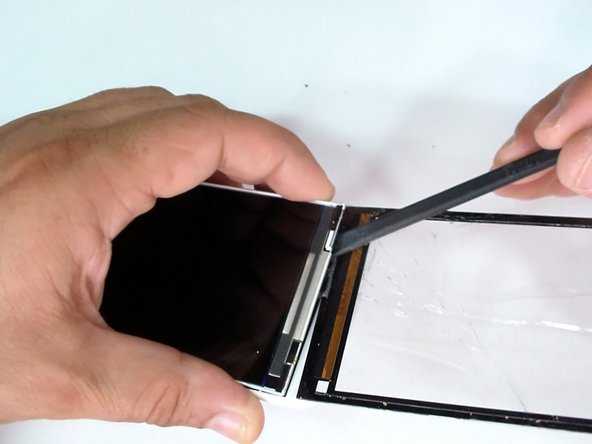
    • The digitizer flex cable goes under the LCD display.

    • Slightly lift the display and unstuck the digitizer ribbon cable from the from the rear side of the display.

  8. HTC Desire 510 Touch screen Glass and/or LCD Display, LCD DISPLAY: passo 8, immagine 1 di 3 HTC Desire 510 Touch screen Glass and/or LCD Display, LCD DISPLAY: passo 8, immagine 2 di 3 HTC Desire 510 Touch screen Glass and/or LCD Display, LCD DISPLAY: passo 8, immagine 3 di 3
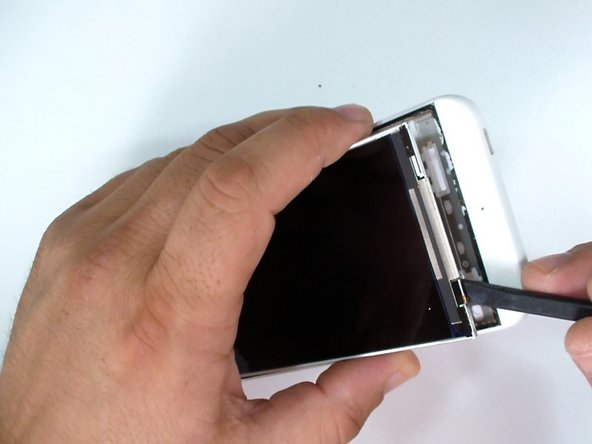
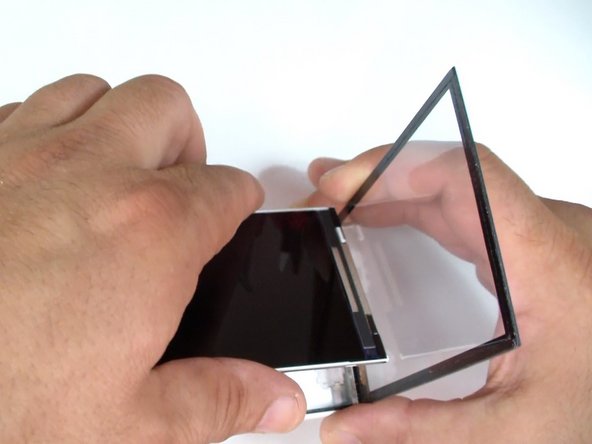
    • If you have a broken LCD display, use a plastic tool and remove it from the middle frame.

    • It's not glued to the frame.

  9. HTC Desire 510 Touch screen Glass and/or LCD Display, INSTALLING THE NEW SPARE PART: passo 9, immagine 1 di 3 HTC Desire 510 Touch screen Glass and/or LCD Display, INSTALLING THE NEW SPARE PART: passo 9, immagine 2 di 3 HTC Desire 510 Touch screen Glass and/or LCD Display, INSTALLING THE NEW SPARE PART: passo 9, immagine 3 di 3
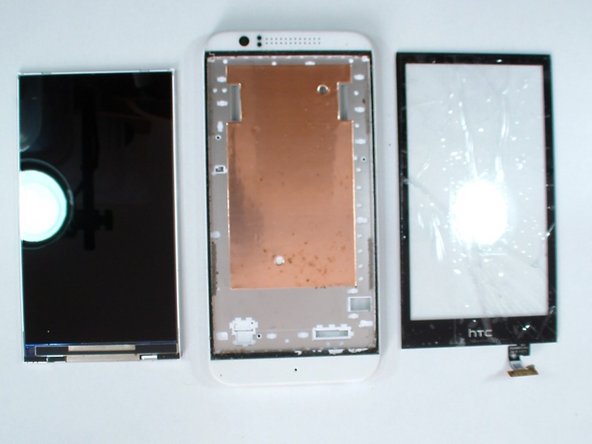
    • Install a new adhesive tape on the digitizer glass.

    • First put the touch screen flex cable in the right hole and then install the LCD Display.

  10. HTC Desire 510 Touch screen Glass and/or LCD Display, REASSEMBLING: passo 10, immagine 1 di 2 HTC Desire 510 Touch screen Glass and/or LCD Display, REASSEMBLING: passo 10, immagine 2 di 2
    • Now is time to reassemble the phone.
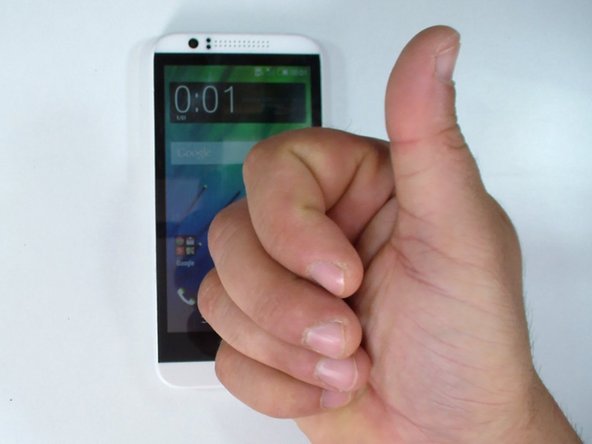
    • That's all.

    • .

    • .

    • .

    • .

    • Did you do it successfully?

Conclusione

To reassemble your device, follow these instructions in reverse order.

Altre 10 persone hanno completato questa guida.

ZFix

Membro da: 12/09/13

191.182 Reputazione

330 Guide realizzate

Team

Master Techs Membro di Master Techs

Community

322 Membri

2.521 Guide realizzate

3 Commenti

thanks for this mate, super helpful

kommer - Replica

I did exactly this and when I turn on my phone, the digitizer recognizes touches for a few milliseconds (buggy touches) when I touch it then it stops recognizing touches. What did I do wrong?

Generic Email - Replica

hello i want to buy HTC desire 510 Screen because my htc mobile Touch is not working. i want to buy. plz tell me to am i buy .

imran Ali Gaming - Replica

Aggiungi Commento

Visualizza Statistiche:

Ultime 24 Ore: 0

Ultimi 7 Giorni: 3

Ultimi 30 Giorni: 8

Tutti i Tempi: 15,421