Salta al contenuto principale

HP Stream 14-CB174WM Motherboard Replacement

Cosa ti serve

  1. HP Stream 14-CB174WM Motherboard Replacement, Lower Case: passo 1, immagine 1 di 2 HP Stream 14-CB174WM Motherboard Replacement, Lower Case: passo 1, immagine 2 di 2
    • Use an opening pick to gently pry up the edge of the rubber foot.

    • Grab the lifted edge of the foot and gently pull it away.

    • Repeat for the other rubber foot.

    • The oils on your skin can damage the adhesive on the rubber feet. Try not to touch the adhesive part of the feet with your hands.

  2. HP Stream 14-CB174WM Motherboard Replacement: passo 2, immagine 1 di 2 HP Stream 14-CB174WM Motherboard Replacement: passo 2, immagine 2 di 2
    • Use a Phillips screwdriver to remove the eight 6.6 mm screws that secure the lower case.

  3. HP Stream 14-CB174WM Motherboard Replacement: passo 3, immagine 1 di 3 HP Stream 14-CB174WM Motherboard Replacement: passo 3, immagine 2 di 3 HP Stream 14-CB174WM Motherboard Replacement: passo 3, immagine 3 di 3
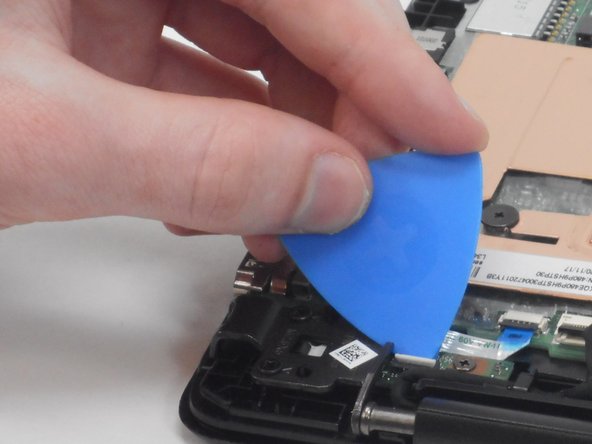
    • Insert an opening pick in the seam between the lower case and chassis.

    • Slide the opening pick around the perimeter, prying every couple of centimeters as you go.

    • You will hear "snaps" of the lower case retaining clips releasing.

    • Continue prying around the entire perimeter until the lower case fully releases.

    • Lift off the lower case.

  4. HP Stream 14-CB174WM Motherboard Replacement, Battery: passo 4, immagine 1 di 3 HP Stream 14-CB174WM Motherboard Replacement, Battery: passo 4, immagine 2 di 3 HP Stream 14-CB174WM Motherboard Replacement, Battery: passo 4, immagine 3 di 3
    • Remove the following Phillips screws that secure the battery:

    • Three 2.9 mm

    • Two 6.8 mm

    • Be sure to keep different screw types separate from one another throughout the battery removal process.

  5. HP Stream 14-CB174WM Motherboard Replacement: passo 5, immagine 1 di 2 HP Stream 14-CB174WM Motherboard Replacement: passo 5, immagine 2 di 2
    • Use your fingers or the point of a spudger to slowly “wiggle” the battery connector directly out of its socket.

    • Do not pull on the wires.

  6. HP Stream 14-CB174WM Motherboard Replacement: passo 6, immagine 1 di 2 HP Stream 14-CB174WM Motherboard Replacement: passo 6, immagine 2 di 2
    • Gently unseat the battery connector wire out from under the two plastic tabs.

  7. HP Stream 14-CB174WM Motherboard Replacement: passo 7, immagine 1 di 2 HP Stream 14-CB174WM Motherboard Replacement: passo 7, immagine 2 di 2
    • Lift the battery up and out of the laptop.

    • The battery should lift out with very little effort. If the battery cannot easily be lifted out of the laptop chassis, check to see if you missed any screws.

  8. HP Stream 14-CB174WM Motherboard Replacement, Wi-Fi Card: passo 8, immagine 1 di 2 HP Stream 14-CB174WM Motherboard Replacement, Wi-Fi Card: passo 8, immagine 2 di 2
    • Locate the Wi-Fi card module near the top of the laptop.

    • It is right above the large copper heat sink.

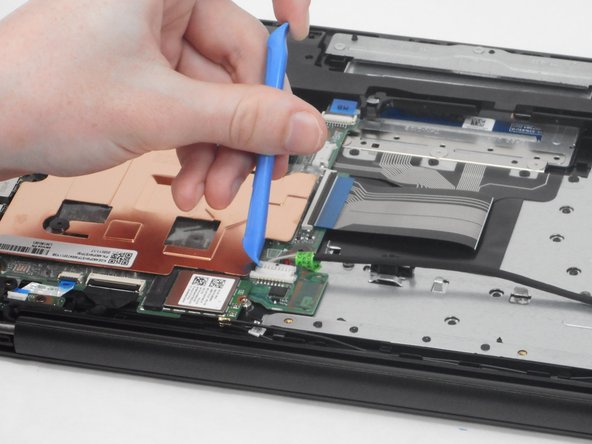
  9. HP Stream 14-CB174WM Motherboard Replacement: passo 9, immagine 1 di 2 HP Stream 14-CB174WM Motherboard Replacement: passo 9, immagine 2 di 2
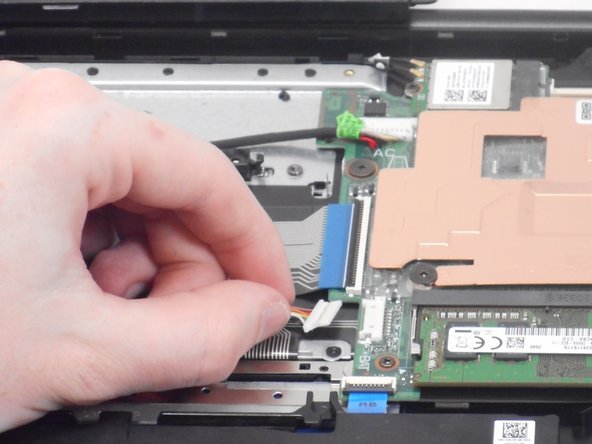
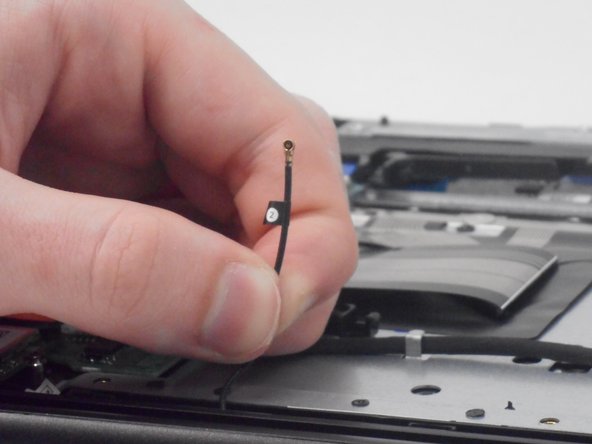
    • Use a plastic opening tool to gently lift and detach the two Wi-Fi card antenna cables.

    • Each wire features numbered tags (1 and 2) corresponding to identical numbers printed on the card. These numbers indicate the designated ports on the wifi card where each wire should be plugged in.

  10. HP Stream 14-CB174WM Motherboard Replacement: passo 10, immagine 1 di 1
    • Remove the single screw that secures the Wi-Fi card using a Phillips screwdriver.

  11. HP Stream 14-CB174WM Motherboard Replacement: passo 11, immagine 1 di 2 HP Stream 14-CB174WM Motherboard Replacement: passo 11, immagine 2 di 2
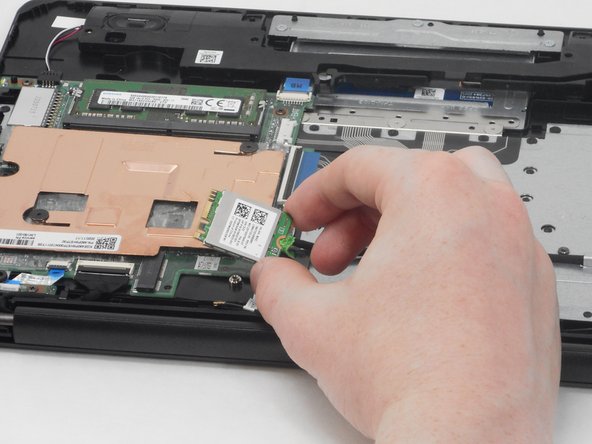
    • Pull the card directly out of its socket.

  12. HP Stream 14-CB174WM Motherboard Replacement, Motherboard: passo 12, immagine 1 di 3 HP Stream 14-CB174WM Motherboard Replacement, Motherboard: passo 12, immagine 2 di 3 HP Stream 14-CB174WM Motherboard Replacement, Motherboard: passo 12, immagine 3 di 3
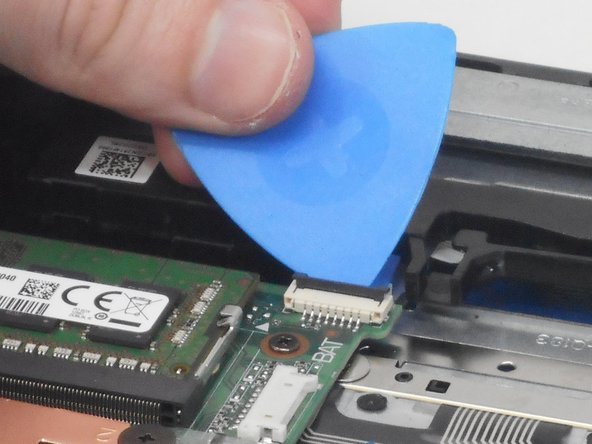
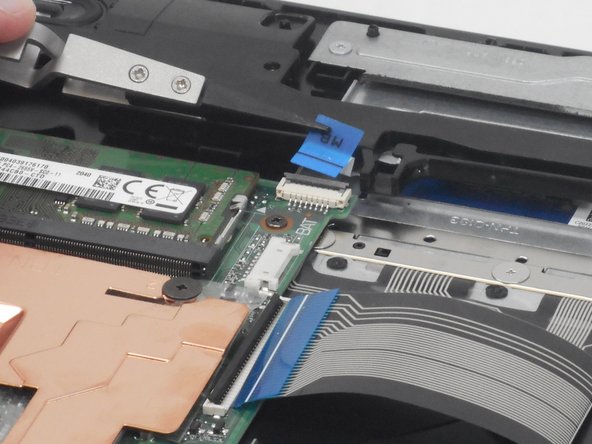
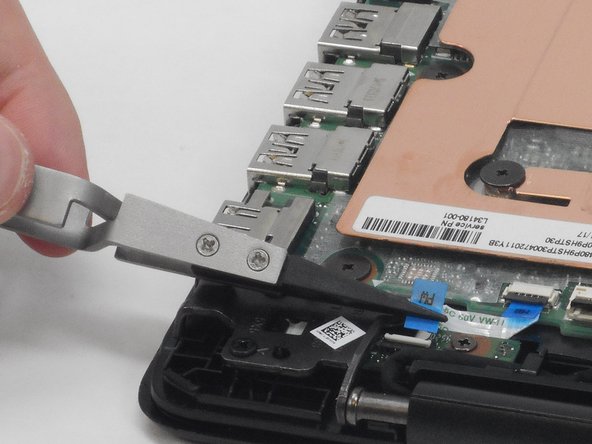
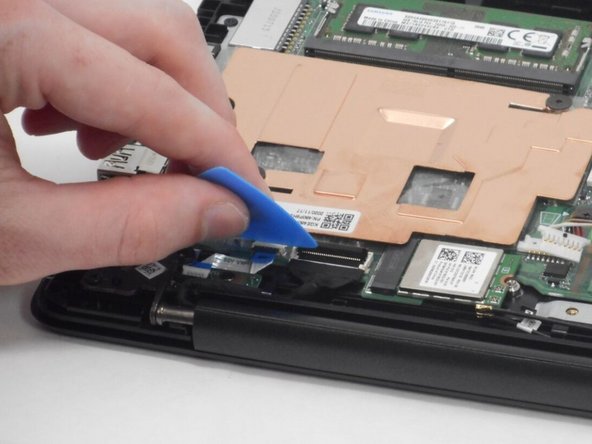
    • Use an opening tool or your fingernail to flip up the black ZIF connector locking flap next to the RAM.

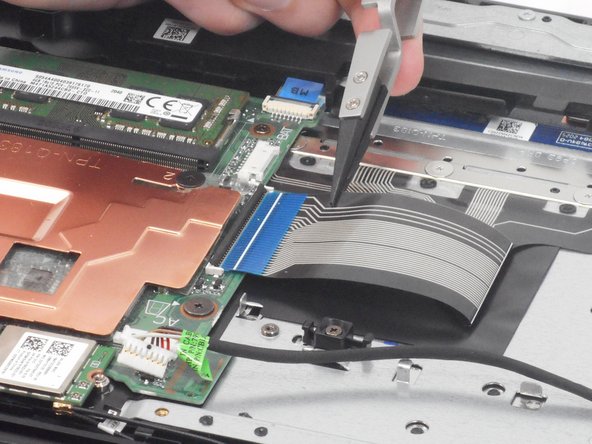
    • Use tweezers to grip and pull the blue plastic tab on the ribbon cable.

    • Remove the ribbon cable.

    • Ribbon cables are delicate and can tear if pulled directly. Instead, grasp and gently pull the blue plastic tab protruding from the connector to release the cable. Avoid using metal tweezers on the cable as they can damage it; opt for tweezers with soft, non-abrasive tips for safer handling.

  13. HP Stream 14-CB174WM Motherboard Replacement: passo 13, immagine 1 di 3 HP Stream 14-CB174WM Motherboard Replacement: passo 13, immagine 2 di 3 HP Stream 14-CB174WM Motherboard Replacement: passo 13, immagine 3 di 3
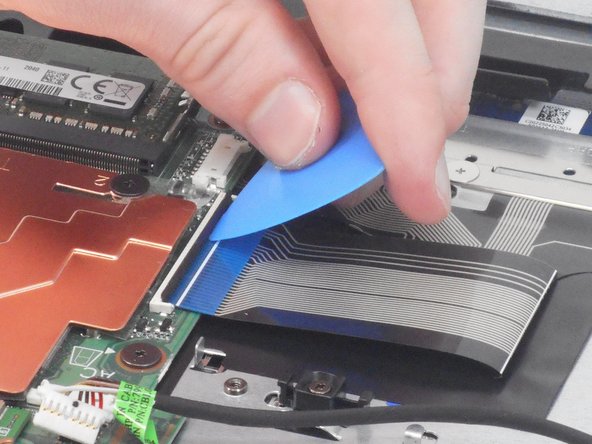
    • Use an opening tool or your fingernail to flip up the black ZIF connector locking flap on the right side of the motherboard.

    • Remove the ribbon cable.

    • Ribbon cables are delicate and can tear if pulled directly. Instead, grasp and gently pull the blue plastic tab protruding from the connector to release the cable. Avoid using metal tweezers on the cable as they can damage it; opt for tweezers with soft, non-abrasive tips for safer handling.

  14. HP Stream 14-CB174WM Motherboard Replacement: passo 14, immagine 1 di 3 HP Stream 14-CB174WM Motherboard Replacement: passo 14, immagine 2 di 3 HP Stream 14-CB174WM Motherboard Replacement: passo 14, immagine 3 di 3
    • Use an opening tool or your fingernail to flip up the black ZIF connector locking flap on the lower-left side of the motherboard.

    • Remove the ribbon cable.

    • Ribbon cables are delicate and can tear if pulled directly. Instead, grasp and gently pull the blue plastic tab protruding from the connector to release the cable. Avoid using metal tweezers on the cable as they can damage it; opt for tweezers with soft, non-abrasive tips for safer handling.

  15. HP Stream 14-CB174WM Motherboard Replacement: passo 15, immagine 1 di 3 HP Stream 14-CB174WM Motherboard Replacement: passo 15, immagine 2 di 3 HP Stream 14-CB174WM Motherboard Replacement: passo 15, immagine 3 di 3
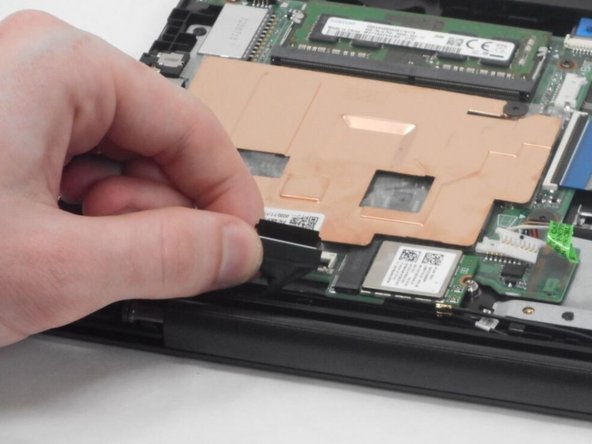
    • Flip up on the black locking flap that secures the display cable.

    • Remove the cable.

  16. HP Stream 14-CB174WM Motherboard Replacement: passo 16, immagine 1 di 3 HP Stream 14-CB174WM Motherboard Replacement: passo 16, immagine 2 di 3 HP Stream 14-CB174WM Motherboard Replacement: passo 16, immagine 3 di 3
    • Use two plastic opening tools to gently "walk" the the speaker connector directly out of its motherboard port.

  17. HP Stream 14-CB174WM Motherboard Replacement: passo 17, immagine 1 di 2 HP Stream 14-CB174WM Motherboard Replacement: passo 17, immagine 2 di 2
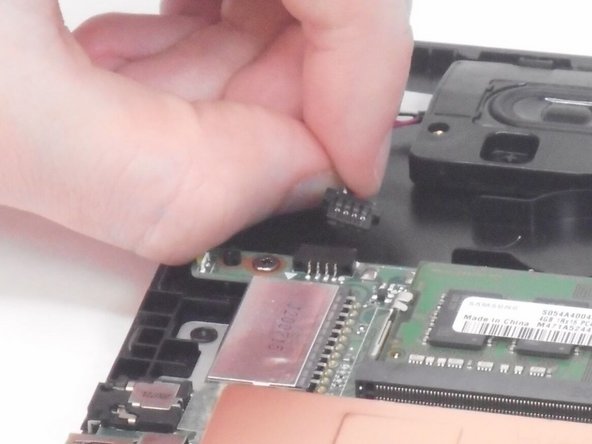
    • Use two plastic opening tools to "walk" the white sliding connector directly out of its port.

    • This connector is for the laptop's power board.

  18. HP Stream 14-CB174WM Motherboard Replacement: passo 18, immagine 1 di 2 HP Stream 14-CB174WM Motherboard Replacement: passo 18, immagine 2 di 2
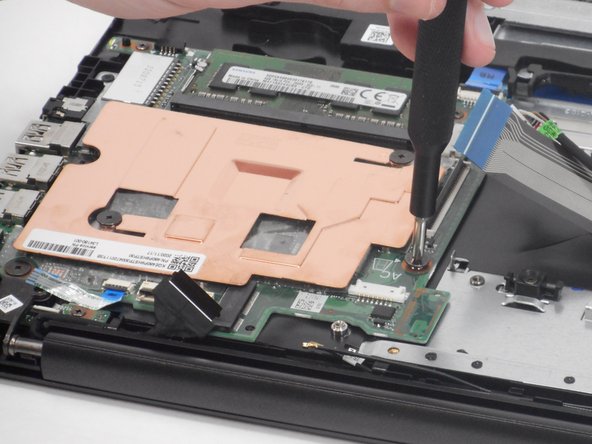
    • Use a Phillips screwdriver to remove the three wide-head screws from the motherboard.

    • Use a Phillips screwdriver to remove the two small-head screws from the motherboard.

    • Do not unscrew the two screws that secure the heatsink.

    • The heatsink is the large copper plate screwed into the motherboard.

  19. HP Stream 14-CB174WM Motherboard Replacement: passo 19, immagine 1 di 1
    • Lift the motherboard straight up and out of the laptop chassis.

    • The motherboard should come out with no force. If it does not lift up with little force, check for screws you may have missed.

Conclusione

To reassemble your device, follow these instructions in reverse order.

Un'altra persona ha completato questa guida.

0 Commenti

Aggiungi Commento

Visualizza Statistiche:

Ultime 24 Ore: 1

Ultimi 7 Giorni: 1

Ultimi 30 Giorni: 16

Tutti i Tempi: 77