Questa versione può contenere modifiche errate. Passa all'ultima istantanea verificata.
Cosa ti serve
-
Questo passaggio è privo di traduzione. Aiuta a tradurlo
-
Pry off the two elliptical rubber inserts (one in each corner).
-
Pry off the two circular rubber inserts below the removed elliptical inserts (one in each corner).
-
-
Questo passaggio è privo di traduzione. Aiuta a tradurlo
-
Remove the eleven 5.6 mm Phillips #1 screws.
-
-
Questo passaggio è privo di traduzione. Aiuta a tradurlo
-
Using an iFixit opening tool, pry open the case to separate the keyboard from the main body.
-
-
Questo passaggio è privo di traduzione. Aiuta a tradurlo
-
Carefully lift the keyboard and locate the three ribbon cables connecting the main body of the laptop to the keyboard.
-
-
-
Questo passaggio è privo di traduzione. Aiuta a tradurlo
-
Using your fingernail, lift the flaps on the ZIF connectors that are securing the three ribbon cables.
-
Carefully disconnect the three ribbon cables.
-
-
Questo passaggio è privo di traduzione. Aiuta a tradurlo
-
Lift the keyboard out of the laptop to remove it from the device.
-
-
Questo passaggio è privo di traduzione. Aiuta a tradurlo
-
Remove any tape holding the battery connector in place.
-
Using your fingers, carefully unplug the battery.
-
-
Questo passaggio è privo di traduzione. Aiuta a tradurlo
-
Remove the four 3mm #000 Phillips screws holding the battery in place.
-
Carefully lift the battery out of the laptop.
-
-
Questo passaggio è privo di traduzione. Aiuta a tradurlo
-
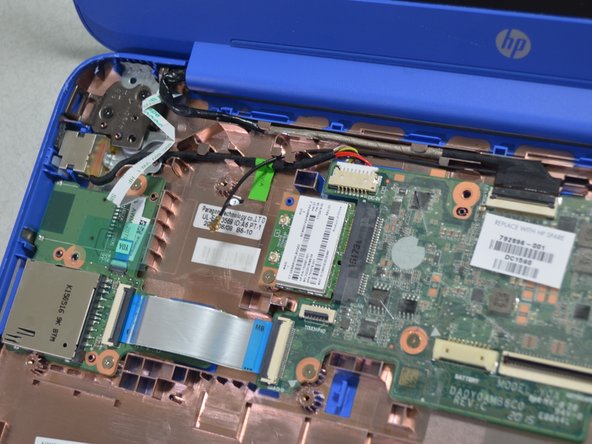
Unplug the black wire attached to the wireless chip.
-
-
Questo passaggio è privo di traduzione. Aiuta a tradurlo
-
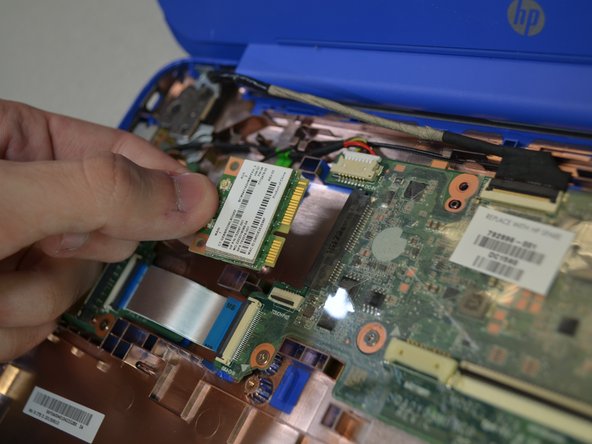
Remove the one 3mm Phillips #000 screw holding the wireless chip in place.
-
Lift the wireless chip up and out.
-


Annulla: non ho completato questa guida.
Un'altra persona ha completato questa guida.

Team

Cal Poly, Team S1-G3, White Winter 2019 Membro di Cal Poly, Team S1-G3, White Winter 2019
CPSU-WHITE-W19S1G3
4 Membri
11 Guide realizzate