Salta al contenuto principale
Unisciti alla Community delle riparazioni - Crea un account

HP Scanjet 4890 Scanner Glass Underside Cleaning

Cosa ti serve

    1. HP Scanjet 4890 Scanner Glass Underside Cleaning, Unplug the cable to the scanner lid: passo 1, immagine 1 di 2 HP Scanjet 4890 Scanner Glass Underside Cleaning, Unplug the cable to the scanner lid: passo 1, immagine 2 di 2
      • In the manual the lid is known as the TMA - Transparent Materials Adapter

      Chiedi a FixBot

      Aggiungi Commento

    2. HP Scanjet 4890 Scanner Glass Underside Cleaning, Remove the scanner lid: passo 2, immagine 1 di 3 HP Scanjet 4890 Scanner Glass Underside Cleaning, Remove the scanner lid: passo 2, immagine 2 di 3 HP Scanjet 4890 Scanner Glass Underside Cleaning, Remove the scanner lid: passo 2, immagine 3 di 3
      • Open the lid 90° and lift straight up.

      Chiedi a FixBot

      Aggiungi Commento

    3. HP Scanjet 4890 Scanner Glass Underside Cleaning, Turn upside down and remove the 4 PH#2 screws: passo 3, immagine 1 di 1
      • 4x PH#2 3x8mm

      Chiedi a FixBot

      Aggiungi Commento

    4. HP Scanjet 4890 Scanner Glass Underside Cleaning, Turn back so that the scanner glass is up: passo 4, immagine 1 di 1
      • While the problem usually is to separate the top from the bottom, make sure that the top does not fall off while turning the scanner over, damaging the scanner glass.

      Chiedi a FixBot

      Aggiungi Commento

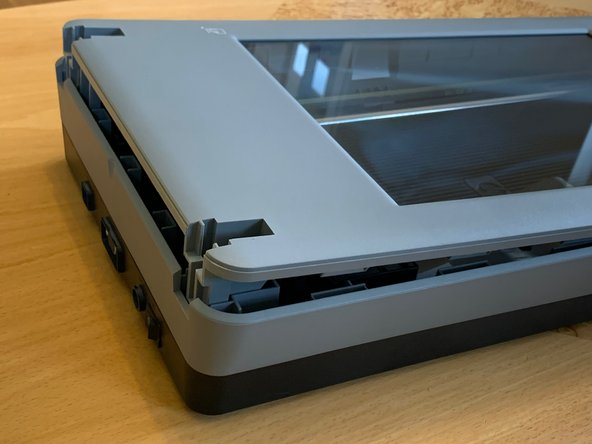
    5. HP Scanjet 4890 Scanner Glass Underside Cleaning, Lift the top cover off the base: passo 5, immagine 1 di 3 HP Scanjet 4890 Scanner Glass Underside Cleaning, Lift the top cover off the base: passo 5, immagine 2 di 3 HP Scanjet 4890 Scanner Glass Underside Cleaning, Lift the top cover off the base: passo 5, immagine 3 di 3
      Strumento utilizzato in questo passaggio:
      Heavy-Duty Suction Cups (Pair)
      $16.95
      • The top has to be lifted straight up at the front and back at the same time.

      • I found Heavy-Duty Suction Cups (Pair) to work best, but due to the structure of the plastic they quickly loose their grip, so work fast.

      • Alternative: Lift the top cover in the back as little as possible and use Plastic Cards to work your way to the front until you are able to get a grip of the whole top cover and lift it straight up.

      Chiedi a FixBot

      Aggiungi Commento

    6. HP Scanjet 4890 Scanner Glass Underside Cleaning, Clean the glass on the inside: passo 6, immagine 1 di 1
      • Use only glass cleaner. Avoid abrasives, acetone, benzene, and carbon tetrachloride, all of which can damage the scanner glass. Avoid isopropyl alcohol because it can leave streaks on the glass.

      • Do not spray the glass cleaner directly on the glass and do not allow the cleaner to seep between the glass and the plastic. If liquid gets between the glass and the plastic it could stain the calibration strip (marked) and render the scanner useless.

      • Dust will immediately begin accumulating in your scanner now that the top cover is off. Minimize the time the scanner base is exposed.

      • Beware of static discharge from your fingers, hand, or tools that can damage the circuit boards inside the scanner.

      Chiedi a FixBot

      Aggiungi Commento

Conclusione

To reassemble your device, follow these instructions in reverse order.

Annulla: non ho completato questa guida.

Altre 4 persone hanno completato questa guida.

0Commenti sulla guida

Aggiungi Commento

Visualizza statistiche:

Ultime 24 ore: 3

Ultimi 7 giorni: 9

Ultimi 30 giorni: 38

Tutti i Tempi: 2,946