Salta al contenuto principale
Unisciti alla Community delle riparazioni - Crea un account

HP ProBook 4520s Screen Replacement

Cosa ti serve

  1. HP ProBook 4520s Screen Replacement, Battery: passo 1, immagine 1 di 2 HP ProBook 4520s Screen Replacement, Battery: passo 1, immagine 2 di 2
    • Flip the 4520s upside-down with the front toward you.

    • Push the two latches below the battery inwards at the same time.

    Chiedi a FixBot
  2. HP ProBook 4520s Screen Replacement: passo 2, immagine 1 di 1
    • Remove the battery by holding the latches and sliding the battery away from you.

    Chiedi a FixBot
  3. HP ProBook 4520s Screen Replacement, Switch Cover: passo 3, immagine 1 di 2 HP ProBook 4520s Screen Replacement, Switch Cover: passo 3, immagine 2 di 2
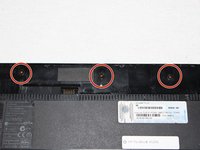
    • Use a Phillips #1 screwdriver to remove three 2mm screws where the battery was located.

    Chiedi a FixBot
  4. HP ProBook 4520s Screen Replacement: passo 4, immagine 1 di 2 HP ProBook 4520s Screen Replacement: passo 4, immagine 2 di 2
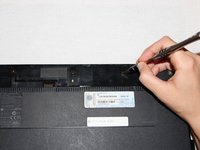
    • Flip the 4520s over and rotate it so the back is facing you.

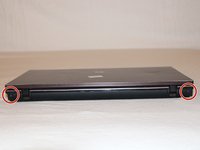
    • Use a metal spudger to peel off two rubber caps located on either side of the battery port.

    Chiedi a FixBot
  5. HP ProBook 4520s Screen Replacement: passo 5, immagine 1 di 1
    • Use a Phillips #1 screwdriver to remove the 3mm screws behind the caps.

    Chiedi a FixBot
  6. HP ProBook 4520s Screen Replacement: passo 6, immagine 1 di 3 HP ProBook 4520s Screen Replacement: passo 6, immagine 2 di 3 HP ProBook 4520s Screen Replacement: passo 6, immagine 3 di 3
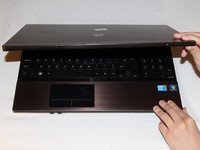
    • Rotate the 4520s and then open it with the screen facing you.

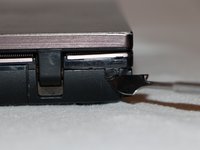
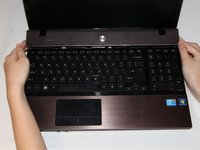
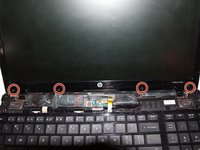
    • The switch cover is located above the keyboard. Push the switch cover away from you until it comes loose from the 4520s.

    • Lift the switch cover away from the 4520s and set it aside.

    Chiedi a FixBot
  7. HP ProBook 4520s Screen Replacement, Screen: passo 7, immagine 1 di 2 HP ProBook 4520s Screen Replacement, Screen: passo 7, immagine 2 di 2
    • Use a metal spudger to remove four rubber caps at the bottom of the screen border.

    Chiedi a FixBot
  8. HP ProBook 4520s Screen Replacement: passo 8, immagine 1 di 2 HP ProBook 4520s Screen Replacement: passo 8, immagine 2 di 2
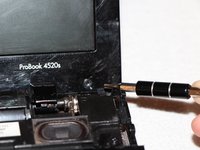
    • Use a Torx (T9) head screwdriver to remove the four 5mm screws beneath the rubber caps.

    Chiedi a FixBot
  9. HP ProBook 4520s Screen Replacement: passo 9, immagine 1 di 3 HP ProBook 4520s Screen Replacement: passo 9, immagine 2 di 3 HP ProBook 4520s Screen Replacement: passo 9, immagine 3 di 3
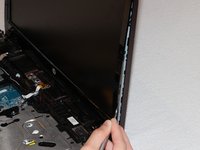
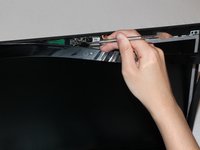
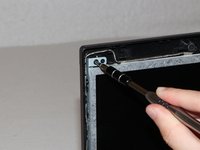
    • Pry open the tabs behind the border of the screen using a metal spudger.

    • Set the border of the screen aside.

    Chiedi a FixBot
  10. HP ProBook 4520s Screen Replacement: passo 10, immagine 1 di 2 HP ProBook 4520s Screen Replacement: passo 10, immagine 2 di 2
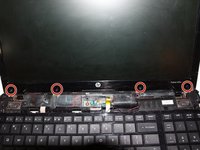
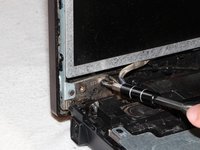
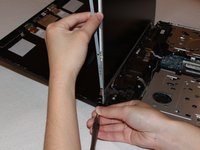
    • Use a Torx (T9) head screwdriver to remove two 5mm screws above the screen, and two more screws below it.

    • The bottom set of screws is installed on the innermost screw holes.

    Chiedi a FixBot
  11. HP ProBook 4520s Screen Replacement: passo 11, immagine 1 di 1
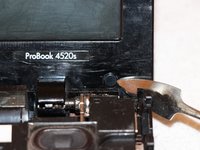
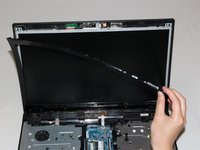
    • Above the screen is a bronze port with a cable connected to it. Disconnect the cable using a metal spudger or your finger.

    Chiedi a FixBot
  12. HP ProBook 4520s Screen Replacement: passo 12, immagine 1 di 1
    • Gently push the back cover away.

    Chiedi a FixBot
  13. HP ProBook 4520s Screen Replacement: passo 13, immagine 1 di 3 HP ProBook 4520s Screen Replacement: passo 13, immagine 2 di 3 HP ProBook 4520s Screen Replacement: passo 13, immagine 3 di 3
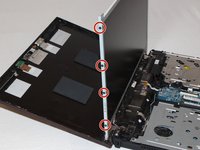
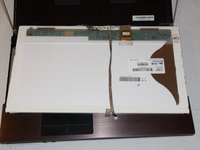
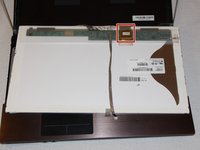
    • Use a Phillips (PH1) head screwdriver to remove eight 2mm screws from the screen. Four of the screws will be on the left side and four will be on the right.

    • Place the screen face down.

    Chiedi a FixBot
  14. HP ProBook 4520s Screen Replacement: passo 14, immagine 1 di 3 HP ProBook 4520s Screen Replacement: passo 14, immagine 2 di 3 HP ProBook 4520s Screen Replacement: passo 14, immagine 3 di 3
    • Peel the ribbon cable away from the screen.

    Chiedi a FixBot
  15. HP ProBook 4520s Screen Replacement: passo 15, immagine 1 di 2 HP ProBook 4520s Screen Replacement: passo 15, immagine 2 di 2
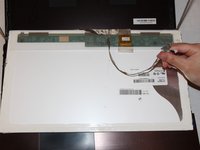
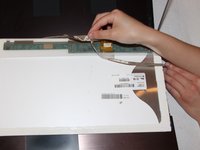
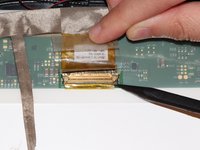
    • To open the clamp for the ribbon cable, use a spudger to pry up the metal bar securing it to the screen.

    • Disconnect the cable after freeing it from the metal bar

    Chiedi a FixBot
Conclusione

To reassemble your device, follow these instructions in reverse order.

Altre 7 persone hanno completato questa guida.

Team

UC Davis, Team 1-3, Oliver Fall 2016 Membro di UC Davis, Team 1-3, Oliver Fall 2016

UCD-OLIVER-F16S1G3

5 Membri

8 guide realizzate

2Commenti sulla guida

I need back cover hp i5 probook 4520s

amir86216 - Rispondi Condividi

I need speakers hp probook 4520s i5

Osagie Rmd - Rispondi Condividi

Aggiungi Commento

Visualizza statistiche:

Ultime 24 ore: 0

Ultimi 7 giorni: 8

Ultimi 30 giorni: 63

Tutti i Tempi: 6,886