Salta al contenuto principale

HP Photosmart Premium C309g Scanner Glass Replacement

Cosa ti serve

  1. HP Photosmart Premium C309g Scanner Glass  Replacement, Scanner Glass: passo 1, immagine 1 di 1
    • Open the top of the printer. The printer should appear as shown.

  2. HP Photosmart Premium C309g Scanner Glass  Replacement: passo 2, immagine 1 di 2 HP Photosmart Premium C309g Scanner Glass  Replacement: passo 2, immagine 2 di 2
    • Use the blue plastic opening tool to pry the trim pieces all the way around the printer.

    • Loosen the pieces around the edges before pulling to remove from the printer.

    • Pull the (4) trim pieces off and set them aside.

  3. HP Photosmart Premium C309g Scanner Glass  Replacement: passo 3, immagine 1 di 2 HP Photosmart Premium C309g Scanner Glass  Replacement: passo 3, immagine 2 di 2
    • Using the blue plastic opening tool, pull from the middle and then slide back to remove the side panels.

    • The side trim pieces need to be removed before the front trim pieces.

  4. HP Photosmart Premium C309g Scanner Glass  Replacement: passo 4, immagine 1 di 1
    • Using the T9 Torx Security screwdriver bit, unscrew the five 12mm screws shown.

  5. HP Photosmart Premium C309g Scanner Glass  Replacement: passo 5, immagine 1 di 1
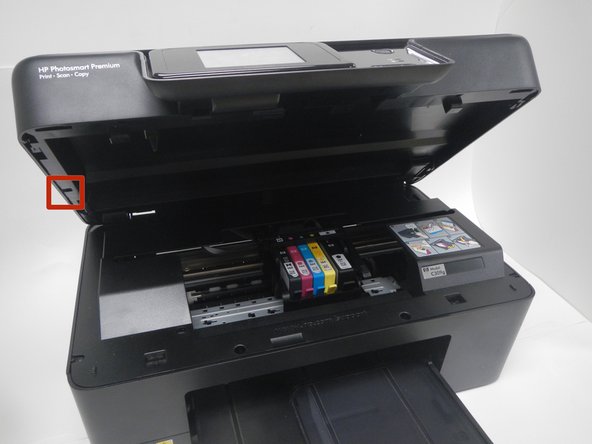
    • The scanner flap is attached by a clip that can be dislodged by pulling it gently away from the printer.

    • Keeping the scanner flap upright, slide it toward the unattached clip in order to dislodge the second clip.

    • Both clips will come unattached and you can set the scanner flap aside.

  6. HP Photosmart Premium C309g Scanner Glass  Replacement: passo 6, immagine 1 di 1
    • Lift the scanner glass piece from the printer.

  7. HP Photosmart Premium C309g Scanner Glass  Replacement: passo 7, immagine 1 di 2 HP Photosmart Premium C309g Scanner Glass  Replacement: passo 7, immagine 2 di 2
    • The scanner glass is attached to the plastic piece with adhesive tape.

    • Pull off the glass and re-set new piece of glass.

Conclusione

To reassemble your device, follow these instructions in reverse order.

Un'altra persona ha completato questa guida.

Laura

Membro da: 10/23/14

694 Reputazione

3 Guide realizzate

Team

Michigan Tech, Team 1-2, Lauer Fall 2014 Membro di Michigan Tech, Team 1-2, Lauer Fall 2014

MTU-LAUER-F14S1G2

3 Membri

5 Guide realizzate

0 Commenti

Aggiungi Commento

Visualizza Statistiche:

Ultime 24 Ore: 4

Ultimi 7 Giorni: 9

Ultimi 30 Giorni: 10

Tutti i Tempi: 764