Questa versione può contenere modifiche errate. Passa all'ultima istantanea verificata.
Cosa ti serve
-
Questo passaggio è privo di traduzione. Aiuta a tradurlo
-
Make sure that your device is properly shut down and unplugged from any outlet.
-
Flip Pavilion over so that the bottom faces up and locate the battery in the bottom left corner.
-
-
Questo passaggio è privo di traduzione. Aiuta a tradurlo
-
Press and slide up the battery release tab with your thumb until the battery pops out of place.
-
-
Questo passaggio è privo di traduzione. Aiuta a tradurlo
-
Using two fingers, pry the rest of the battery out of the socket.
-
-
Questo passaggio è privo di traduzione. Aiuta a tradurlo
-
Using the Phillips #0 screwdriver, unscrew the two Phillips PM 2.5X6.0mm screws.
-
-
Questo passaggio è privo di traduzione. Aiuta a tradurlo
-
Place the spudger underneath the cover of the hard drive and push up gently until the hard drive pops out of place.
-
Completely remove the hard drive from its socket.
-
-
Questo passaggio è privo di traduzione. Aiuta a tradurlo
-
Using a Phillips #0 screwdriver, unscrew all four Phillips PM 2.5X13.0mm screws and place in a secure area until the end of the project.
-
-
Questo passaggio è privo di traduzione. Aiuta a tradurlo
-
Flip laptop back over and open as far as it can go.
-
-
Questo passaggio è privo di traduzione. Aiuta a tradurlo
-
Use the flat edge of the plastic spudger inserted under the bottom of the strip cover and pry upwards to un-clip the cover, starting at the right and moving to the left.
-
-
Questo passaggio è privo di traduzione. Aiuta a tradurlo
-
Use hands to completely lift off the strip cover and remove.
-
-
Questo passaggio è privo di traduzione. Aiuta a tradurlo
-
Use the Phillips #0 screwdriver again, unscrew all four Phillips PM 2.5X13.0mm screws from the top of the keyboard and set aside.
-
-
-
Questo passaggio è privo di traduzione. Aiuta a tradurlo
-
Using your hands, lift the keyboard up from the top towards yourself until the keyboard is resting in your hand.
-
-
Questo passaggio è privo di traduzione. Aiuta a tradurlo
-
Gently slide out the connecting cable from the laptop to the keyboard.
-
-
Questo passaggio è privo di traduzione. Aiuta a tradurlo
-
Completely remove the keyboard from the rest of the laptop.
-
-
Questo passaggio è privo di traduzione. Aiuta a tradurlo
-
Flip the Pavilion back over on its backside.
-
-
Questo passaggio è privo di traduzione. Aiuta a tradurlo
-
Using the same Phillips #0 screwdriver, unscrew the six Phillips PM 2.5X6.0mm screws.
-
Also remove the four Phillips PM 2.5X13.0mm screws to remove the thermal plate with the same screwdriver.
-
-
Questo passaggio è privo di traduzione. Aiuta a tradurlo
-
Flip the laptop back over and open the lid all the way.
-
Using the flat edge of the plastic spudger, pry straight up to remove the Mini PCI Connector Cables from the board.
-
-
Questo passaggio è privo di traduzione. Aiuta a tradurlo
-
Using the tweezers, gently squeeze and pull backwards on the display cable until it is disconnected.
-
-
Questo passaggio è privo di traduzione. Aiuta a tradurlo
-
Use the Phillips #0 screwdriver again to remove the four Phillips 2.5X13.0mm screws that hold the clips for the screen into place.
-
-
Questo passaggio è privo di traduzione. Aiuta a tradurlo
-
Turn the laptop around until the top cover is facing you. Keep the laptop in an open position.
-
Unscrew the four Phillips PM 2.5X6.0mm screws using the Phillips #0 that hold the clips of the screen on to the base.
-
-
Questo passaggio è privo di traduzione. Aiuta a tradurlo
-
Firmly grasp the top of the screen with your hands and pull towards you and upwards to remove the screen from the base.
-
-
Questo passaggio è privo di traduzione. Aiuta a tradurlo
-
Flip the back laptop over so the bottom of the laptop is facing up.
-
-
Questo passaggio è privo di traduzione. Aiuta a tradurlo
-
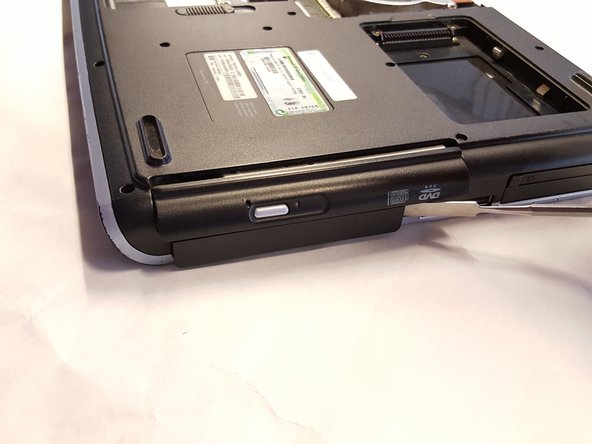
Unscrew the two Phillip PM 2.5X6.0mm screws in the top right that hold the optical cover in place using a Philips #0 screwdriver.
-
-
Questo passaggio è privo di traduzione. Aiuta a tradurlo
-
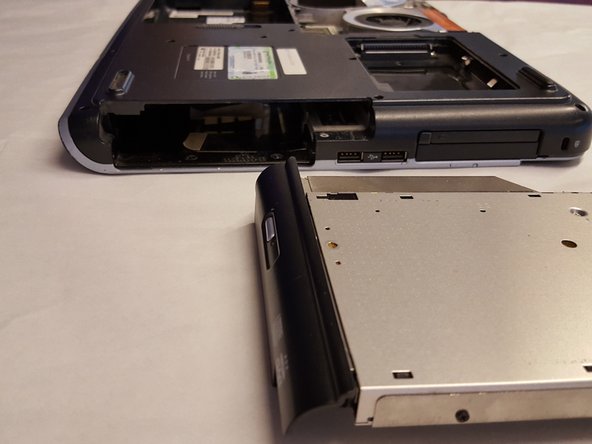
Use the plastic spudger and insert it into the side of the CD drive and push outwards to pop the drive out of place.
-
-
Questo passaggio è privo di traduzione. Aiuta a tradurlo
-
Using your hands, firmly grasp the CD drive and pull outwards until it is completely removed.
-
-
Questo passaggio è privo di traduzione. Aiuta a tradurlo
-
After the CD Drive is removed, return to the back plate of the laptop.
-
There are four Philip PM 2.5X6.0mm small screws.
-
There are ten Phillip PM 2.5X13.0mm long screws.
-
Using the same Philip's #0 screwdriver, remove all fourteen screws.
-
-
Questo passaggio è privo di traduzione. Aiuta a tradurlo
-
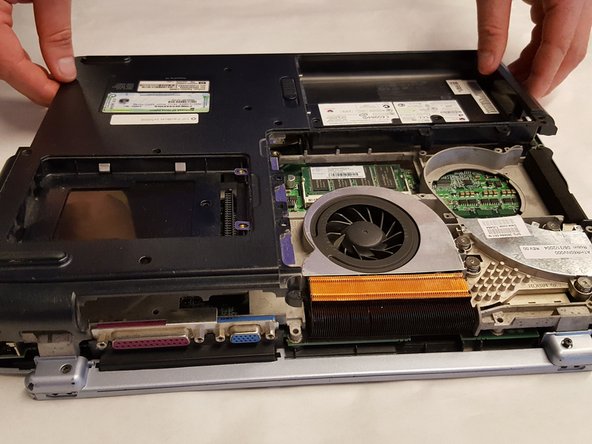
Insert the plastic spudger into the edge of the base plate and the side of the laptop directly above the battery space and gently pry the base plate loose from its clips moving from right to left.
-
Once the clips are undone, lift the base plate up and off of the laptop.
-
-
Questo passaggio è privo di traduzione. Aiuta a tradurlo
-
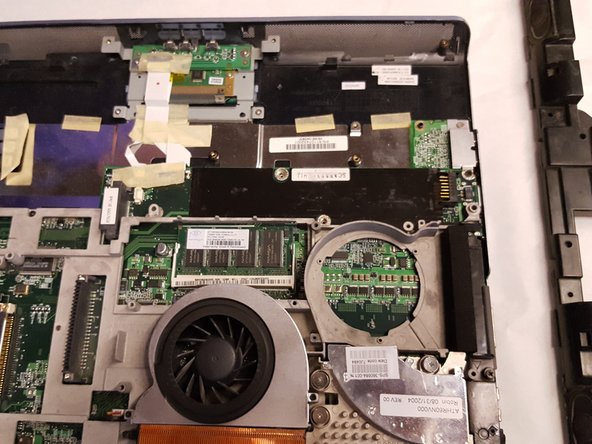
Unscrew the one Phillip 2.5X6.0mm screw using the #0 Phillips again holding the speaker into place but do not remove speaker
-
-
Questo passaggio è privo di traduzione. Aiuta a tradurlo
-
Using your fingers, firmly grasp the wires that connect the speaker to the board and gently pull the cable away from the connector in the same direction that the wires are running.
-
-
Questo passaggio è privo di traduzione. Aiuta a tradurlo
-
Grasp speaker assembly firmly and pull towards you and up to remove the speaker completely from the laptop.
-


Annulla: non ho completato questa guida.
Un'altra persona ha completato questa guida.

Team

UMass Dartmouth, Team 4-6, Catania Fall 2016 Membro di UMass Dartmouth, Team 4-6, Catania Fall 2016
UMASSD-CATANIA-F16S4G6
3 Membri
5 Guide realizzate