Salta al contenuto principale

HP Pavilion x360 14m-cd0003dx Touchpad Replacement

Cosa ti serve

  1. HP Pavilion x360 14m-cd0003dx Touchpad Replacement, Battery: passo 1, immagine 1 di 1
    • Turn off the computer.

    • Disconnect the power cord and any external devices connected to the computer.

    • Make sure the device is completely turned off or else you may risk injury through electric shock.

  2. HP Pavilion x360 14m-cd0003dx Touchpad Replacement: passo 2, immagine 1 di 2 HP Pavilion x360 14m-cd0003dx Touchpad Replacement: passo 2, immagine 2 di 2
    • Flip the device so that the back plate of the laptop is up.

    • Use a Phillips #0 screwdriver to remove the four 6 mm Phillips screws from the bottom cover.

    • You might have to use a spudger to remove any rubber bezels that cover the screws.

    • Pry off the back cover with the spudger tool.

  3. HP Pavilion x360 14m-cd0003dx Touchpad Replacement: passo 3, immagine 1 di 3 HP Pavilion x360 14m-cd0003dx Touchpad Replacement: passo 3, immagine 2 di 3 HP Pavilion x360 14m-cd0003dx Touchpad Replacement: passo 3, immagine 3 di 3
    • Remove the six 5 mm battery screws, and the battery can then be taken out.

  4. HP Pavilion x360 14m-cd0003dx Touchpad Replacement, Touchpad: passo 4, immagine 1 di 3 HP Pavilion x360 14m-cd0003dx Touchpad Replacement, Touchpad: passo 4, immagine 2 di 3 HP Pavilion x360 14m-cd0003dx Touchpad Replacement, Touchpad: passo 4, immagine 3 di 3
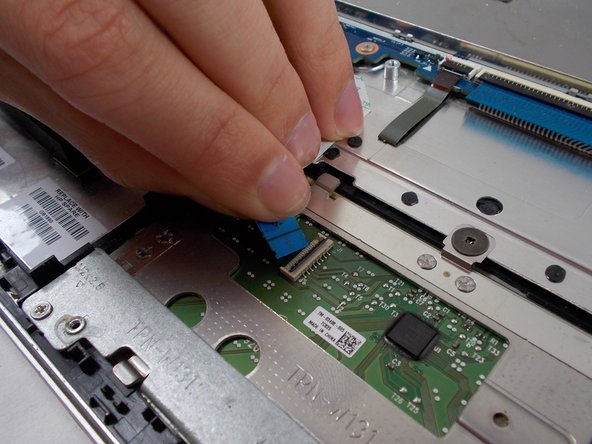
    • Lift the black tab on the ZIF connector, and gently pull the track pad ribbon cable free.

  5. HP Pavilion x360 14m-cd0003dx Touchpad Replacement: passo 5, immagine 1 di 3 HP Pavilion x360 14m-cd0003dx Touchpad Replacement: passo 5, immagine 2 di 3 HP Pavilion x360 14m-cd0003dx Touchpad Replacement: passo 5, immagine 3 di 3
    • Use a Phillips Head Screwdriver to remove the bottom 3 screws (5 mm).

    • Remove the metal plate that secures the touch pad.

  6. HP Pavilion x360 14m-cd0003dx Touchpad Replacement: passo 6, immagine 1 di 2 HP Pavilion x360 14m-cd0003dx Touchpad Replacement: passo 6, immagine 2 di 2
    • Use a Phillips Head Screwdriver to unscrew top 3 screws (5 mm).

    • Remove touch pad.

Conclusione

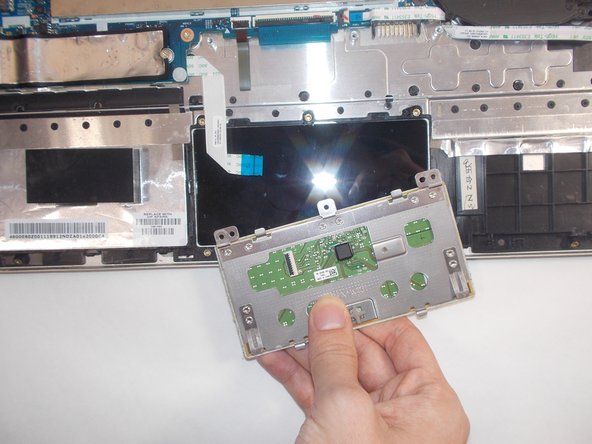
To reassemble your device, follow these instructions in reverse order.

Elijah Jope

Membro da: 03/22/22

379 Reputazione

3 Guide realizzate

Team

0 Commenti

Aggiungi Commento

Visualizza Statistiche:

Ultime 24 Ore: 2

Ultimi 7 Giorni: 4

Ultimi 30 Giorni: 10

Tutti i Tempi: 380