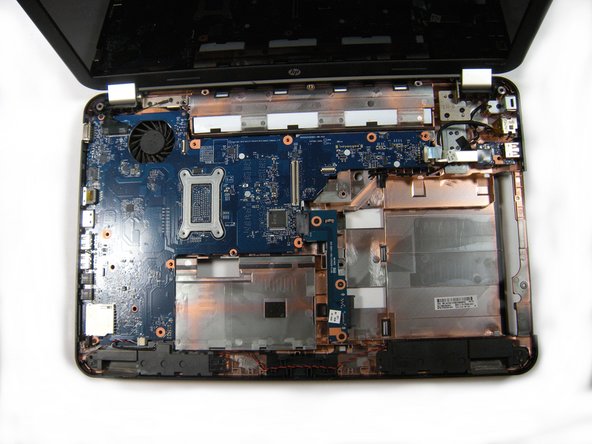
Salta al contenuto principale

HP Pavilion g6-1b79dx Speaker Replacement

Cosa ti serve

  1. HP Pavilion g6-1b79dx Speaker Replacement, Battery: passo 1, immagine 1 di 1
    • Flip the computer so the bottom is facing up with the battery away from you.

    • Turn off the computer and disconnect the charger.

  2. HP Pavilion g6-1b79dx Speaker Replacement: passo 2, immagine 1 di 2 HP Pavilion g6-1b79dx Speaker Replacement: passo 2, immagine 2 di 2
    • Slide the battery switch to the left until the battery unlatches from the base of the laptop.

  3. HP Pavilion g6-1b79dx Speaker Replacement: passo 3, immagine 1 di 2 HP Pavilion g6-1b79dx Speaker Replacement: passo 3, immagine 2 di 2
    • Lift the battery from its compartment away from the laptop.

  4. HP Pavilion g6-1b79dx Speaker Replacement, Bottom Panel: passo 4, immagine 1 di 1
    • Loosen the two 5.7 mm screws on the bottom panel using a PH00 screwdriver.

    • The screws do not come out of the panel due to small washers. Do not try to remove the screws completely.

  5. HP Pavilion g6-1b79dx Speaker Replacement: passo 5, immagine 1 di 1
    • Use the metal spudger all around the panel to pop it up from the base.

    • When working with electronics, it's important to choose a tool that's ESD-safe to avoid accidental damage to the device. The regular black nylon spudger or a plastic opening tool should be used whenever possible.

    • Using your finger is acceptable but not entirely recommended. Be gentle if you choose to use your hands.

  6. HP Pavilion g6-1b79dx Speaker Replacement: passo 6, immagine 1 di 3 HP Pavilion g6-1b79dx Speaker Replacement: passo 6, immagine 2 di 3 HP Pavilion g6-1b79dx Speaker Replacement: passo 6, immagine 3 di 3
    • With your hands, lift the panel completely off the base of the laptop.

  7. HP Pavilion g6-1b79dx Speaker Replacement, RAM: passo 7, immagine 1 di 3 HP Pavilion g6-1b79dx Speaker Replacement, RAM: passo 7, immagine 2 di 3 HP Pavilion g6-1b79dx Speaker Replacement, RAM: passo 7, immagine 3 di 3
    • Slide the two latches away from the RAM to unhook it.

  8. HP Pavilion g6-1b79dx Speaker Replacement: passo 8, immagine 1 di 3 HP Pavilion g6-1b79dx Speaker Replacement: passo 8, immagine 2 di 3 HP Pavilion g6-1b79dx Speaker Replacement: passo 8, immagine 3 di 3
    • Gently slide the RAM out from the laptop.

  9. HP Pavilion g6-1b79dx Speaker Replacement, Hard Drive: passo 9, immagine 1 di 2 HP Pavilion g6-1b79dx Speaker Replacement, Hard Drive: passo 9, immagine 2 di 2
    • Use the PH 00 screwdriver to unscrew the 2.5 mm screw to the right of the hard drive.

  10. HP Pavilion g6-1b79dx Speaker Replacement: passo 10, immagine 1 di 3 HP Pavilion g6-1b79dx Speaker Replacement: passo 10, immagine 2 di 3 HP Pavilion g6-1b79dx Speaker Replacement: passo 10, immagine 3 di 3
    • Pull the triangular blue tab to diconnect and remove the hard drive. You can see the word 'Pull' on the cover.

  11. HP Pavilion g6-1b79dx Speaker Replacement, Wireless Card: passo 11, immagine 1 di 3 HP Pavilion g6-1b79dx Speaker Replacement, Wireless Card: passo 11, immagine 2 di 3 HP Pavilion g6-1b79dx Speaker Replacement, Wireless Card: passo 11, immagine 3 di 3
    • Unlatch the two antenna cable connectors from the wireless card.

  12. HP Pavilion g6-1b79dx Speaker Replacement: passo 12, immagine 1 di 1
    • Remove the two 2.5 mm screws in the wireless card with a PH00 screwdriver.

    • You may have to gently bend the cables away from the wireless card to remove the screws

  13. HP Pavilion g6-1b79dx Speaker Replacement: passo 13, immagine 1 di 3 HP Pavilion g6-1b79dx Speaker Replacement: passo 13, immagine 2 di 3 HP Pavilion g6-1b79dx Speaker Replacement: passo 13, immagine 3 di 3
    • Gently disconnect the wireless card from the laptop.

  14. HP Pavilion g6-1b79dx Speaker Replacement, CD Drive: passo 14, immagine 1 di 2 HP Pavilion g6-1b79dx Speaker Replacement, CD Drive: passo 14, immagine 2 di 2
    • Using the PH 00 screwdriver, remove the screw left of the CD drive.

  15. HP Pavilion g6-1b79dx Speaker Replacement: passo 15, immagine 1 di 3 HP Pavilion g6-1b79dx Speaker Replacement: passo 15, immagine 2 di 3 HP Pavilion g6-1b79dx Speaker Replacement: passo 15, immagine 3 di 3
    • Slide the CD drive out from the exterior of the laptop.

  16. HP Pavilion g6-1b79dx Speaker Replacement, Keyboard: passo 16, immagine 1 di 1
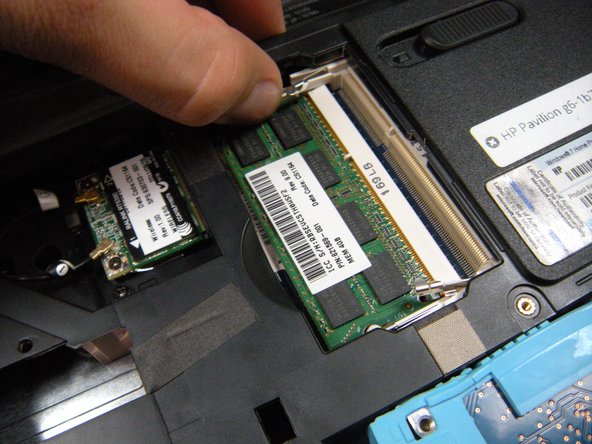
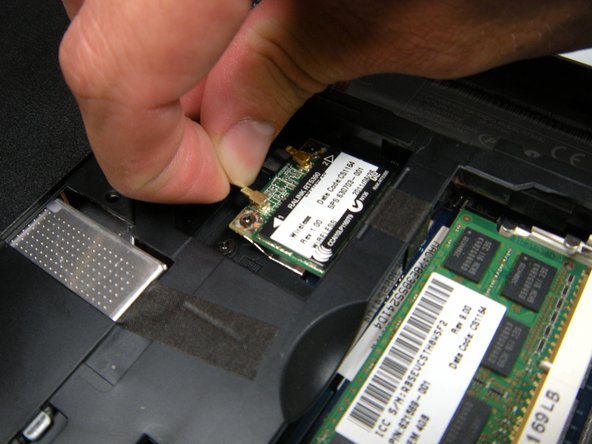
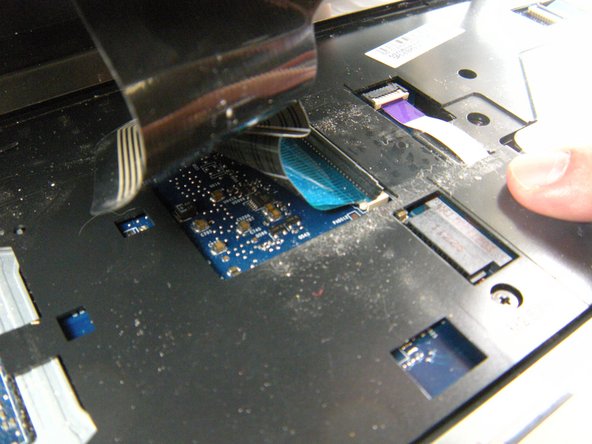
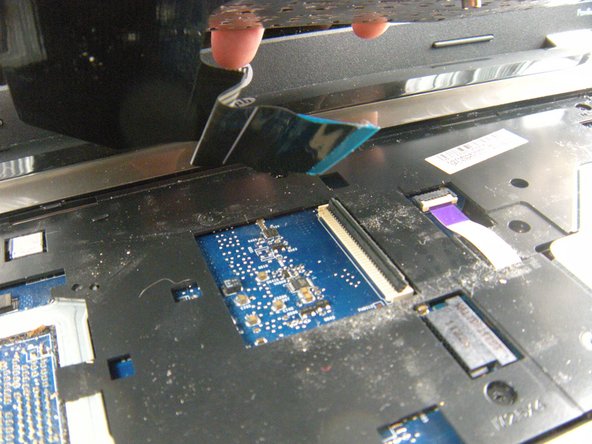
    • Using a PH 00 screwdriver, remove the screw located next to the wireless card.

    • You can remove the wireless card for this process but it is not necessary.

    • This screw has a small keyboard icon next to it.

  17. HP Pavilion g6-1b79dx Speaker Replacement: passo 17, immagine 1 di 1
    • Flip the laptop over and open it.

    • The components beneath your computer may be loose and fall out when you flip the laptop. Be careful when turning it over.

  18. HP Pavilion g6-1b79dx Speaker Replacement: passo 18, immagine 1 di 3 HP Pavilion g6-1b79dx Speaker Replacement: passo 18, immagine 2 di 3 HP Pavilion g6-1b79dx Speaker Replacement: passo 18, immagine 3 di 3
    • Insert a plastic spudger or similar pry tool, beneath the keyboard, near the "insert" key, and pop the keyboard up from the laptop.

    • When working with electronics, it's important to choose a tool that's ESD-safe to avoid accidental damage to the device. The regular black nylon spudger or a plastic opening tool should be used whenever possible.

    • Starting at the opening you just created, run your fingers around the outside of the keyboard separating it from the rest of the computer.

    • Only lift the keyboard up a few inches because it is attached to the laptop by a ribbon cable.

  19. HP Pavilion g6-1b79dx Speaker Replacement: passo 19, immagine 1 di 3 HP Pavilion g6-1b79dx Speaker Replacement: passo 19, immagine 2 di 3 HP Pavilion g6-1b79dx Speaker Replacement: passo 19, immagine 3 di 3
    • Slightly angle the keyboard back so the ribbon connector underneath it is visible.

    • Remove the ribbon cable by using your fingers to pull up and away from the connector.

  20. HP Pavilion g6-1b79dx Speaker Replacement: passo 20, immagine 1 di 1
    • With the ribbon cable detached, you can now completely remove the keyboard.

  21. HP Pavilion g6-1b79dx Speaker Replacement, Speaker: passo 21, immagine 1 di 3 HP Pavilion g6-1b79dx Speaker Replacement, Speaker: passo 21, immagine 2 di 3 HP Pavilion g6-1b79dx Speaker Replacement, Speaker: passo 21, immagine 3 di 3
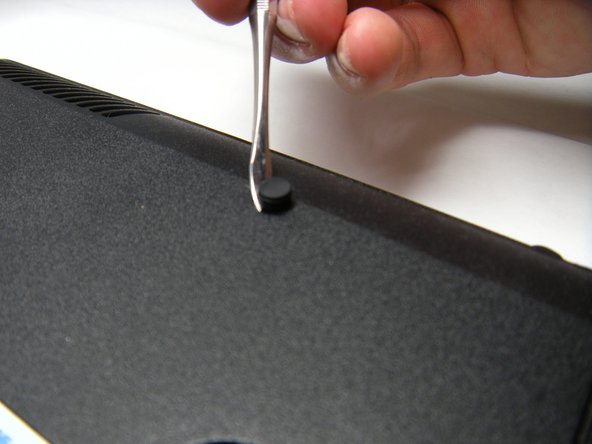
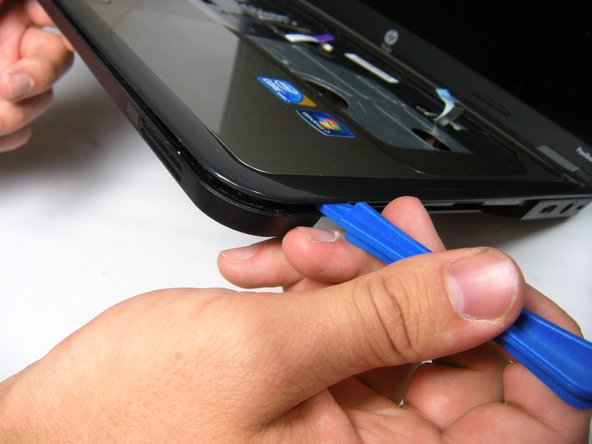
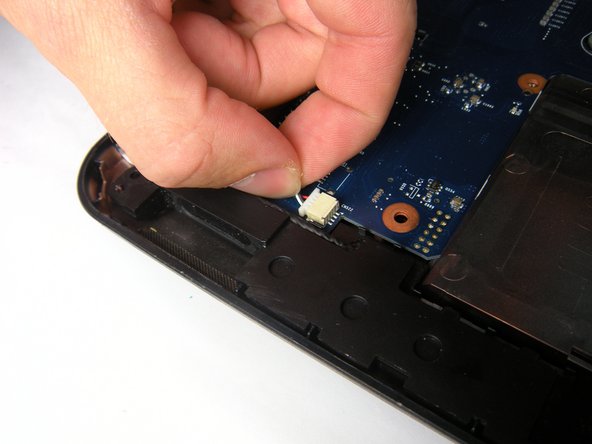
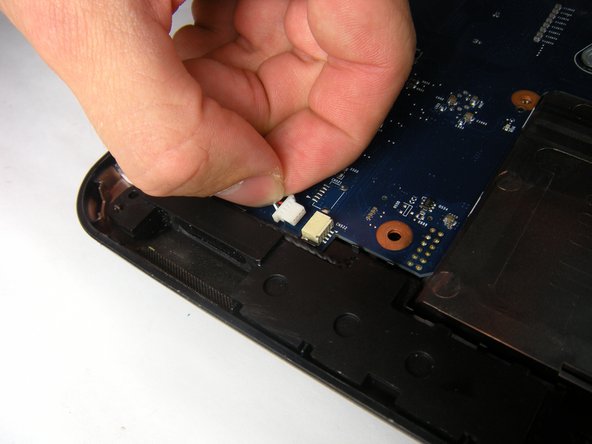
    • With the laptop bottom facing up, locate the rubber plug on the right side of the computer.

    • Use a metal splunger to remove the plug.

  22. HP Pavilion g6-1b79dx Speaker Replacement: passo 22, immagine 1 di 1
    • Remove the ten 6.7 mm screws using a PH00 screwdriver.

    • Remove the five 3.4 mm screws using a PH00 screwdriver.

  23. HP Pavilion g6-1b79dx Speaker Replacement: passo 23, immagine 1 di 1
    • Flip the computer over and open it.

    • Detach the two purple ribbons from the ribbon connectors.

    • Unscrew the six 4.6 mm screws using the PH00 screwdriver.

  24. HP Pavilion g6-1b79dx Speaker Replacement: passo 24, immagine 1 di 3 HP Pavilion g6-1b79dx Speaker Replacement: passo 24, immagine 2 di 3 HP Pavilion g6-1b79dx Speaker Replacement: passo 24, immagine 3 di 3
    • Use the plastic opening tool to pry out the front panel around the entire computer.

  25. HP Pavilion g6-1b79dx Speaker Replacement: passo 25, immagine 1 di 3 HP Pavilion g6-1b79dx Speaker Replacement: passo 25, immagine 2 di 3 HP Pavilion g6-1b79dx Speaker Replacement: passo 25, immagine 3 di 3
    • Gently lift the front panel away from the computer.

  26. HP Pavilion g6-1b79dx Speaker Replacement: passo 26, immagine 1 di 3 HP Pavilion g6-1b79dx Speaker Replacement: passo 26, immagine 2 di 3 HP Pavilion g6-1b79dx Speaker Replacement: passo 26, immagine 3 di 3
    • Locate the red and black speaker cables connecting the speakers and detach them from the two holders.

  27. HP Pavilion g6-1b79dx Speaker Replacement: passo 27, immagine 1 di 3 HP Pavilion g6-1b79dx Speaker Replacement: passo 27, immagine 2 di 3 HP Pavilion g6-1b79dx Speaker Replacement: passo 27, immagine 3 di 3
    • Pull the speaker cables out of their connectors.

  28. HP Pavilion g6-1b79dx Speaker Replacement: passo 28, immagine 1 di 2 HP Pavilion g6-1b79dx Speaker Replacement: passo 28, immagine 2 di 2
    • Slide the left speaker out from under the blue motherboard.

  29. HP Pavilion g6-1b79dx Speaker Replacement: passo 29, immagine 1 di 3 HP Pavilion g6-1b79dx Speaker Replacement: passo 29, immagine 2 di 3 HP Pavilion g6-1b79dx Speaker Replacement: passo 29, immagine 3 di 3
    • Lift the right speaker directly up and remove it from the computer.

Conclusione

To reassemble your device, follow these instructions in reverse order.

Altre 10 persone hanno completato questa guida.

Team

Baylor, Team 10-12, Williams Fall 2015 Membro di Baylor, Team 10-12, Williams Fall 2015

BU-WILLIAMS-F15S10G12

3 Membri

8 Guide realizzate

2 Commenti

I Love the practical very much

Mamadoumolo Jalloh - Replica

HP Pavilion g6 price

YASIR KHAN OFFICIAL - Replica

Aggiungi Commento

Visualizza Statistiche:

Ultime 24 Ore: 0

Ultimi 7 Giorni: 4

Ultimi 30 Giorni: 13

Tutti i Tempi: 6,603