Salta al contenuto principale

Questa versione può contenere modifiche errate. Passa all'ultima istantanea verificata.

Cosa ti serve

  1. Questo passaggio è privo di traduzione. Aiuta a tradurlo

    : passo 1, immagine 1 di 1
    • Flip over the device so that the bottom is facing you.

    • Locate the battery on the bottom of your laptop.

  2. Questo passaggio è privo di traduzione. Aiuta a tradurlo

    : passo 2, immagine 1 di 2 : passo 2, immagine 2 di 2
    • Slide the tab all the way over to the left until battery pops out. Lift out and remove battery.

  3. Questo passaggio è privo di traduzione. Aiuta a tradurlo

    : passo 3, immagine 1 di 2 : passo 3, immagine 2 di 2
    • Remove the RAM port cover by unscrewing the two screws.

    • These screws can not be fully removed because they’re captive. Loosen them until they turn freely.

  4. Questo passaggio è privo di traduzione. Aiuta a tradurlo

    : passo 4, immagine 1 di 2 : passo 4, immagine 2 di 2
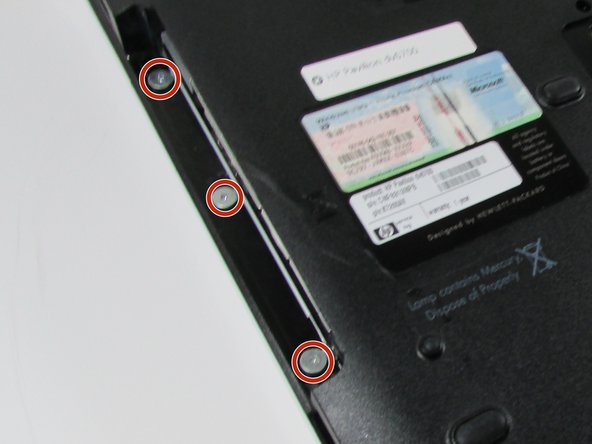
    • Use a Phillips #00 screwdriver to remove the two screws securing Hard Disk Drive (HDD) cover.

    • Screws will not fully remove. Loosen them until they turn freely.

  5. Questo passaggio è privo di traduzione. Aiuta a tradurlo

    : passo 5, immagine 1 di 3 : passo 5, immagine 2 di 3 : passo 5, immagine 3 di 3
    • Use a Phillips #00 screwdriver to remove the 25 screws securing the bottom of the computer.

  6. Questo passaggio è privo di traduzione. Aiuta a tradurlo

    : passo 6, immagine 1 di 3 : passo 6, immagine 2 di 3 : passo 6, immagine 3 di 3
    • Detach WiFi antenna wires.

    • Be sure that the wires are labeled so you remember which ones go where.

  7. Questo passaggio è privo di traduzione. Aiuta a tradurlo

    : passo 7, immagine 1 di 3 : passo 7, immagine 2 di 3 : passo 7, immagine 3 di 3
    • Using the Phillips #0 screwdriver remove the 2 screws.

    • Use a needle-nose pliers to do the initial loosening, then switch to using a hex screwdriver (size 5) head to do the rest of the loosening.

  8. Questo passaggio è privo di traduzione. Aiuta a tradurlo

    : passo 8, immagine 1 di 2 : passo 8, immagine 2 di 2
    • Flip over HP Pavilion dv6700 so that the top is facing you.

    • Open up HP Pavilion dv6700.

  9. Questo passaggio è privo di traduzione. Aiuta a tradurlo

    : passo 9, immagine 1 di 3 : passo 9, immagine 2 di 3 : passo 9, immagine 3 di 3
    • Use an iFixit opening tool to pry open the plastic bar above the keyboard.

    • Be careful not to yank so hard that you rip out the ribbon cables underneath. There is enough room to pull safely, but use control to prevent damage.

  10. Questo passaggio è privo di traduzione. Aiuta a tradurlo

    : passo 10, immagine 1 di 3 : passo 10, immagine 2 di 3 : passo 10, immagine 3 di 3
    • Pull out and up on keyboard to remove it.

    • Do not yank it all of the way out, as there is a ribbon cable underneath.

    • Slide the two black locks on the side of the keyboard cable connection port up to release the cable.

    • Grip the ribbon cable near the connection point and gently but firmly pull it out.

  11. Questo passaggio è privo di traduzione. Aiuta a tradurlo

    : passo 11, immagine 1 di 2 : passo 11, immagine 2 di 2
    • Flip over the plastic bar.

    • Detach the display connector.

    • Do not pull on the wires. Pull on the black plastic part or wedge an iFixit opening tool or fingernail between the port and the connector.

  12. Questo passaggio è privo di traduzione. Aiuta a tradurlo

    : passo 12, immagine 1 di 3 : passo 12, immagine 2 di 3 : passo 12, immagine 3 di 3
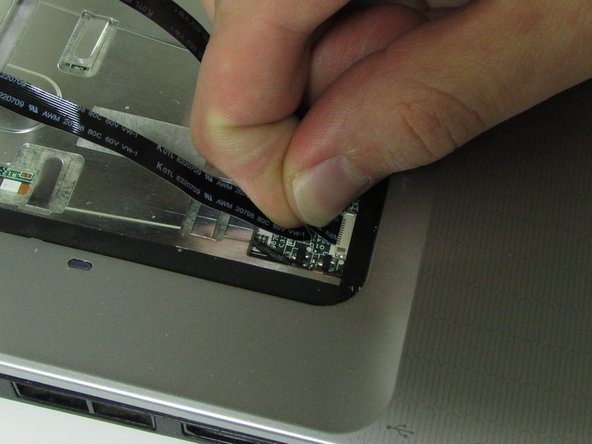
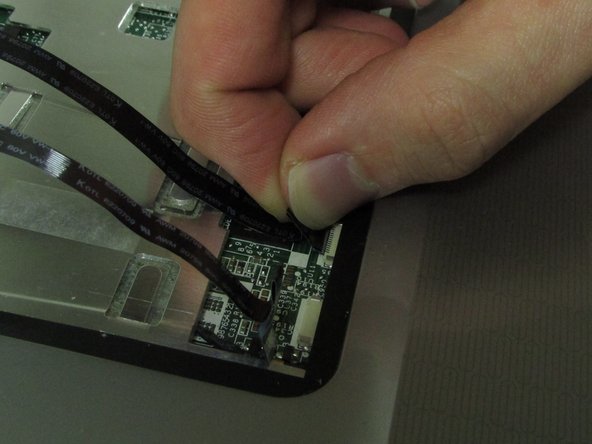
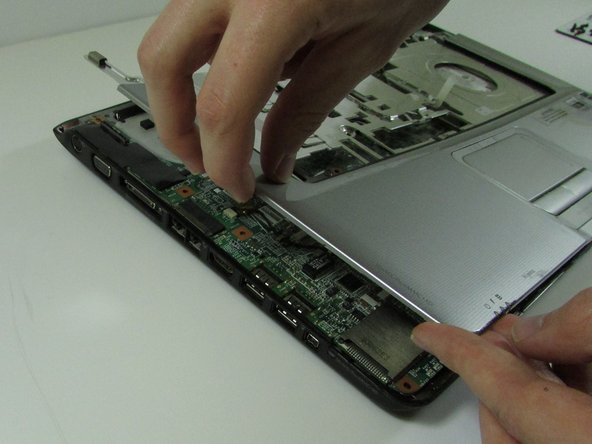
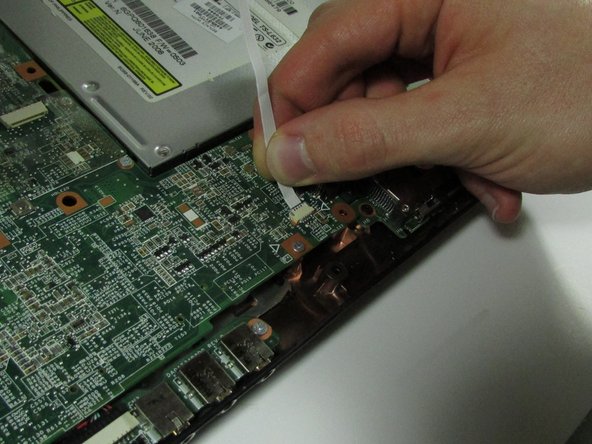
    • Detach the ribbon cables.

    • Pull from the area closest to the connection port gently but firmly.

  13. Questo passaggio è privo di traduzione. Aiuta a tradurlo

    : passo 13, immagine 1 di 3 : passo 13, immagine 2 di 3 : passo 13, immagine 3 di 3
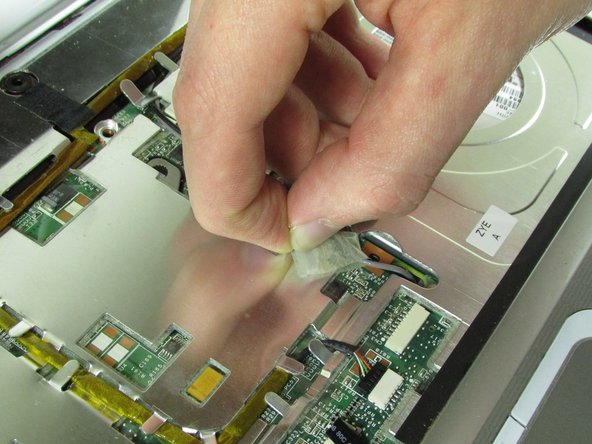
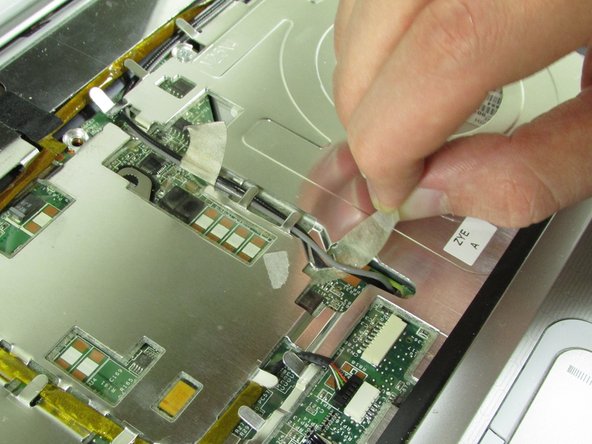
    • Pull up on tape holding down wires.

  14. Questo passaggio è privo di traduzione. Aiuta a tradurlo

    : passo 14, immagine 1 di 3 : passo 14, immagine 2 di 3 : passo 14, immagine 3 di 3
    • Pull up on the WiFi wires and out from under the metal tabs.

    • Do not yank them out. Let them hang loose once they are out from under the tabs.

  15. Questo passaggio è privo di traduzione. Aiuta a tradurlo

    : passo 15, immagine 1 di 3 : passo 15, immagine 2 di 3 : passo 15, immagine 3 di 3
    • Disconnect the connector from the port.

    • Remove the wire from under the metal tabs.

    • Let wire hang loose after removing under the tabs.

  16. Questo passaggio è privo di traduzione. Aiuta a tradurlo

    : passo 16, immagine 1 di 2 : passo 16, immagine 2 di 2
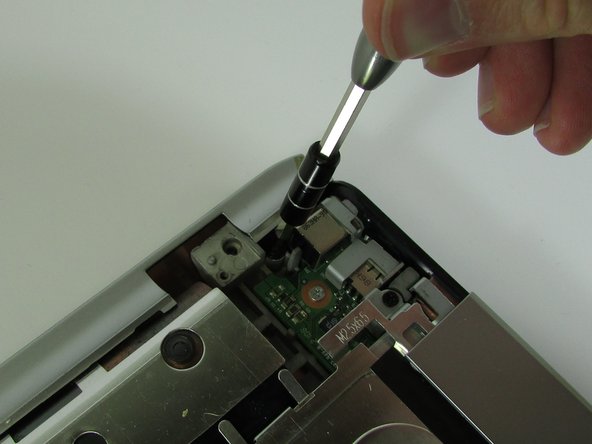
    • Use a Phillips #00 screwdriver to remove the black screw located in the top right corner near the display.

  17. Questo passaggio è privo di traduzione. Aiuta a tradurlo

    : passo 17, immagine 1 di 2 : passo 17, immagine 2 di 2
    • Pull upward on the screen connector tab.

    • It will be firmly secured, so don't be afraid to use a little extra force to pull it off.

  18. Questo passaggio è privo di traduzione. Aiuta a tradurlo

    : passo 18, immagine 1 di 2 : passo 18, immagine 2 di 2
    • Use a Phillips #00 screwdriver to remove the black screw securing the screen.

    • Keep your hand on the screen to secure it, as once you remove this screw, it will come loose.

    • Lift the screen off and set it aside.

  19. Questo passaggio è privo di traduzione. Aiuta a tradurlo

    : passo 19, immagine 1 di 3 : passo 19, immagine 2 di 3 : passo 19, immagine 3 di 3
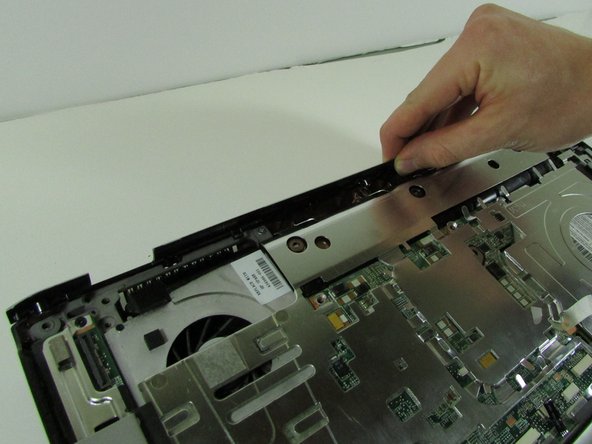
    • Unscrew the black screw in the top right corner using the Phillips #00 screwdriver.

    • Pull up on the top piece and remove it.

  20. Questo passaggio è privo di traduzione. Aiuta a tradurlo

    : passo 20, immagine 1 di 3 : passo 20, immagine 2 di 3 : passo 20, immagine 3 di 3
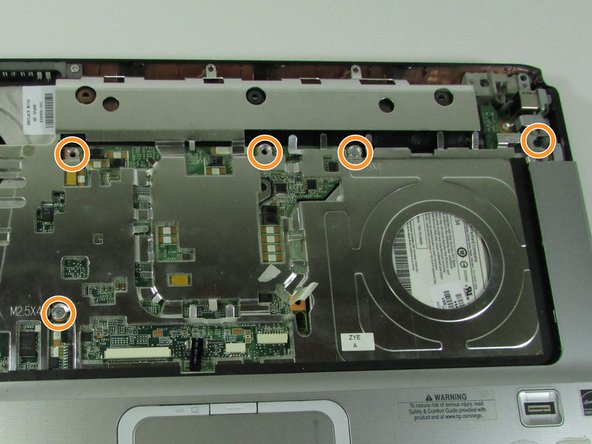
    • Remove the screw in top left corner using the Phillips #00 screwdriver

    • Remove the five screws that are located on the motherboard cover.

    • Pull up on the cover to remove it.

    • You can use a plastic opener if it is hard to get your fingers under the cover's edges.

    • Do not pull hard on the cover, as there are two ribbon cables under the cover connected to the motherboard.

  21. Questo passaggio è privo di traduzione. Aiuta a tradurlo

    : passo 21, immagine 1 di 3 : passo 21, immagine 2 di 3 : passo 21, immagine 3 di 3
    • Pull gently but firmly on the ribbon cables at the connection points to remove them

  22. Questo passaggio è privo di traduzione. Aiuta a tradurlo

    : passo 22, immagine 1 di 3 : passo 22, immagine 2 di 3 : passo 22, immagine 3 di 3
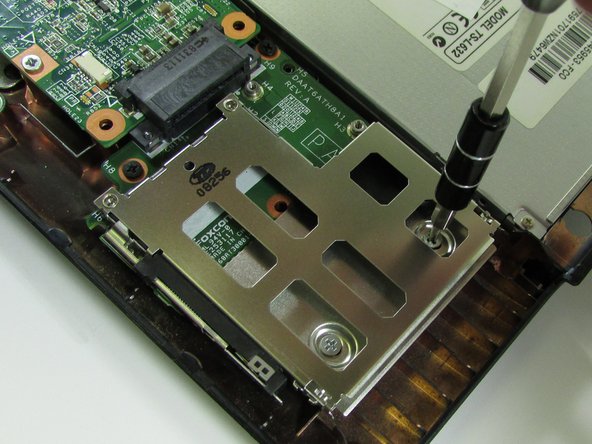
    • Remove the four screws from the ExpressCard component using the Phillips #00 screwdriver.

  23. Questo passaggio è privo di traduzione. Aiuta a tradurlo

    : passo 23, immagine 1 di 3 : passo 23, immagine 2 di 3 : passo 23, immagine 3 di 3
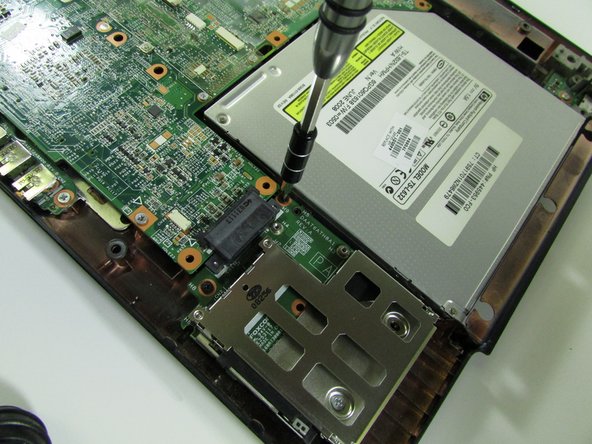
    • Remove ExpressCard component by sliding it out.

    • Remove Optical Drive by sliding it out.

  24. Questo passaggio è privo di traduzione. Aiuta a tradurlo

    : passo 24, immagine 1 di 2 : passo 24, immagine 2 di 2
    • Detach connector from the motherboard.

    • This piece is likely to be very hard to disconnect, so do not be afraid to use more force than normal.

  25. Questo passaggio è privo di traduzione. Aiuta a tradurlo

    : passo 25, immagine 1 di 1
    • Using the Phillips #00 screwdriver, remove the one screw near where the ExpressCard component was.

  26. Questo passaggio è privo di traduzione. Aiuta a tradurlo

    : passo 26, immagine 1 di 3 : passo 26, immagine 2 di 3 : passo 26, immagine 3 di 3
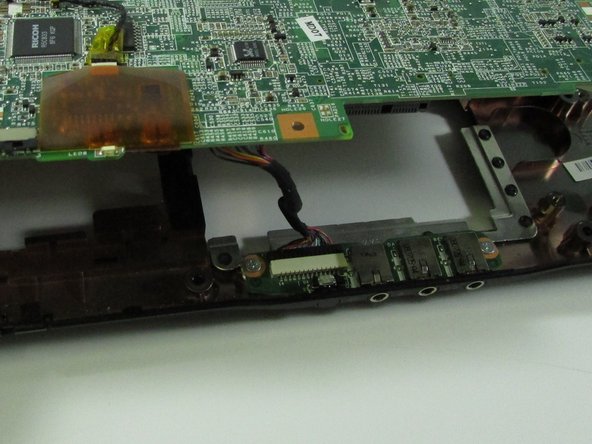
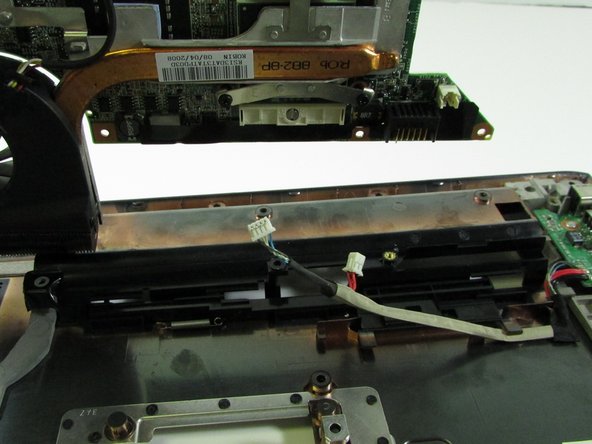
    • Lift up motherboard.

    • Detach the motherboard connector at the front under the motherboard.

  27. Questo passaggio è privo di traduzione. Aiuta a tradurlo

    : passo 27, immagine 1 di 3 : passo 27, immagine 2 di 3 : passo 27, immagine 3 di 3
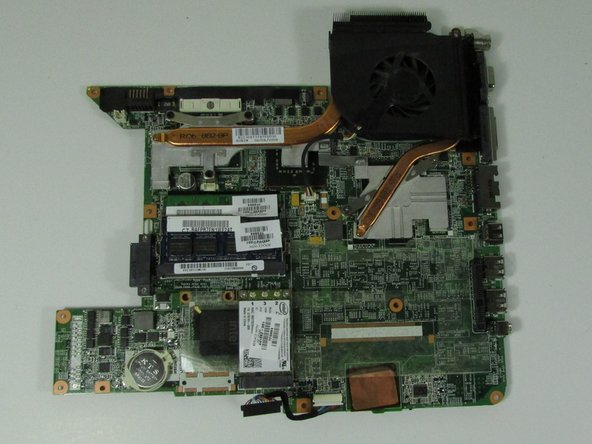
    • Lift up and out the motherboard.

    • Detach the connector under the motherboard.

    • Remove the motherboard.

Linea Traguardo

Altre 8 persone hanno completato questa guida.

2 Commenti

Brilliant presentation.

Great Help

Thanks

ivor - Replica

Thank you for all your help . Very decent of you.

Spot on guide and detail.

Ian, Poynton< Cheshire

UK.

558vulcanxh - Replica

Aggiungi Commento

Visualizza Statistiche:

Ultime 24 Ore: 3

Ultimi 7 Giorni: 12

Ultimi 30 Giorni: 23

Tutti i Tempi: 3,394