Salta al contenuto principale

HP Pavilion dv4-4141us Fan Replacement

Cosa ti serve

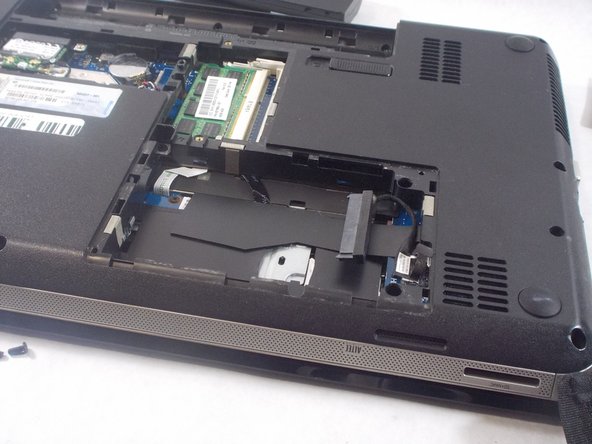
  1. HP Pavilion dv4-4141us Fan Replacement, Back Panel: passo 1, immagine 1 di 1
    • Lift up the back panel using a spudger, and remove it from the device.

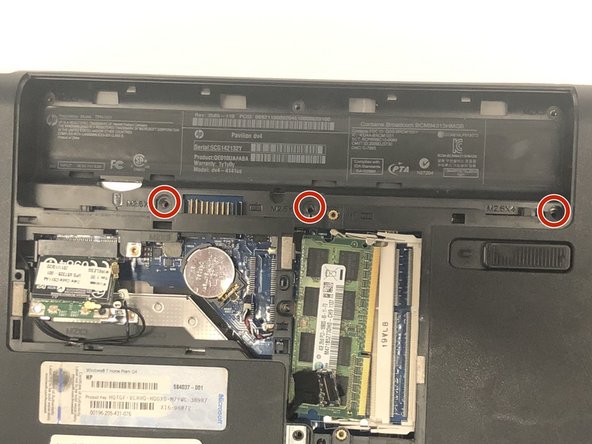
  2. HP Pavilion dv4-4141us Fan Replacement: passo 2, immagine 1 di 3 HP Pavilion dv4-4141us Fan Replacement: passo 2, immagine 2 di 3 HP Pavilion dv4-4141us Fan Replacement: passo 2, immagine 3 di 3
    • Using the Phillips #1 screwdriver unscrew the panel from the computer.

    • Lift the panel up and remove it from the laptop.

  3. HP Pavilion dv4-4141us Fan Replacement, Hard Drive: passo 3, immagine 1 di 3 HP Pavilion dv4-4141us Fan Replacement, Hard Drive: passo 3, immagine 2 di 3 HP Pavilion dv4-4141us Fan Replacement, Hard Drive: passo 3, immagine 3 di 3
    • Use the spudger to lift the left side of the hard drive.

    • Unplug the hard drive and remove it from the device.

  4. HP Pavilion dv4-4141us Fan Replacement, Fan: passo 4, immagine 1 di 2 HP Pavilion dv4-4141us Fan Replacement, Fan: passo 4, immagine 2 di 2
    • Use a Phillips #1 Screwdriver to remove all the screws indicated in the pictures.

  5. HP Pavilion dv4-4141us Fan Replacement: passo 5, immagine 1 di 1
    • Use opening tool to separate the Key board and mouse pad.

    • It would be best to find a tool that is small enough to fit and start on the bottom at either corner and slide across lifting the panel up.

    • Be careful not to push too far underneath to not damage the interior and also it is advised to not bend or crack the plastic back cover.

  6. HP Pavilion dv4-4141us Fan Replacement: passo 6, immagine 1 di 1
    • Use a spudger to gently lift the white plastic flap and release the ribbon cable holding the keyboard in place.

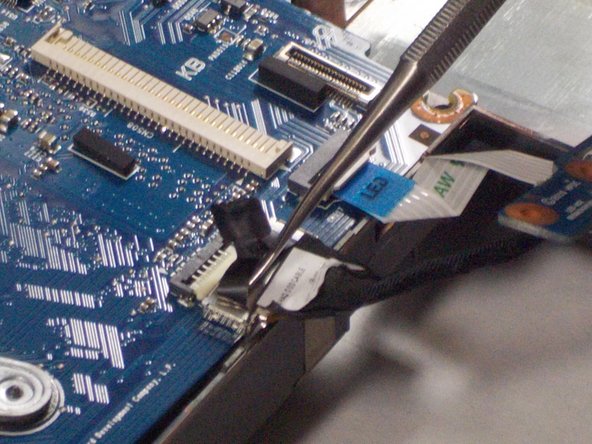
  7. HP Pavilion dv4-4141us Fan Replacement: passo 7, immagine 1 di 2 HP Pavilion dv4-4141us Fan Replacement: passo 7, immagine 2 di 2
    • Use the spudger to lift up the flap and release the cable for both of these two separate components.

    • Be extra careful not to break these clips as they are fragile and are a part of the motherboard.

  8. HP Pavilion dv4-4141us Fan Replacement: passo 8, immagine 1 di 1
    • Unclip the last wire holding the motherboard in place. To do this pull down on the wire in the direction of the arrow.

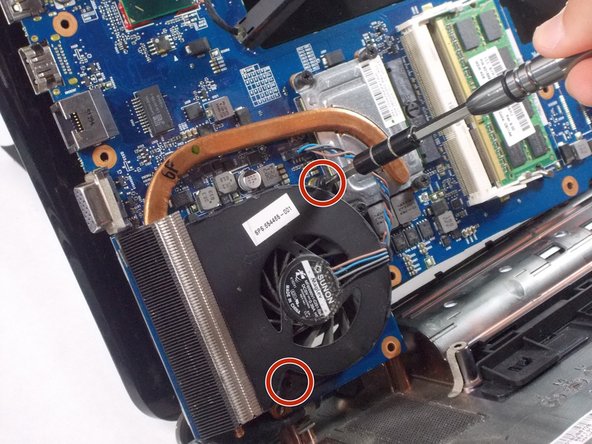
  9. HP Pavilion dv4-4141us Fan Replacement: passo 9, immagine 1 di 2 HP Pavilion dv4-4141us Fan Replacement: passo 9, immagine 2 di 2
    • Take out the mother board and flip it over so that you can access the fan.

    • Unscrew the two screws holding the fan in place.

  10. HP Pavilion dv4-4141us Fan Replacement: passo 10, immagine 1 di 1
    • Release the fan from the motherboard by disconnecting the wire from the fan.

Conclusione

To reassemble your device, follow these instructions in reverse order.

Un'altra persona ha completato questa guida.

Team

Un commento

Thanks! I was able to upgrade my Intel Core i3 2330m to a considerably more powerful core i5 2410m! The instructions were very easy to follow. This fixed my problem!

Sam Watson - Replica

Aggiungi Commento

Visualizza Statistiche:

Ultime 24 Ore: 0

Ultimi 7 Giorni: 2

Ultimi 30 Giorni: 6

Tutti i Tempi: 280