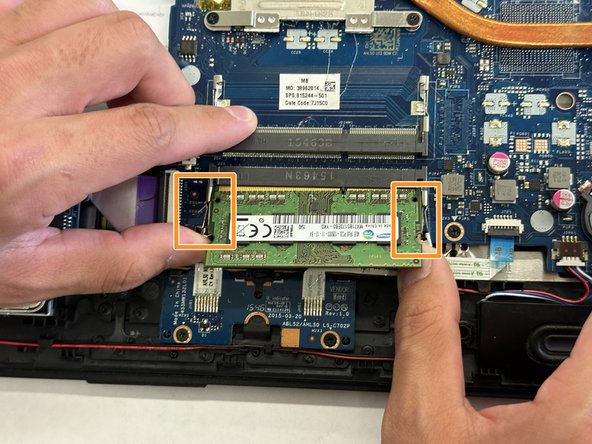
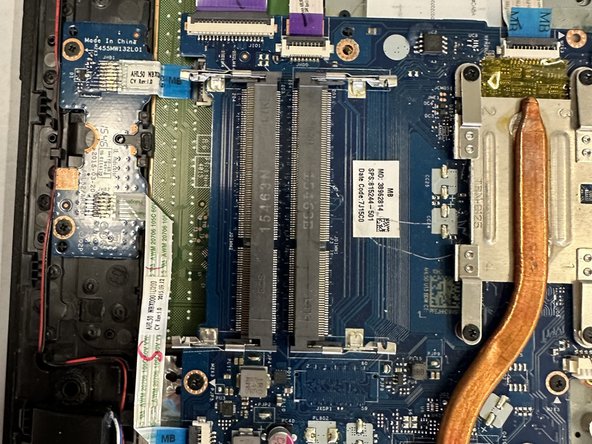
Salta al contenuto principale

HP Pavilion TPN-C125 RAM Replacement

Cosa ti serve

  1. HP Pavilion TPN-C125 RAM Replacement, RAM: passo 1, immagine 1 di 2 HP Pavilion TPN-C125 RAM Replacement, RAM: passo 1, immagine 2 di 2
    • Flip the laptop over so the bottom is facing up and the external battery is at the top.

  2. HP Pavilion TPN-C125 RAM Replacement: passo 2, immagine 1 di 2 HP Pavilion TPN-C125 RAM Replacement: passo 2, immagine 2 di 2
    • Use your thumbs to slide the battery locks towards the center and pop the battery out.

  3. HP Pavilion TPN-C125 RAM Replacement: passo 3, immagine 1 di 2 HP Pavilion TPN-C125 RAM Replacement: passo 3, immagine 2 di 2
    • Slowly peel off the two rubber stoppers found at the top corners of the laptop.

    • This will expose two Philips #00 10 mm screws required to remove the back plate.

    • Be careful not to peel off the rubber stoppers too quickly as it could cause the adhesive on the rubber stopper to strip off.

  4. HP Pavilion TPN-C125 RAM Replacement: passo 4, immagine 1 di 2 HP Pavilion TPN-C125 RAM Replacement: passo 4, immagine 2 di 2
    • Use a Phillips #00 screwdriver to remove the twelve 10 mm screws (from the twelve holes shown) that secure the bottom case.

    • Use an opening tool to carefully separate the back case from the chassis, working around all four sides.

    • You will hear a "click" as you release the clips and remove it.

  5. HP Pavilion TPN-C125 RAM Replacement: passo 5, immagine 1 di 3 HP Pavilion TPN-C125 RAM Replacement: passo 5, immagine 2 di 3 HP Pavilion TPN-C125 RAM Replacement: passo 5, immagine 3 di 3
    • The RAM sticks can be found in the bottom right section of the laptop.

    • Push both side arms holding the RAM stick in place outwards.

    • The RAM sticks will "pop" up at a 45-degree angle when released from the arms.

    • Slide the RAM sticks out of the socket gently.

  6. HP Pavilion TPN-C125 RAM Replacement: passo 6, immagine 1 di 3 HP Pavilion TPN-C125 RAM Replacement: passo 6, immagine 2 di 3 HP Pavilion TPN-C125 RAM Replacement: passo 6, immagine 3 di 3
    • Carefully slide the new replacement RAM sticks into their slots.

    • Make sure to align edge of the RAM sticks with the slots to avoid damaging both.

    • Gently push the RAM sticks downward until the latches click into place to secure them.

Conclusione

To reassemble your device, follow these instructions in reverse order.

Cesar Gomez

Membro da: 03/05/24

183 Reputazione

1 Guida realizzata

Team

0 Commenti

Aggiungi Commento

Visualizza Statistiche:

Ultime 24 Ore: 0

Ultimi 7 Giorni: 17

Ultimi 30 Giorni: 42

Tutti i Tempi: 117