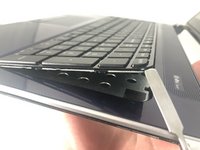
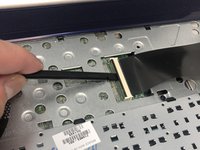
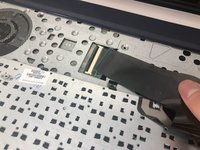
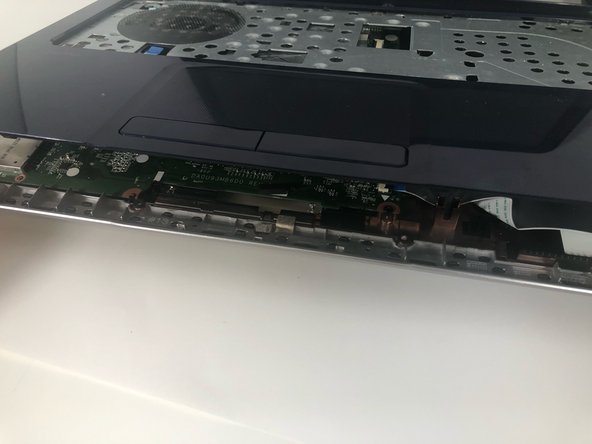
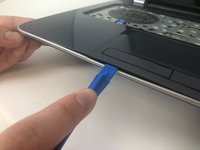
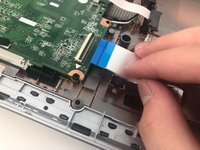
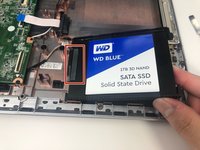
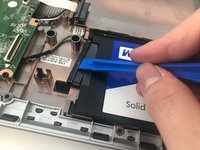
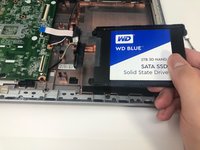
Salta al contenuto principale

HP Pavilion 15-n232nr Hard Drive Replacement

Cosa ti serve

  1. HP Pavilion 15-n232nr Hard Drive Replacement, Battery: passo 1, immagine 1 di 2 HP Pavilion 15-n232nr Hard Drive Replacement, Battery: passo 1, immagine 2 di 2
    • Flip the laptop over.

  2. HP Pavilion 15-n232nr Hard Drive Replacement: passo 2, immagine 1 di 3 HP Pavilion 15-n232nr Hard Drive Replacement: passo 2, immagine 2 di 3 HP Pavilion 15-n232nr Hard Drive Replacement: passo 2, immagine 3 di 3
    • Slide the battery locks towards the center of the laptop. The battery will detach automatically.

    • Remove the battery by sliding it away from the laptop housing.

  3. HP Pavilion 15-n232nr Hard Drive Replacement, Keyboard: passo 3, immagine 1 di 2 HP Pavilion 15-n232nr Hard Drive Replacement, Keyboard: passo 3, immagine 2 di 2
    • Unscrew the 6 mm Phillips #1 screw securing the keyboard.

  4. HP Pavilion 15-n232nr Hard Drive Replacement: passo 4, immagine 1 di 2 HP Pavilion 15-n232nr Hard Drive Replacement: passo 4, immagine 2 di 2
    • Flip the laptop to the front side and open it up.

  5. HP Pavilion 15-n232nr Hard Drive Replacement: passo 5, immagine 1 di 2 HP Pavilion 15-n232nr Hard Drive Replacement: passo 5, immagine 2 di 2
    • Use the metal spudger to release the keyboard from the front panel.

  6. HP Pavilion 15-n232nr Hard Drive Replacement: passo 6, immagine 1 di 3 HP Pavilion 15-n232nr Hard Drive Replacement: passo 6, immagine 2 di 3 HP Pavilion 15-n232nr Hard Drive Replacement: passo 6, immagine 3 di 3
    • Flip the keyboard out and locate the connector.

    • Use the spudger to unhinge the the fastener and remove the connector.

    • Keyboard should be completely detached after this step.

  7. HP Pavilion 15-n232nr Hard Drive Replacement, Optical Drive: passo 7, immagine 1 di 2 HP Pavilion 15-n232nr Hard Drive Replacement, Optical Drive: passo 7, immagine 2 di 2
    • Remove the 6 mm Phillips #1 screw securing the optical drive.

  8. HP Pavilion 15-n232nr Hard Drive Replacement: passo 8, immagine 1 di 2 HP Pavilion 15-n232nr Hard Drive Replacement: passo 8, immagine 2 di 2
    • Use the iFixit opening tool to slide the optical drive away from the laptop housing.

  9. HP Pavilion 15-n232nr Hard Drive Replacement, Hard Drive: passo 9, immagine 1 di 2 HP Pavilion 15-n232nr Hard Drive Replacement, Hard Drive: passo 9, immagine 2 di 2
    • The battery and optical drive should be removed at this point in the process.

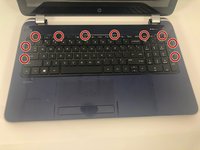
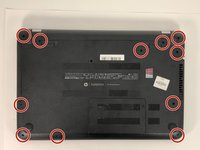
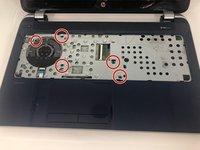
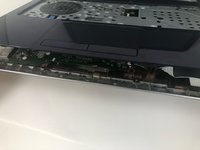
    • Remove the ten 6 mm Phillips #1 screws.

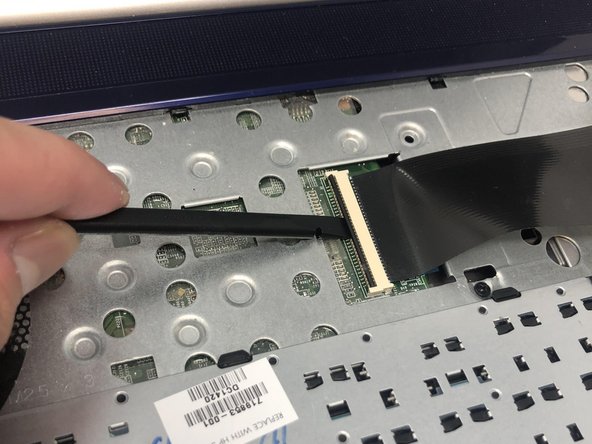
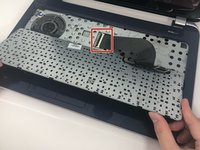
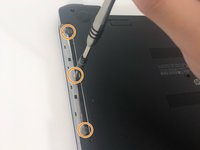
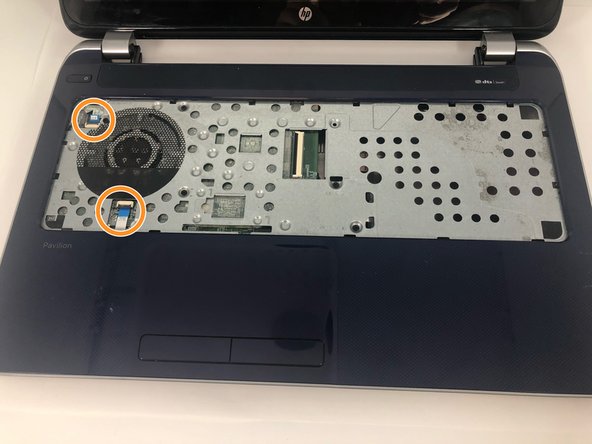
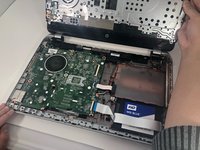
    • Remove the three 1 mm Phillips #000 screws.

  10. HP Pavilion 15-n232nr Hard Drive Replacement: passo 10, immagine 1 di 2 HP Pavilion 15-n232nr Hard Drive Replacement: passo 10, immagine 2 di 2
    Attrezzo utilizzato in questo passaggio:
    Tweezers
    $4.99
    Compra
    • Remove the five 2.5mm Phillips #1 screws.

    • Use the spudger to unhinge the cable connectors. Use tweezers to complete removal.

  11. HP Pavilion 15-n232nr Hard Drive Replacement: passo 11, immagine 1 di 3 HP Pavilion 15-n232nr Hard Drive Replacement: passo 11, immagine 2 di 3 HP Pavilion 15-n232nr Hard Drive Replacement: passo 11, immagine 3 di 3
    • Carefully use the iFixit opening tool to release the front panel.

  12. HP Pavilion 15-n232nr Hard Drive Replacement: passo 12, immagine 1 di 3 HP Pavilion 15-n232nr Hard Drive Replacement: passo 12, immagine 2 di 3 HP Pavilion 15-n232nr Hard Drive Replacement: passo 12, immagine 3 di 3
    • Use the spudger to unhinge the daughterboard connector.

    • Remove daughterboard connector.

  13. HP Pavilion 15-n232nr Hard Drive Replacement: passo 13, immagine 1 di 1
    • Remove the 2.5 mm Phillips #1 screw and remove the daughterboard

  14. HP Pavilion 15-n232nr Hard Drive Replacement: passo 14, immagine 1 di 3 HP Pavilion 15-n232nr Hard Drive Replacement: passo 14, immagine 2 di 3 HP Pavilion 15-n232nr Hard Drive Replacement: passo 14, immagine 3 di 3
    • Use the iFixit opening tool to remove the hard drive connector.

    • Remove the hard drive by lifting the right side and pulling it out.

Conclusione

To reassemble your device, follow these instructions in reverse order.

Altre 6 persone hanno completato questa guida.

2 Commenti

How to test it's processor

Kashmir Singh - Replica

Great guide, thank you!!

alt255d - Replica

Aggiungi Commento

Visualizza Statistiche:

Ultime 24 Ore: 0

Ultimi 7 Giorni: 2

Ultimi 30 Giorni: 5

Tutti i Tempi: 1,373