Salta al contenuto principale

Questa guida ha delle modifiche più recenti. Passa all'ultima versione non verificata.

HP Pavilion 11-n010dx Ram Replacement

Cosa ti serve

  1. HP Pavilion 11-n010dx Ram Replacement, Battery: passo 1, immagine 1 di 2 HP Pavilion 11-n010dx Ram Replacement, Battery: passo 1, immagine 2 di 2
    • Use the nylon spudger to remove the rubber pads near the hinge of the screen, then remove the screws under the pads.

    • Use the Phillips #0 to remove four 9mm screws.

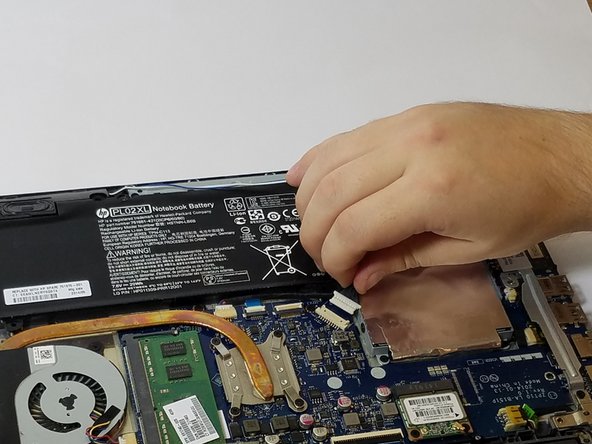
    • Use the Phillips #0 to remove seven 6mm screws.

  2. HP Pavilion 11-n010dx Ram Replacement: passo 2, immagine 1 di 3 HP Pavilion 11-n010dx Ram Replacement: passo 2, immagine 2 di 3 HP Pavilion 11-n010dx Ram Replacement: passo 2, immagine 3 di 3
    • Use the nylon spudger to pry the back casing near the hinges for the screen.

    • Continue to pry along the edge of the back case until the back is ready to be removed.

    • Careful when beginning to remove the case. There is a cable attached between the bottom case and the motherboard that must be properly disconnected.

  3. HP Pavilion 11-n010dx Ram Replacement: passo 3, immagine 1 di 2 HP Pavilion 11-n010dx Ram Replacement: passo 3, immagine 2 di 2
    • Use the blue plastic opening tool to lift up on the white tab that is holding the cable in place on the motherboard.

    • Now carefully pull the cable out of place and remove the entire back casing.

  4. HP Pavilion 11-n010dx Ram Replacement: passo 4, immagine 1 di 1
    • Remove the five 6mm screws that hold the battery in place using the Phillips #0.

  5. HP Pavilion 11-n010dx Ram Replacement: passo 5, immagine 1 di 2 HP Pavilion 11-n010dx Ram Replacement: passo 5, immagine 2 di 2
    • Use the nylon spudger to pry away the blue/white wire that is positioned near your battery.

  6. HP Pavilion 11-n010dx Ram Replacement: passo 6, immagine 1 di 2 HP Pavilion 11-n010dx Ram Replacement: passo 6, immagine 2 di 2
    • Disconnect the battery cable from the motherboard by carefully pulling on the black wire at the point closest to the white tab.

  7. HP Pavilion 11-n010dx Ram Replacement: passo 7, immagine 1 di 1
    • Remove the battery from your device.

  8. HP Pavilion 11-n010dx Ram Replacement, Ram: passo 8, immagine 1 di 2 HP Pavilion 11-n010dx Ram Replacement, Ram: passo 8, immagine 2 di 2
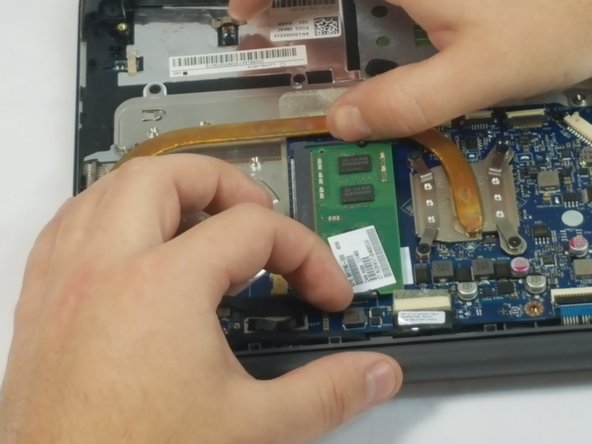
    • Using your fingernails, pull the tabs on either side of the RAM to release the module from its secured spot.

  9. HP Pavilion 11-n010dx Ram Replacement: passo 9, immagine 1 di 2 HP Pavilion 11-n010dx Ram Replacement: passo 9, immagine 2 di 2
    • Carefully grab and pull to remove the RAM from your device.

Conclusione

To reassemble your device, follow these instructions in reverse order.

Un'altra persona ha completato questa guida.

Joseph Lintz

Membro da: 09/15/16

915 Reputazione

5 Guide realizzate

Team

USF Tampa, Team 11-5, Blackwell Fall 2016 Membro di USF Tampa, Team 11-5, Blackwell Fall 2016

USFT-BLACKWELL-F16S11G5

3 Membri

5 Guide realizzate

0 Commenti

Aggiungi Commento

Visualizza Statistiche:

Ultime 24 Ore: 0

Ultimi 7 Giorni: 2

Ultimi 30 Giorni: 5

Tutti i Tempi: 701