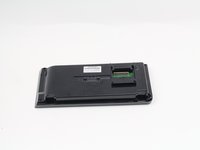
Salta al contenuto principale

HP Officejet Pro 8625 Display Replacement

Cosa ti serve

  1. HP Officejet Pro 8625 Display  Replacement, Display Motherboard: passo 1, immagine 1 di 2 HP Officejet Pro 8625 Display  Replacement, Display Motherboard: passo 1, immagine 2 di 2
    • Disconnect the display by holding it in place while pulling down on the plastic hinge.

    • Slowly apply more and more force as it does take a lot to separate, do not worry about the hinge or display breaking.

  2. HP Officejet Pro 8625 Display  Replacement: passo 2, immagine 1 di 3 HP Officejet Pro 8625 Display  Replacement: passo 2, immagine 2 di 3 HP Officejet Pro 8625 Display  Replacement: passo 2, immagine 3 di 3
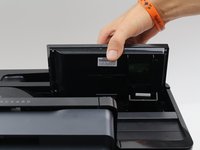
    • Lift the display as high as it will allow to expose the back of the display.

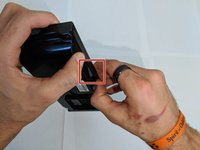
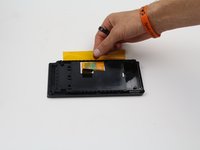
    • Pinch the sides of the cover and pull away from the printer to reveal the connector.

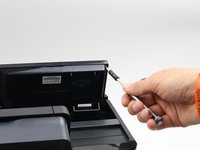
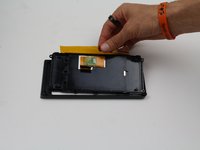
    • Remove the connector by pulling both away from the display and towards the printer.

  3. HP Officejet Pro 8625 Display  Replacement: passo 3, immagine 1 di 3 HP Officejet Pro 8625 Display  Replacement: passo 3, immagine 2 di 3 HP Officejet Pro 8625 Display  Replacement: passo 3, immagine 3 di 3
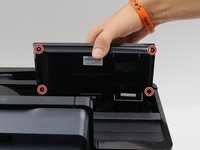
    • Remove the four 6.2 mm T9 screws from the back of the display.

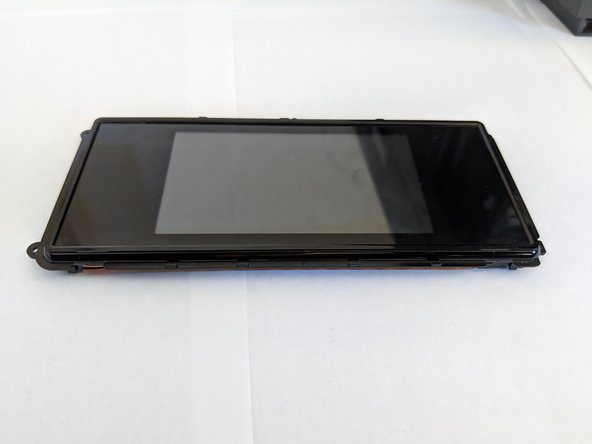
    • Pull the display assembly up and away from the printer.

  4. HP Officejet Pro 8625 Display  Replacement: passo 4, immagine 1 di 2 HP Officejet Pro 8625 Display  Replacement: passo 4, immagine 2 di 2
    • Remove the back cover from the display assembly by pressing down on the point of connection.

    • If you use a plastic spudger for this step, be careful not to brake the plastic as you do not need to use much force to remove the back cover.

  5. HP Officejet Pro 8625 Display  Replacement: passo 5, immagine 1 di 2 HP Officejet Pro 8625 Display  Replacement: passo 5, immagine 2 di 2
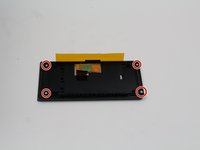
    • Remove the four 4.8 mm T6 screws from the back of the display motherboard.

  6. HP Officejet Pro 8625 Display  Replacement: passo 6, immagine 1 di 2 HP Officejet Pro 8625 Display  Replacement: passo 6, immagine 2 di 2
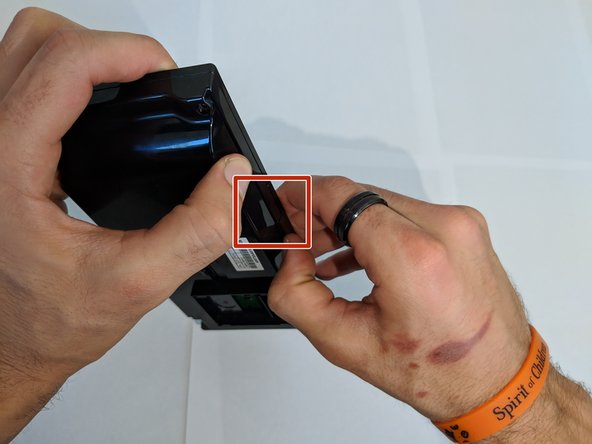
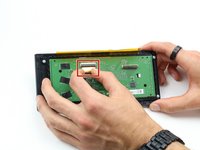
    • Remove the connection on the front of the display motherboard.

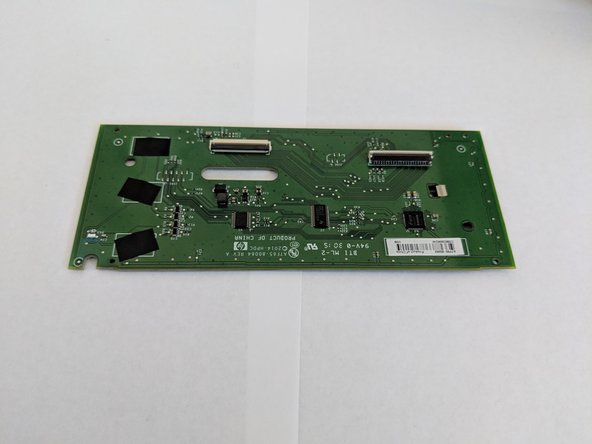
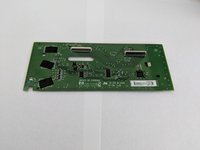
    • Remove the display motherboard.

  7. HP Officejet Pro 8625 Display  Replacement, Display: passo 7, immagine 1 di 2 HP Officejet Pro 8625 Display  Replacement, Display: passo 7, immagine 2 di 2
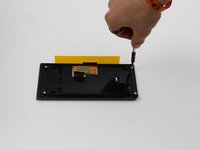
    • Remove the four 4.8 mm screws from the back of the display using a T6 screwdriver.

  8. HP Officejet Pro 8625 Display  Replacement: passo 8, immagine 1 di 3 HP Officejet Pro 8625 Display  Replacement: passo 8, immagine 2 di 3 HP Officejet Pro 8625 Display  Replacement: passo 8, immagine 3 di 3
    • Lift the display out of the case.

Conclusione

To reassemble your device, follow these instructions in reverse order.

Cole Andrews

Membro da: 10/08/18

273 Reputazione

2 Guide realizzate

Team

Cal Poly, Team S13-G3, White Fall 2018 Membro di Cal Poly, Team S13-G3, White Fall 2018

CPSU-WHITE-F18S13G3

3 Membri

14 Guide realizzate

0 Commenti

Aggiungi Commento

Visualizza Statistiche:

Ultime 24 Ore: 0

Ultimi 7 Giorni: 2

Ultimi 30 Giorni: 4

Tutti i Tempi: 441