Questa versione può contenere modifiche errate. Passa all'ultima istantanea verificata.
Cosa ti serve
-
Questo passaggio è privo di traduzione. Aiuta a tradurlo
-
Open the main lid as far as it will go.
-
Use a plastic opening tool to gently pry off the hinge on the right side by pushing it to the left and off the hook.
-
Open the lid further.
-
-
Questo passaggio è privo di traduzione. Aiuta a tradurlo
-
Use a T9 torx screwdriver to remove a total of ten (10) 12mm screws from the main cover by turning the screwdriver counterclockwise.
-
-
Questo passaggio è privo di traduzione. Aiuta a tradurlo
-
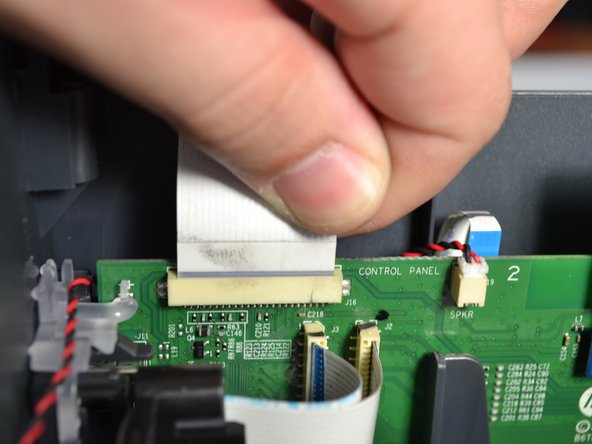
Grab the main cover and lift it up slightly.
-
-
Questo passaggio è privo di traduzione. Aiuta a tradurlo
-
Grab the base of the white ribbon cable connecting the cover to the base of the printer and pull it out.
-
-
Questo passaggio è privo di traduzione. Aiuta a tradurlo
-
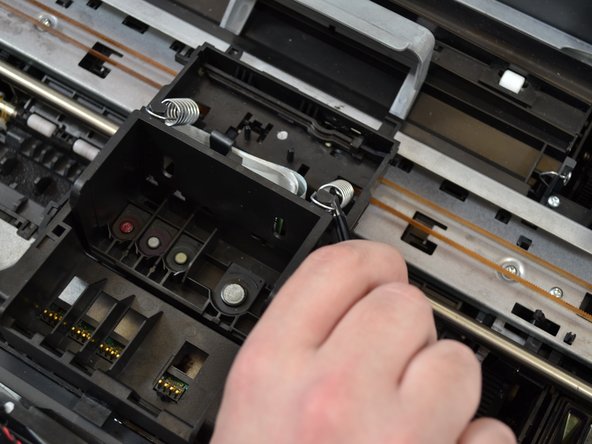
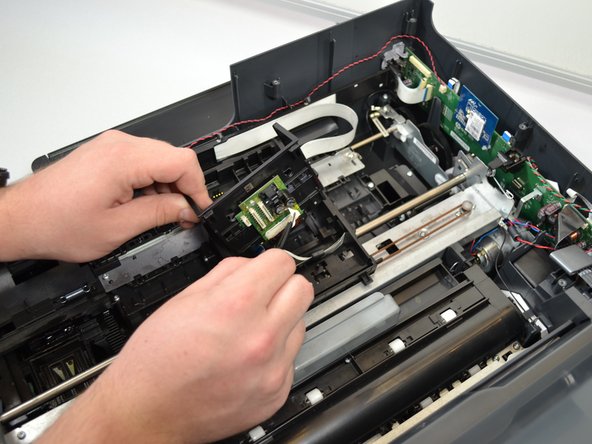
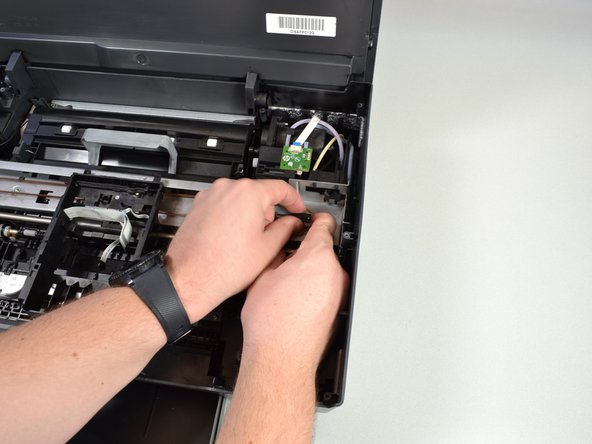
Using tweezers, pinch the top of the spring located on the right side of the printhead.
-
Pull the spring up and around the hook of the carriage to remove the spring from the printhead.
-
Use the same procedure to remove the left spring.
-
-
-
Questo passaggio è privo di traduzione. Aiuta a tradurlo
-
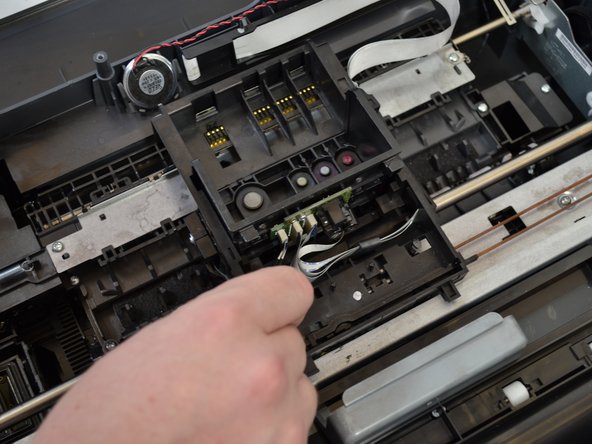
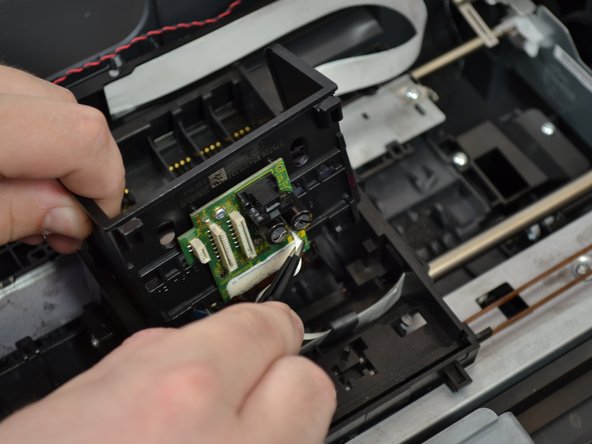
Pinch the left most white cable located on the back of the printhead with your tweezers.
-
Pull the cable to remove it from the printhead.
-
Continue this process to remove all three white cable from the printhead.
-
-
Questo passaggio è privo di traduzione. Aiuta a tradurlo
-
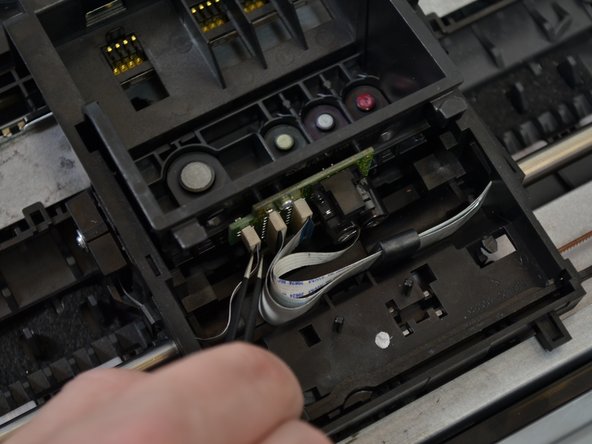
Lift the printhead off the printer to expose the last white cable.
-
Pinch the the last cable with the tweezers.
-
Pull the cable to disconnect it from the printhead.
-
-
Questo passaggio è privo di traduzione. Aiuta a tradurlo
-
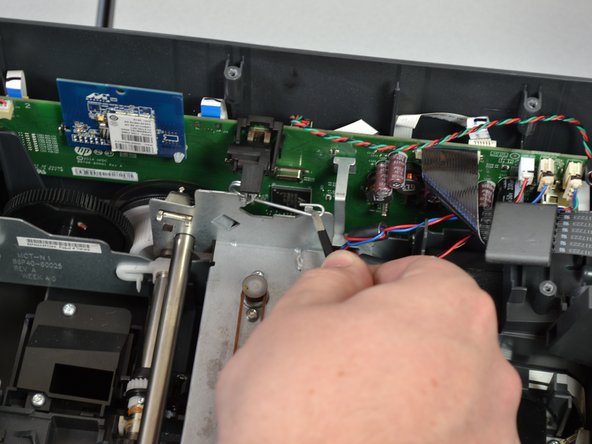
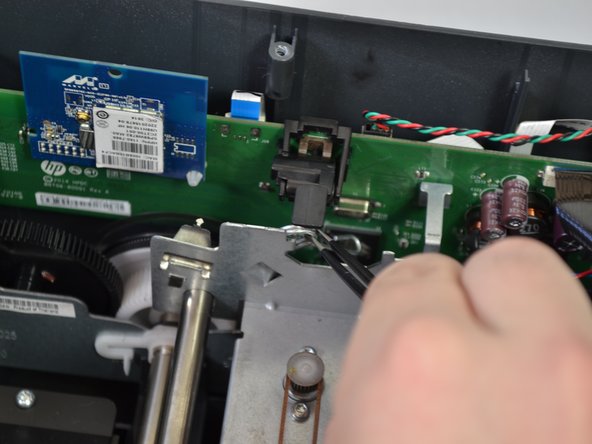
Using the tweezers, remove the right side of the metal clamp that is holding the metal frame in place by pulling up.
-
With the tweezers, unhook the metal coil side of the clamp and pull up to remove it completely.
-
Repeat these steps on the other side of the printer.
-
-
Questo passaggio è privo di traduzione. Aiuta a tradurlo
-
On the right side of the printer, remove the screw (6mm T9) holding the carriage belt wheel by turning the screwdriver counterclockwise.
-
-
Questo passaggio è privo di traduzione. Aiuta a tradurlo
-
Using the tweezers, remove the metal clamp directly under the screw that was just removed by pulling up.
-
-
Questo passaggio è privo di traduzione. Aiuta a tradurlo
-
Using one hand, loosen the carriage belt around the wheel by compressing the spring against the wheel.
-
While still compressing the spring, use your other hand to grab the spring and wheel and pull up to remove them.
-
-
Questo passaggio è privo di traduzione. Aiuta a tradurlo
-
Unwrap the carriage belt from the hook on the other side of the printer using the tweezers by pulling to the left and up.
-
-
Questo passaggio è privo di traduzione. Aiuta a tradurlo
-
Grab the metal rod connected to the carriage.
-
Push the rod to the left and lift up the right end.
-
Lift the metal rod completely out of the printer by lifting straight up, and slide the rod out of the carriage by pushing the left end to the right.
-
-
Questo passaggio è privo di traduzione. Aiuta a tradurlo
-
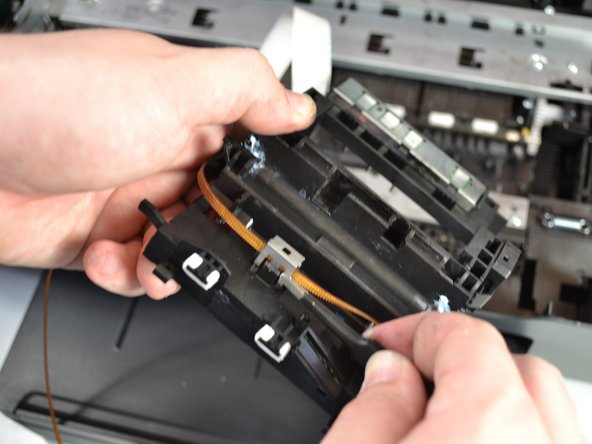
Flip the carriage upside down.
-
Using the metal tweezers, remove the clamp over the carriage belt by first pulling up on the back of the clamp, then on the front.
-
-
Questo passaggio è privo di traduzione. Aiuta a tradurlo
-
Remove the carriage belt by holding the carriage in one hand and pulling the carriage belt up with the other.
-


Annulla: non ho completato questa guida.
Un'altra persona ha completato questa guida.
Team

Cal Poly, Team S2-G4, Livingston Winter 2018 Membro di Cal Poly, Team S2-G4, Livingston Winter 2018
CPSU-LIVINGSTON-W18S2G4
4 Membri
16 Guide realizzate