Questa versione può contenere modifiche errate. Passa all'ultima istantanea verificata.
Cosa ti serve
-
Questo passaggio è privo di traduzione. Aiuta a tradurlo
-
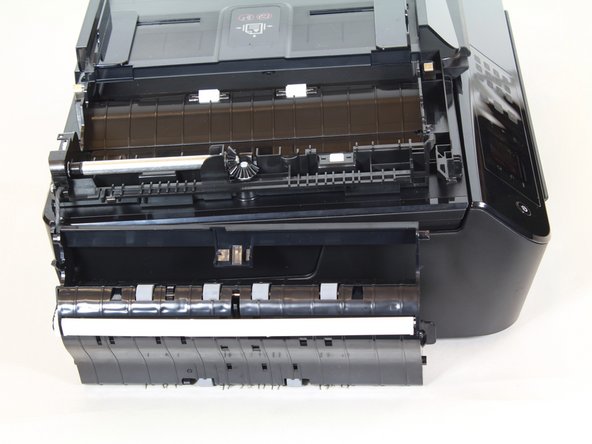
Lift the fax feeder cover until it stands on its own.
-
-
Questo passaggio è privo di traduzione. Aiuta a tradurlo
-
Use the plastic opening tool to unclasp the hinge that holds the feeder cover.
-
-
-
Questo passaggio è privo di traduzione. Aiuta a tradurlo
-
Lift the green tab to remove the fax feeder from the printer.
-
-
Questo passaggio è privo di traduzione. Aiuta a tradurlo
-
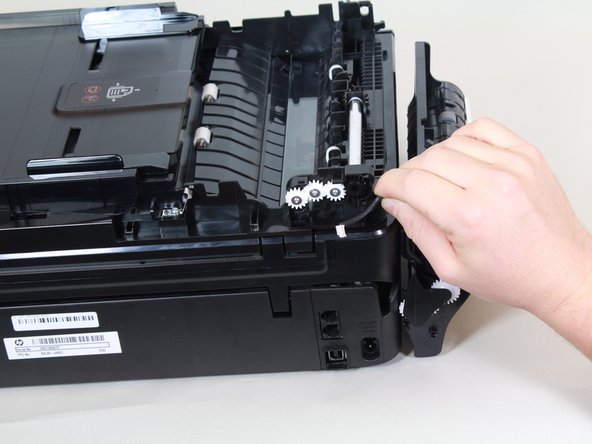
Use the plastic opening tool to pry the pivot point apart while lifting the feeder up.
-
-
Questo passaggio è privo di traduzione. Aiuta a tradurlo
-
Use a screwdriver to remove the single 9mm T10 screw.
-
Remove the wire cover and pull the wire away from the printer. The fax feeder head is now free to be separated from the printer.
-


Annulla: non ho completato questa guida.
Altre 2 persone hanno completato questa guida.
Team

Cal Poly, Team S18-G3, Livingston Winter 2018 Membro di Cal Poly, Team S18-G3, Livingston Winter 2018
CPSU-LIVINGSTON-W18S18G3
4 Membri
18 Guide realizzate
Un commento
I am so glad i found this site…I was able to unjam a lease that had gotten stuck…..thank you thank you7… times over…Lee