Salta al contenuto principale

Questa guida ha delle modifiche più recenti. Passa all'ultima versione non verificata.

HP Mobile Thin Client mt41 Optical Disc Drive Replacement

Cosa ti serve

  1. HP Mobile Thin Client mt41 Optical Disc Drive Replacement, Optical Disc Drive: passo 1, immagine 1 di 2 HP Mobile Thin Client mt41 Optical Disc Drive Replacement, Optical Disc Drive: passo 1, immagine 2 di 2
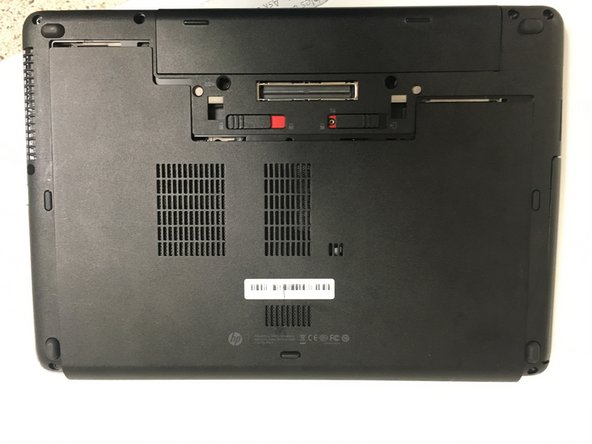
    • Turn off and unplug your laptop. Also, make sure to disconnect all the external devices.

    • After that, slide the two switches to the indicated directions in order to remove the battery and the back cover.

  2. HP Mobile Thin Client mt41 Optical Disc Drive Replacement: passo 2, immagine 1 di 2 HP Mobile Thin Client mt41 Optical Disc Drive Replacement: passo 2, immagine 2 di 2
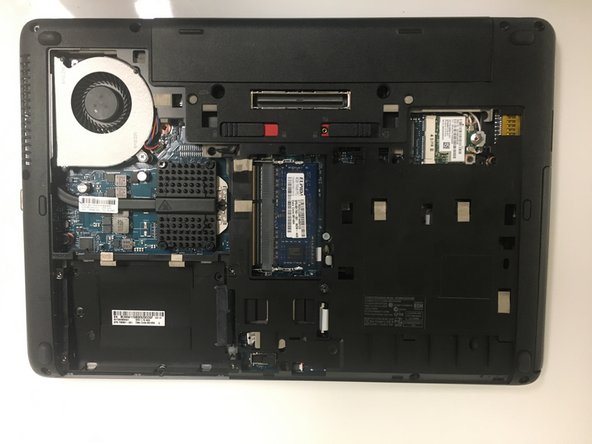
    • Now you're able to remove the battery and the service cover.

    • Slide the battery upward to remove it.

  3. HP Mobile Thin Client mt41 Optical Disc Drive Replacement: passo 3, immagine 1 di 3 HP Mobile Thin Client mt41 Optical Disc Drive Replacement: passo 3, immagine 2 di 3 HP Mobile Thin Client mt41 Optical Disc Drive Replacement: passo 3, immagine 3 di 3
    • Slide the service cover downward.

    • After that, lift the back cover to remove it.

  4. HP Mobile Thin Client mt41 Optical Disc Drive Replacement: passo 4, immagine 1 di 3 HP Mobile Thin Client mt41 Optical Disc Drive Replacement: passo 4, immagine 2 di 3 HP Mobile Thin Client mt41 Optical Disc Drive Replacement: passo 4, immagine 3 di 3
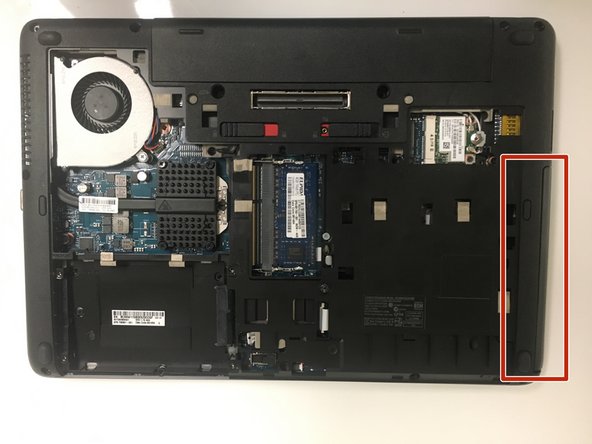
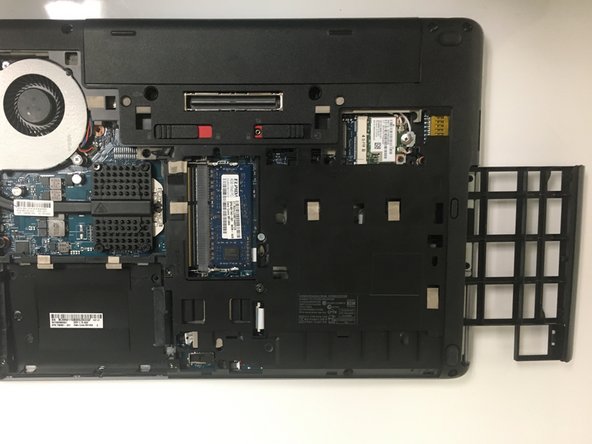
    • Unlock the indicated screw in order to remove the optical drive.

    • Slide the optical drive to completely remove it from the laptop.

Conclusione

To reassemble your device, follow these instructions in reverse order.

0 Commenti

Aggiungi Commento

Visualizza Statistiche:

Ultime 24 Ore: 1

Ultimi 7 Giorni: 6

Ultimi 30 Giorni: 8

Tutti i Tempi: 430