Questa versione può contenere modifiche errate. Passa all'ultima istantanea verificata.
Cosa ti serve
-
Questo passaggio è privo di traduzione. Aiuta a tradurlo
-
Remove the nine screws that keep the back cover secured using the T5 Torx screwdriver.
-
-
Questo passaggio è privo di traduzione. Aiuta a tradurlo
-
Remove the middle plate using the iFixit opening tool.
-
-
Questo passaggio è privo di traduzione. Aiuta a tradurlo
-
Pop the back cover off from its latches by separating the two parts along their seam using the iFixit opening tool.
-
-
-
Questo passaggio è privo di traduzione. Aiuta a tradurlo
-
Lift the back cover once all corners are unclasped from their latches.
-
-
Questo passaggio è privo di traduzione. Aiuta a tradurlo
-
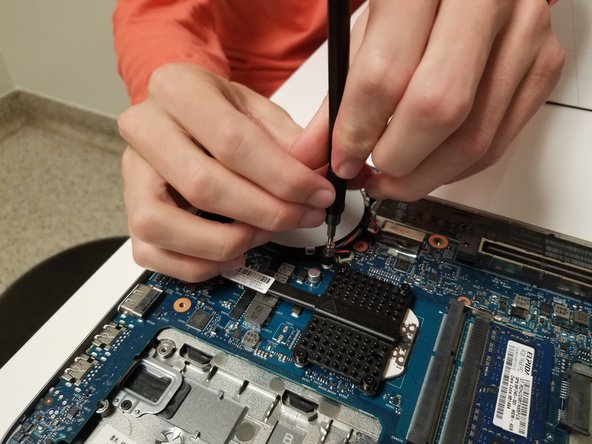
Using a J1 head for your screwdriver, remove the 4 surrounding screws.
-
-
Questo passaggio è privo di traduzione. Aiuta a tradurlo
-
Keep your screws close by, and slowly remove the CPU fan.
-
-
Questo passaggio è privo di traduzione. Aiuta a tradurlo
-
Be mindful of wires, the final step is to unplug the fan from the motherboard, at the base of red and blue wires.
-


Annulla: non ho completato questa guida.
Un'altra persona ha completato questa guida.
Team

University of North Texas, Team S2-G5, Thomas Spring 2018 Membro di University of North Texas, Team S2-G5, Thomas Spring 2018
UNT-THOMAS-S18S2G5
5 Membri
6 Guide realizzate