Questa versione può contenere modifiche errate. Passa all'ultima istantanea verificata.
Cosa ti serve
-
Questo passaggio è privo di traduzione. Aiuta a tradurlo
-
Hold the netbook top-side down with the lid closed.
-
Slide the plastic battery release latches towards the lock symbols.
-
-
Questo passaggio è privo di traduzione. Aiuta a tradurlo
-
Turn the netbook to view its edge.
-
Press both orange eject buttons simultaneously, and use a spudger to pry off the back case.
-
-
Questo passaggio è privo di traduzione. Aiuta a tradurlo
-
Pull the back case off from the front edge.
-
-
-
Questo passaggio è privo di traduzione. Aiuta a tradurlo
-
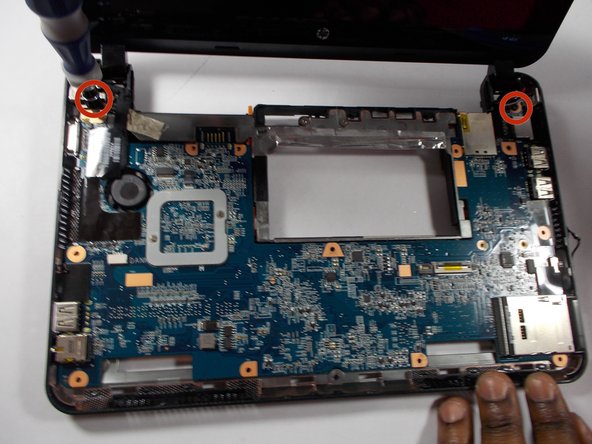
Using a screwdriver, remove the three 6.6 mm screws highlighted with the red circles in the first picture above.
-
-
Questo passaggio è privo di traduzione. Aiuta a tradurlo
-
Once you have removed the screws, flip the netbook over so that the keyboard is now facing upwards. Open the screen as far back as the netbook allows.
-
Using a prying tool, lift upwards and remove the plastic casing that covers the spaces around the keys of the keyboard.
-
-
Questo passaggio è privo di traduzione. Aiuta a tradurlo
-
Lift the latch on the ZIF (zero insertion-force) connector using a plastic opening tool. The ZIF connector is located on the motherboard and is connected to the keyboard through the ribbon cable.
-
Disconnect the ribbon cable from the ZIF connector on the motherboard by lifting it up and out; this completely removes the keyboard.
-
-
Questo passaggio è privo di traduzione. Aiuta a tradurlo
-
Use the spudger to peel the front black plastic plate from the rest of the case, starting at a corner and working your way around the entire case.
-
-
Questo passaggio è privo di traduzione. Aiuta a tradurlo
-
Locate the cable that connects the trackpad to the motherboard and carefully remove it.
-
-
Questo passaggio è privo di traduzione. Aiuta a tradurlo
-
Use a screwdriver to remove the 9.3 mm screws on top of the motherboard.
-
-
Questo passaggio è privo di traduzione. Aiuta a tradurlo
-
Remove the gold tape that holds the motherboard.
-
-
Questo passaggio è privo di traduzione. Aiuta a tradurlo
-
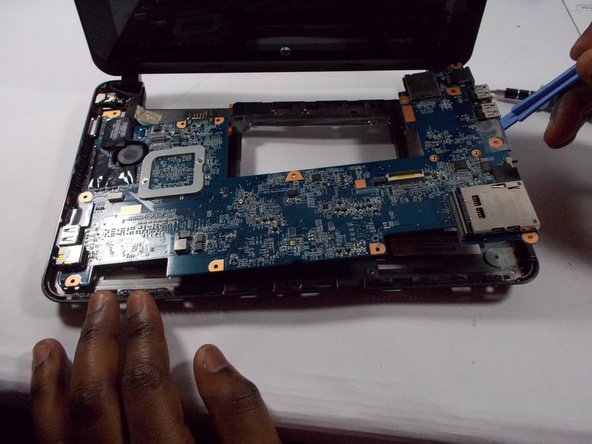
Use a spudger to carefully remove the motherboard.
-
-
Questo passaggio è privo di traduzione. Aiuta a tradurlo
-
Flip over the motherboard to get to the fan.
-
Carefully remove the cable that is attaches the fan to the motherboard.
-
Remove the screws that hold in the fan.
-
The fan is now able to be completely removed.
-


Annulla: non ho completato questa guida.
Altre 3 persone hanno completato questa guida.
Team

UMass Dartmouth, Team 3-6, Calaway Spring 2014 Membro di UMass Dartmouth, Team 3-6, Calaway Spring 2014
UMASSD-CALAWAY-S14S3G6
3 Membri
2 Guide realizzate