Salta al contenuto principale

HP G62 347NR CD/DVD Drive Replacement

Cosa ti serve

  1. HP G62 347NR  CD/DVD Drive Replacement, CD/DVD Drive: passo 1, immagine 1 di 1
    • Make sure the device is turned off before removing the battery to avoid loss or corruption of files.

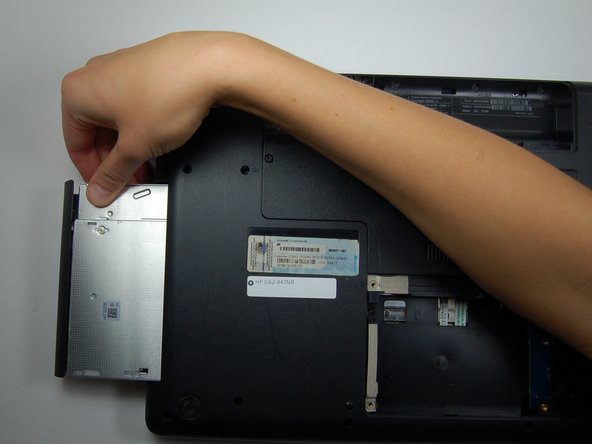
    • Turn the device over so the bottom is facing up.

    • Slide the battery release to the left until you hear a click.

    • Once you hear a click, the battery will have been released from the battery compartment.

  2. HP G62 347NR  CD/DVD Drive Replacement: passo 2, immagine 1 di 1
    • Remove the battery, carefully, from the compartment.

  3. HP G62 347NR  CD/DVD Drive Replacement: passo 3, immagine 1 di 1
    • Find the hard drive compartment with two Phillips head screws.

    • Use the PH1 screwdriver to loosen and remove both screws.

    • Gently remove the hard drive compartment.

  4. HP G62 347NR  CD/DVD Drive Replacement: passo 4, immagine 1 di 1
    • On the far left of the hard drive compartment, find the Phillips head screw.

    • Remove the Phillips head screw with the PH1 screwdriver.

  5. HP G62 347NR  CD/DVD Drive Replacement: passo 5, immagine 1 di 2 HP G62 347NR  CD/DVD Drive Replacement: passo 5, immagine 2 di 2
    • Get the plastic opening tool and place it between the laptop and the CD/DVD drive. Place it toward the center of the drive for maximum support.

    • Carefully pry the CD/DVD drive open.

    • Slide the CD/DVD drive out once it is pried open.

Conclusione

To reassemble your device, follow these instructions in reverse order.

Team

Texas Tech, Team 6-1, Bennett Fall 2016 Membro di Texas Tech, Team 6-1, Bennett Fall 2016

TTU-BENNETT-F16S6G1

3 Membri

3 Guide realizzate

0 Commenti

Aggiungi Commento

Visualizza Statistiche:

Ultime 24 Ore: 0

Ultimi 7 Giorni: 2

Ultimi 30 Giorni: 6

Tutti i Tempi: 505