Salta al contenuto principale

HP Envy x360 m6-aq105dx Solid State Drive Replacement

Guida Archiviata
Questa guida รจ mantenuta solo per scopi storici. Usa la versione aggiornata della guida per eseguire la riparazione.

Cosa ti serve

  1. HP Envy x360 m6-aq105dx Solid State Drive Replacement, Back Cover: passo 1, immagine 1 di 1
    • Ground yourself by touching a metal object or surface. This prevents electrical damage to other components in the laptop.

    • Remove the two 7.8 mm screws using the Phillips #0 screwdriver.

    • Remove the six 5.2 mm screws using the Torx T5 screwdriver.

  2. HP Envy x360 m6-aq105dx Solid State Drive Replacement: passo 2, immagine 1 di 1
    • Light to moderate force is required to remove the back cover.

    • Insert the Jimmy in between the frame of the laptop and the removable back cover and remove the back cover from the device.

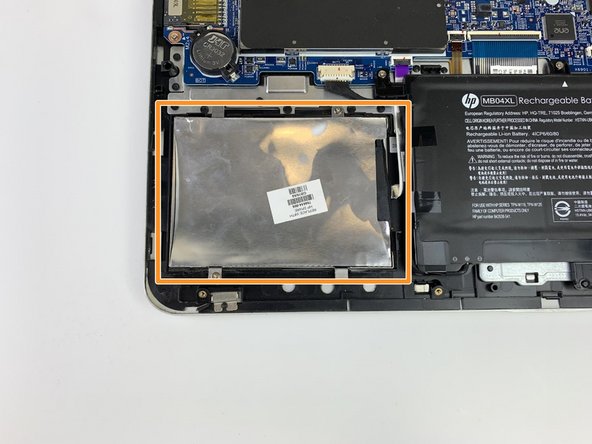
  3. HP Envy x360 m6-aq105dx Solid State Drive Replacement, Solid State Drive: passo 3, immagine 1 di 1
    • Remove the two 4.6 mm screws securing old hard drive/solid-state drive in place using the Phillips #0 screwdriver.

  4. HP Envy x360 m6-aq105dx Solid State Drive Replacement: passo 4, immagine 1 di 2 HP Envy x360 m6-aq105dx Solid State Drive Replacement: passo 4, immagine 2 di 2
    • Disconnect the SATA cable connected to the old hard drive/solid-state drive.

    • Remove the solid state drive.

Conclusione

To reassemble your device, follow these instructions in reverse order.

0 Commenti

Aggiungi Commento

Visualizza Statistiche:

Ultime 24 Ore: 0

Ultimi 7 Giorni: 0

Ultimi 30 Giorni: 0

Tutti i Tempi: 36