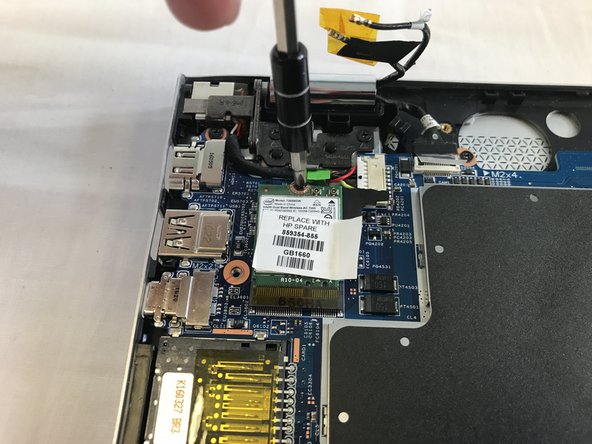
Salta al contenuto principale

HP Envy x360 m6-aq005dx WiFi Replacement

Cosa ti serve

  1. HP Envy x360 m6-aq005dx WiFi Replacement, Back Panel: passo 1, immagine 1 di 2 HP Envy x360 m6-aq005dx WiFi Replacement, Back Panel: passo 1, immagine 2 di 2
    • Use the plastic opening tool to remove the gray rubber pads on the bottom of the laptop. For our device we only needed to remove the two at the top.

  2. HP Envy x360 m6-aq005dx WiFi Replacement: passo 2, immagine 1 di 3 HP Envy x360 m6-aq005dx WiFi Replacement: passo 2, immagine 2 di 3 HP Envy x360 m6-aq005dx WiFi Replacement: passo 2, immagine 3 di 3
    • Use a Torx T5 screwdriver to remove the six 5.1 mm screws.

    • Use a JIS #1 screwdriver to remove the two 7.2mm screws.

  3. HP Envy x360 m6-aq005dx WiFi Replacement: passo 3, immagine 1 di 1
    • Use a plastic opening tool to pry open the case. Go slowly around the edge. You will hear popping noises, such are due to popping open the small joints that keep the cover attached.

  4. HP Envy x360 m6-aq005dx WiFi Replacement, WiFi: passo 4, immagine 1 di 1
    • Battery might cause a small electric shock

    • Use tweezers to disconnect the battery from the motherboard.

  5. HP Envy x360 m6-aq005dx WiFi Replacement: passo 5, immagine 1 di 1
    • Use the plastic opening tool to disconnect Disconnect the two cables attached to the wifi

  6. HP Envy x360 m6-aq005dx WiFi Replacement: passo 6, immagine 1 di 2 HP Envy x360 m6-aq005dx WiFi Replacement: passo 6, immagine 2 di 2
    • Use a PH0 tool bit to remove the one 2.8mm screw.

Conclusione

To reassemble your device, follow these instructions in reverse order.

Team

USF Tampa, Team S13-G17, Cagle Fall 2017 Membro di USF Tampa, Team S13-G17, Cagle Fall 2017

USFT-CAGLE-F17S13G17

4 Membri

7 Guide realizzate

0 Commenti

Aggiungi Commento

Visualizza Statistiche:

Ultime 24 Ore: 0

Ultimi 7 Giorni: 0

Ultimi 30 Giorni: 0

Tutti i Tempi: 327