Salta al contenuto principale

HP Envy x360 15m-bp111dx Hard Drive Replacement

Cosa ti serve

  1. HP Envy x360 15m-bp111dx Hard Drive Replacement, Back Panel: passo 1, immagine 1 di 2 HP Envy x360 15m-bp111dx Hard Drive Replacement, Back Panel: passo 1, immagine 2 di 2
    • Remove the rubber feet to access the screws.

    • Using a Phillips #0 screwdriver, remove the four 7 mm screws.

    • Using a T5 Torx screwdriver, remove the three 5 mm screws.

  2. HP Envy x360 15m-bp111dx Hard Drive Replacement: passo 2, immagine 1 di 3 HP Envy x360 15m-bp111dx Hard Drive Replacement: passo 2, immagine 2 di 3 HP Envy x360 15m-bp111dx Hard Drive Replacement: passo 2, immagine 3 di 3
    • Insert opening picks or an opening tool inside the edge of the chassis to separate the back panel from the rest of the computer.

    • You may hear snapping as the clips are released while you work your way around the perimeter of the computer. This is normal.

    • Remove the back case.

  3. HP Envy x360 15m-bp111dx Hard Drive Replacement, Battery: passo 3, immagine 1 di 2 HP Envy x360 15m-bp111dx Hard Drive Replacement, Battery: passo 3, immagine 2 di 2
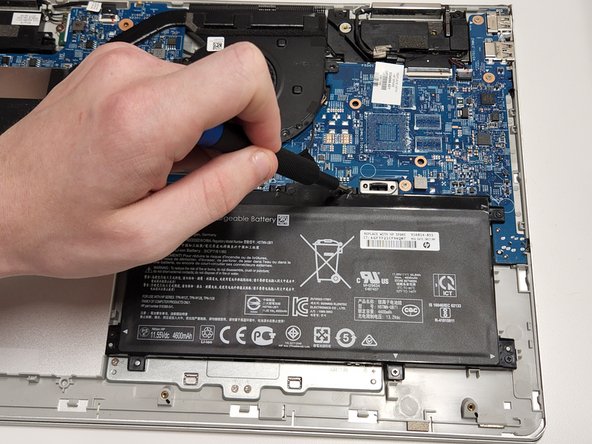
    • Use a Phillips screwdriver to remove the seven 4 mm screws securing the battery.

  4. HP Envy x360 15m-bp111dx Hard Drive Replacement: passo 4, immagine 1 di 3 HP Envy x360 15m-bp111dx Hard Drive Replacement: passo 4, immagine 2 di 3 HP Envy x360 15m-bp111dx Hard Drive Replacement: passo 4, immagine 3 di 3
    • Carefully lift the battery, and pull it towards you to remove it.

  5. HP Envy x360 15m-bp111dx Hard Drive Replacement, Hard Drive: passo 5, immagine 1 di 1
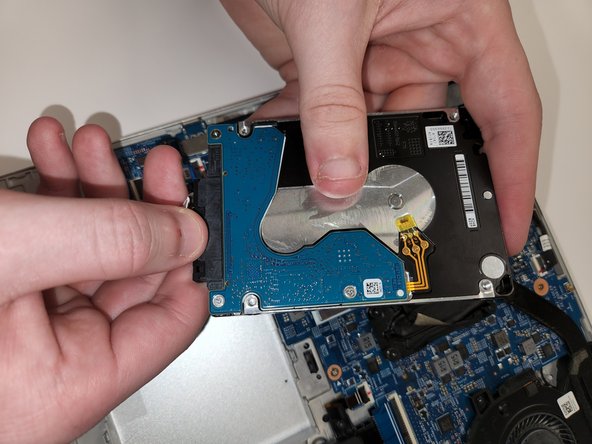
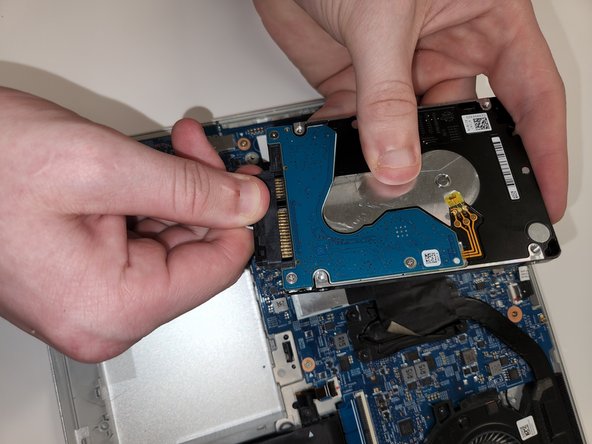
    • The hard drive bay is located in the lower left corner of the computer.

    • The hard drive will be covered by a black rubber sheath which can be removed by simply pulling it off of the hard drive (not pictured).

  6. HP Envy x360 15m-bp111dx Hard Drive Replacement: passo 6, immagine 1 di 3 HP Envy x360 15m-bp111dx Hard Drive Replacement: passo 6, immagine 2 di 3 HP Envy x360 15m-bp111dx Hard Drive Replacement: passo 6, immagine 3 di 3
    • Pull the rubber casing away from the drive (not pictured here) and gently lift the hard drive out of the computer.

    • Unplug the drive from power by grabbing the SATA / power cable on the plastic edge and pulling it away from the drive.

    • Do not disconnect the ribbon cable from the motherboard.

  7. HP Envy x360 15m-bp111dx Hard Drive Replacement: passo 7, immagine 1 di 1
    • The hard drive is now removed and can be replaced.

Conclusione

To reassemble your device, follow these instructions in reverse order.

Ross Snead

Membro da: 02/22/22

162 Reputazione

1 Guida realizzata

Team

Clemson, Team 2-2, Hunter Spring 2022 Membro di Clemson, Team 2-2, Hunter Spring 2022

CLEM-HUNTER-S22S2G2

5 Membri

6 Guide realizzate

0 Commenti

Aggiungi Commento

Visualizza Statistiche:

Ultime 24 Ore: 4

Ultimi 7 Giorni: 8

Ultimi 30 Giorni: 19

Tutti i Tempi: 397