Salta al contenuto principale

HP Envy Touchsmart m6-k125dx Motherboard Replacement

Cosa ti serve

  1. HP Envy Touchsmart m6-k125dx Motherboard Replacement, Back Panel: passo 1, immagine 1 di 2 HP Envy Touchsmart m6-k125dx Motherboard Replacement, Back Panel: passo 1, immagine 2 di 2
    • Turn the laptop over so that the bottom is facing up

    • Using the J0 screwdriver, unscrew all 12 M2.5x5.5 screws from the back panel.

  2. HP Envy Touchsmart m6-k125dx Motherboard Replacement: passo 2, immagine 1 di 1
    • Carefully remove the back panel to reveal the inner components.

  3. HP Envy Touchsmart m6-k125dx Motherboard Replacement, Cooling Fan: passo 3, immagine 1 di 2 HP Envy Touchsmart m6-k125dx Motherboard Replacement, Cooling Fan: passo 3, immagine 2 di 2
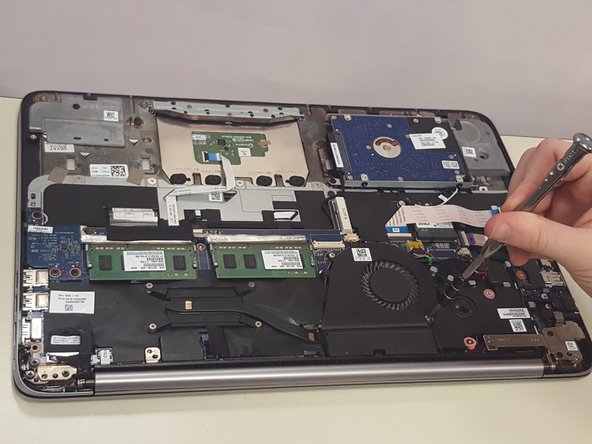
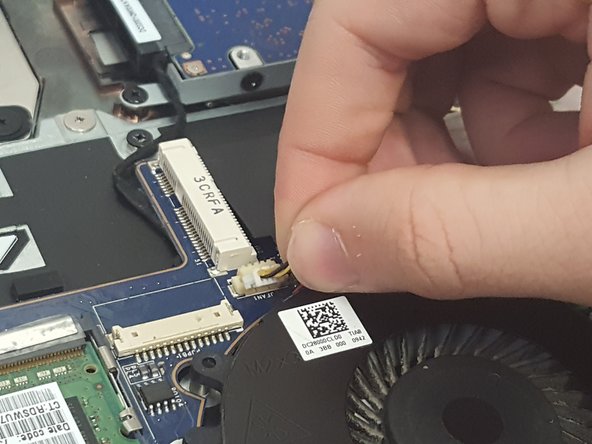
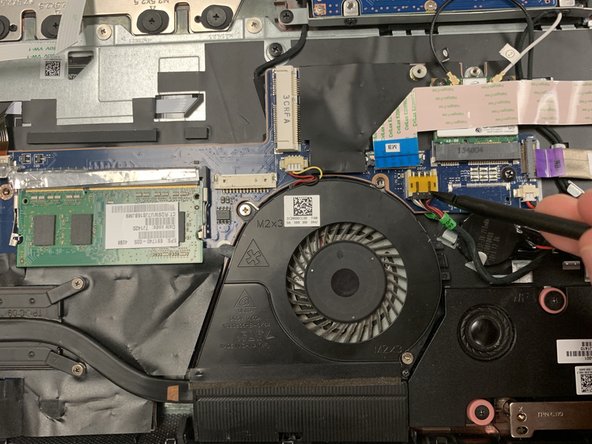
    • Use the J0 screwdriver to remove the two M2.0x3.0 screws holding in the cooling fan

  4. HP Envy Touchsmart m6-k125dx Motherboard Replacement: passo 4, immagine 1 di 3 HP Envy Touchsmart m6-k125dx Motherboard Replacement: passo 4, immagine 2 di 3 HP Envy Touchsmart m6-k125dx Motherboard Replacement: passo 4, immagine 3 di 3
    • Unplug the cord and carefully remove the cooling fan

  5. HP Envy Touchsmart m6-k125dx Motherboard Replacement, Motherboard: passo 5, immagine 1 di 2 HP Envy Touchsmart m6-k125dx Motherboard Replacement, Motherboard: passo 5, immagine 2 di 2
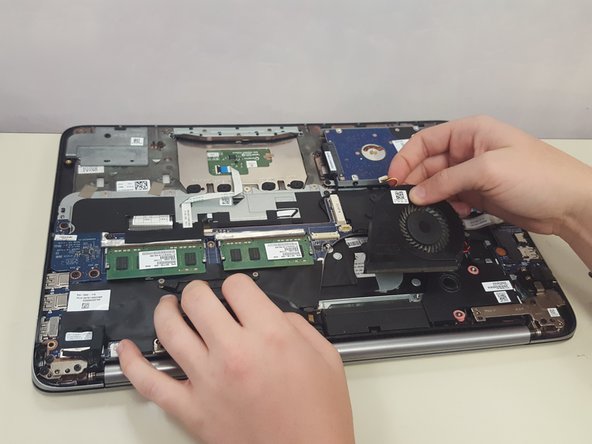
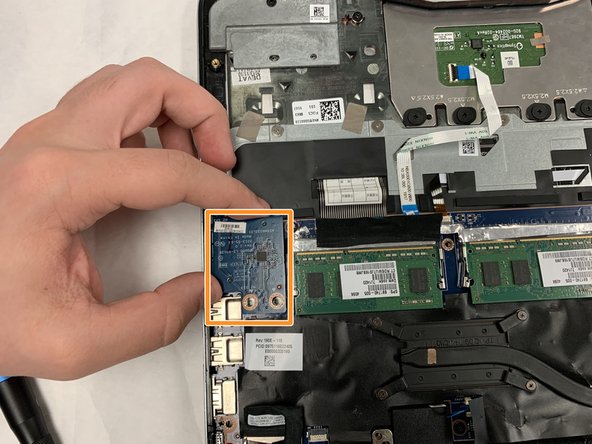
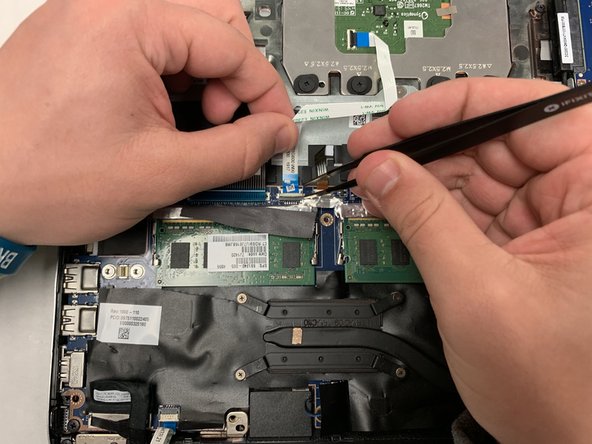
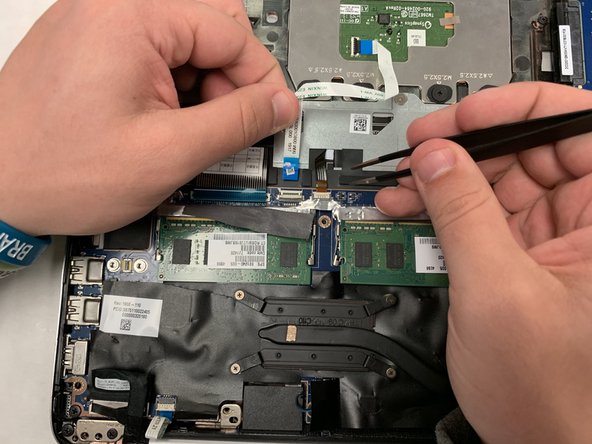
    • Use the J1 screwdriver to remove the three M2.5x2.5 screws on the SD card reader.

    • Remove the SD card reader and set it aside.

  6. HP Envy Touchsmart m6-k125dx Motherboard Replacement: passo 6, immagine 1 di 3 HP Envy Touchsmart m6-k125dx Motherboard Replacement: passo 6, immagine 2 di 3 HP Envy Touchsmart m6-k125dx Motherboard Replacement: passo 6, immagine 3 di 3
    • Disconnect the six ZIF connectors.

    • Use the tweezers to flip up the plastic retaining flap.

    • Pull the cable out horizontally.

  7. HP Envy Touchsmart m6-k125dx Motherboard Replacement: passo 7, immagine 1 di 2 HP Envy Touchsmart m6-k125dx Motherboard Replacement: passo 7, immagine 2 di 2
    • Disconnect the four remaining connectors.

    • Use a plastic opening tool or spudger if necessary to pry the connector apart.

  8. HP Envy Touchsmart m6-k125dx Motherboard Replacement: passo 8, immagine 1 di 2 HP Envy Touchsmart m6-k125dx Motherboard Replacement: passo 8, immagine 2 di 2
    • Use the J0 screwdriver to remove the two M2.5x2.5 screws on the wireless network card.

    • Slide the card horizontally toward the front of the laptop and out of its socket.

  9. HP Envy Touchsmart m6-k125dx Motherboard Replacement: passo 9, immagine 1 di 1
    • Use the J1 screwdriver to remove the four M2.5x2.5 screws that secure the motherboard to the case.

    • Pull up on the right side of the motherboard, away from the USB ports, then slide out to the right.

Conclusione

To reassemble your device, follow these instructions in reverse order.

Alan Orr

Membro da: 04/06/19

139 Reputazione

1 Guida realizzata

Team

IUPUI, Team S14-G14, Wilson Spring 2019 Membro di IUPUI, Team S14-G14, Wilson Spring 2019

IUPUI-WILSON-S19S14G14

4 Membri

3 Guide realizzate

0 Commenti

Aggiungi Commento

Visualizza Statistiche:

Ultime 24 Ore: 1

Ultimi 7 Giorni: 6

Ultimi 30 Giorni: 9

Tutti i Tempi: 614