Salta al contenuto principale

HP Elite X2 1013 G3 Motherboard Replacement

Cosa ti serve

  1. HP Elite X2 1013 G3 Motherboard Replacement, Screen: passo 1, immagine 1 di 1
    • Flip the device over so the base is facing the ceiling.

    • Lift up the tablet stand.

    • Remove the four 2 mm screws from the tablet using a T5 Torx screwdriver.

  2. HP Elite X2 1013 G3 Motherboard Replacement: passo 2, immagine 1 di 2 HP Elite X2 1013 G3 Motherboard Replacement: passo 2, immagine 2 di 2
    • Flip the tablet over with the screen facing upwards.

    • Place the suction handle in the center of the screen and slowly lift off the screen until it is at a 30 degree angle, starting by gently prying up the bottom.

    • Do not pull the screen beyond a 30 degree angle. Additional internal components must be disconnected first.

  3. HP Elite X2 1013 G3 Motherboard Replacement: passo 3, immagine 1 di 2 HP Elite X2 1013 G3 Motherboard Replacement: passo 3, immagine 2 di 2
    • With the screen lifted at a 30 degree angle, gently disconnect the yellow ribbon cable at the end connected to the screen.

    • Gently disconnect the orange ribbon cable at the end connected to the bottom plate.

  4. HP Elite X2 1013 G3 Motherboard Replacement: passo 4, immagine 1 di 2 HP Elite X2 1013 G3 Motherboard Replacement: passo 4, immagine 2 di 2
    • Remove the screen from the tablet.

  5. HP Elite X2 1013 G3 Motherboard Replacement, Battery: passo 5, immagine 1 di 1
    • Use the Phillips #00 screwdriver to remove the six 2 mm screws.

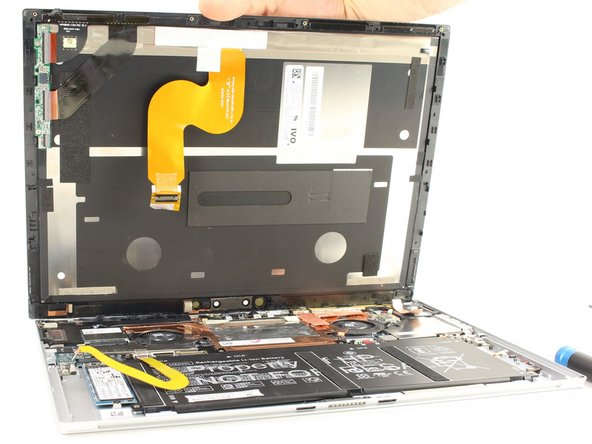
    • Gently disconnect the two connectors.

  6. HP Elite X2 1013 G3 Motherboard Replacement: passo 6, immagine 1 di 1
    • Lift the battery out of the housing.

  7. HP Elite X2 1013 G3 Motherboard Replacement, Motherboard: passo 7, immagine 1 di 1
    • Remove five screws from the heat sink using a Phillips #0 screwdriver.

    • Remove the heat sink from the tablet.

  8. HP Elite X2 1013 G3 Motherboard Replacement: passo 8, immagine 1 di 1
    • Remove the single screw from the lightning cable connector using a Phillips #0 screwdriver.

    • Lift the lightning cable connector out of the tablet.

  9. HP Elite X2 1013 G3 Motherboard Replacement: passo 9, immagine 1 di 1
    • Remove the ten screws holding down the motherboard using a Phillips #0 screwdriver.

  10. HP Elite X2 1013 G3 Motherboard Replacement: passo 10, immagine 1 di 1
    • Remove the motherboard from the tablet.

Conclusione

To reassemble your device, follow these instructions in reverse order.

0 Commenti

Aggiungi Commento

Visualizza Statistiche:

Ultime 24 Ore: 0

Ultimi 7 Giorni: 9

Ultimi 30 Giorni: 26

Tutti i Tempi: 516