Questa versione può contenere modifiche errate. Passa all'ultima istantanea verificata.
Cosa ti serve
-
Questo passaggio è privo di traduzione. Aiuta a tradurlo
-
Open the front access panel by placing your finger in the front slot and pulling gently.
-
-
Questo passaggio è privo di traduzione. Aiuta a tradurlo
-
Open the protective lid that is covering the glass. Press gently against the base of the panel to remove the lid from the rest of the printer.
-
-
Questo passaggio è privo di traduzione. Aiuta a tradurlo
-
Remove the four 9mm T10 Torx screws on the top.
-
-
Questo passaggio è privo di traduzione. Aiuta a tradurlo
-
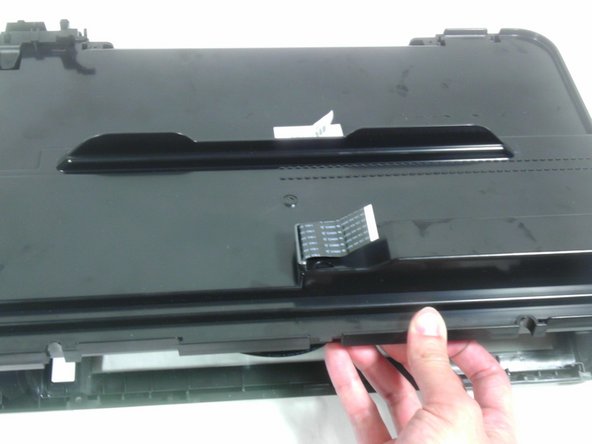
Carefully lift the top panel off of the printer.
-
Do not tear or damage the two cables that connect the top lid to the motherboard.
-
-
-
Questo passaggio è privo di traduzione. Aiuta a tradurlo
-
Remove the two cables by gripping each one close to their connection ports on the motherboard and gently disconnecting them.
-
-
Questo passaggio è privo di traduzione. Aiuta a tradurlo
-
Remove one 9mm T10 Torx screw from the back of the printer lid.
-
-
Questo passaggio è privo di traduzione. Aiuta a tradurlo
-
Press outward on the plastic tab holding the back panel in place.
-
-
Questo passaggio è privo di traduzione. Aiuta a tradurlo
-
Pull the back panel towards you and lift it away from the rest of the printer cover.
-
-
Questo passaggio è privo di traduzione. Aiuta a tradurlo
-
Remove one 9mm T10 Torx screw from the white retaining tab.
-
-
Questo passaggio è privo di traduzione. Aiuta a tradurlo
-
To remove the scanner glass, gently push it towards you.
-
Slide glass panel until it is completely removed from printer.
-
Annulla: non ho completato questa guida.
Altre 3 persone hanno completato questa guida.


