Questa versione può contenere modifiche errate. Passa all'ultima istantanea verificata.
Cosa ti serve
-
Questo passaggio è privo di traduzione. Aiuta a tradurlo
-
Remove the back two 14.0 mm Torx #10 screws.
-
-
Questo passaggio è privo di traduzione. Aiuta a tradurlo
-
Lay the printer on its back.
-
Grab the paper tray by its right side and pull it to the left and up.
-
-
Questo passaggio è privo di traduzione. Aiuta a tradurlo
-
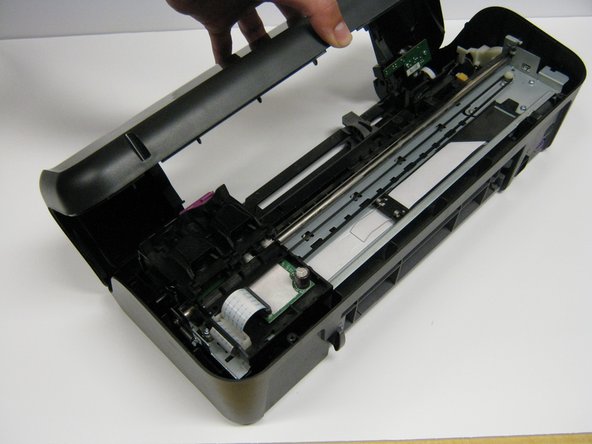
Open the frontal access panel by lifting it from the top.
-
Similar to the paper tray, grab it from the right side and pull it to the left and up.
-
-
-
Questo passaggio è privo di traduzione. Aiuta a tradurlo
-
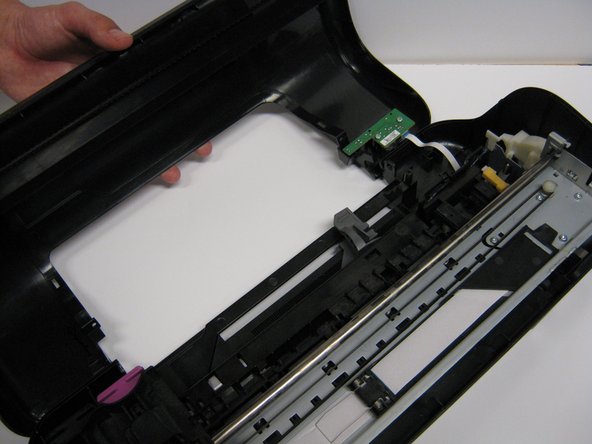
Take out the two frontal 14.0 mm Torx #10 screws.
-
Carefully lift the frontal cover.
-
-
Questo passaggio è privo di traduzione. Aiuta a tradurlo
-
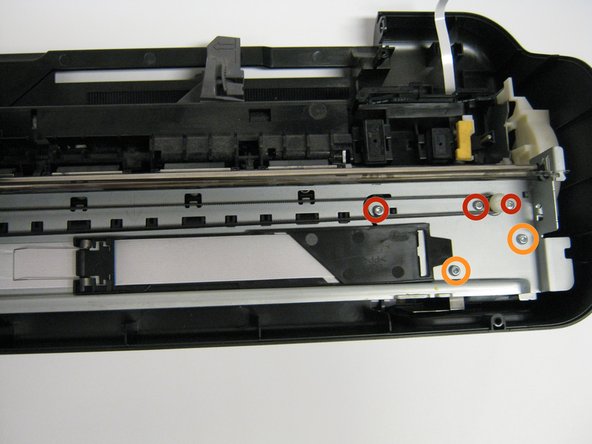
Remove the five 13.0 mm Torx #10 screws found on top of the frame.
-
Remove the four 9.0 mm Torx #10 smaller screws.
-
-
Questo passaggio è privo di traduzione. Aiuta a tradurlo
-
Now detach the white strip and wires by gently lifting them up.
-
-
Questo passaggio è privo di traduzione. Aiuta a tradurlo
-
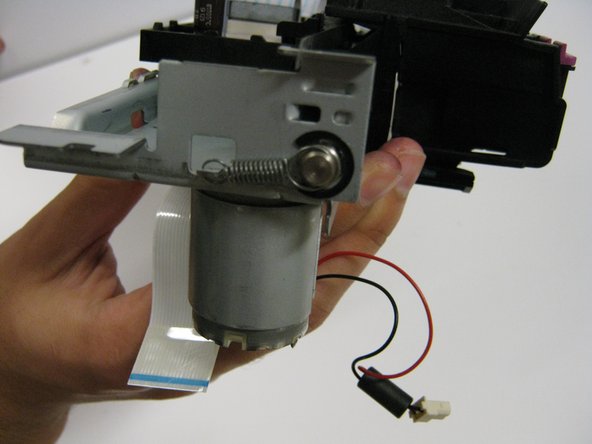
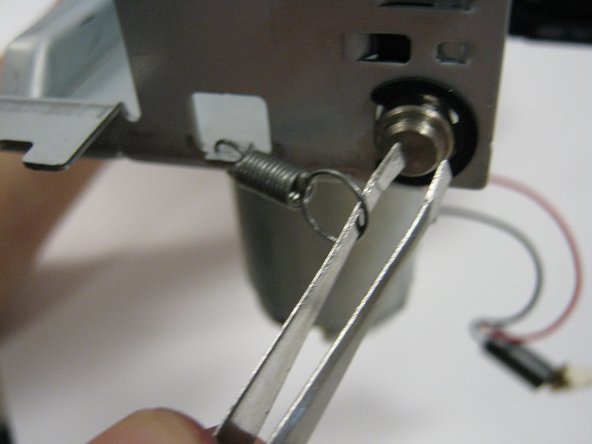
Locate the springs. They will be on the side of the metal frame.
-
Using the tweezers, grab the loop of the spring that is connected to the bar.
-
Remove the spring by lifting the loop.
-


Annulla: non ho completato questa guida.
Un'altra persona ha completato questa guida.
Team

Cal Poly, Team 1-41, Maness Winter 2014 Membro di Cal Poly, Team 1-41, Maness Winter 2014
CPSU-MANESS-W14S1G41
4 Membri
14 Guide realizzate