Salta al contenuto principale

HP Chromebook 11 G6 EE Motherboard Replacement

Cosa ti serve

  1. HP Chromebook 11 G6 EE Motherboard Replacement, Remove keyboard screws: passo 1, immagine 1 di 1
    • Remove the screws from the bottom case.

    • Two M2.5x8 PH1 screws.

    • Six M2.5x6 PH1 screws.

  2. HP Chromebook 11 G6 EE Motherboard Replacement, Remove keyboard: passo 2, immagine 1 di 2 HP Chromebook 11 G6 EE Motherboard Replacement, Remove keyboard: passo 2, immagine 2 di 2
    • Use a plastic opening pick to release the clips that secure the keyboard.

    • Avoid too much prying force. If you pry too hard, you'll break your pick. The trick is to get the pick in just a little bit, and then run it along the edge of the device.

    • DO NOT use metal tools for this step.

  3. HP Chromebook 11 G6 EE Motherboard Replacement, Disconnect keyboard: passo 3, immagine 1 di 1
    • Lift up the keyboard part way, being careful to not put stress on the keyboard and touchpad ribbon cables.

  4. HP Chromebook 11 G6 EE Motherboard Replacement, Disconnect keyboard: passo 4, immagine 1 di 3 HP Chromebook 11 G6 EE Motherboard Replacement, Disconnect keyboard: passo 4, immagine 2 di 3 HP Chromebook 11 G6 EE Motherboard Replacement, Disconnect keyboard: passo 4, immagine 3 di 3
    • Lift up the keyboard part way, being careful to not put stress on the keyboard and touchpad ribbon cables.

    • Disconnect the keyboard ZIF connector

  5. HP Chromebook 11 G6 EE Motherboard Replacement, Disconnect touchpad: passo 5, immagine 1 di 2 HP Chromebook 11 G6 EE Motherboard Replacement, Disconnect touchpad: passo 5, immagine 2 di 2
    • Disconnect touchpad ZIF connector.

    • Now you can remove the keyboard assembly completely.

    • If your replacement keyboard came with touchpad and cable, you can start reassembling the computer now. If you need to retrieve the touchpad from the old keyboard, keep reading.

  6. HP Chromebook 11 G6 EE Motherboard Replacement, Remove touchpad: passo 7, immagine 1 di 1
    • Lift up the plastic guard covering the three PH0 M2x2 screws and remove them.

    • Lift the touchpad out and place into new keyboard.

    • Be sure to evenly tighten the touchpad screws during reinstallation. Even a small variance can lead to a touchpad that feels "off".

  7. HP Chromebook 11 G6 EE Motherboard Replacement, Disconnect battery: passo 8, immagine 1 di 2 HP Chromebook 11 G6 EE Motherboard Replacement, Disconnect battery: passo 8, immagine 2 di 2
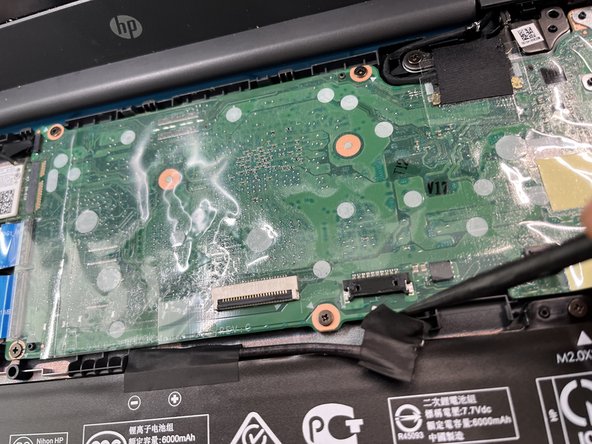
    • Peel back the tape over the battery connector, and use a spudger or your fingernails to pull the connector out.

    • Avoid using metal tools prior to this step to reduce the risk of shorting out components.

  8. HP Chromebook 11 G6 EE Motherboard Replacement, Remove I/O cover: passo 9, immagine 1 di 3 HP Chromebook 11 G6 EE Motherboard Replacement, Remove I/O cover: passo 9, immagine 2 di 3 HP Chromebook 11 G6 EE Motherboard Replacement, Remove I/O cover: passo 9, immagine 3 di 3
    • Remove two M2x3.5 screws

    • Remove the I/O cover

  9. HP Chromebook 11 G6 EE Motherboard Replacement, Disconnect LVDS cable: passo 10, immagine 1 di 3 HP Chromebook 11 G6 EE Motherboard Replacement, Disconnect LVDS cable: passo 10, immagine 2 di 3 HP Chromebook 11 G6 EE Motherboard Replacement, Disconnect LVDS cable: passo 10, immagine 3 di 3
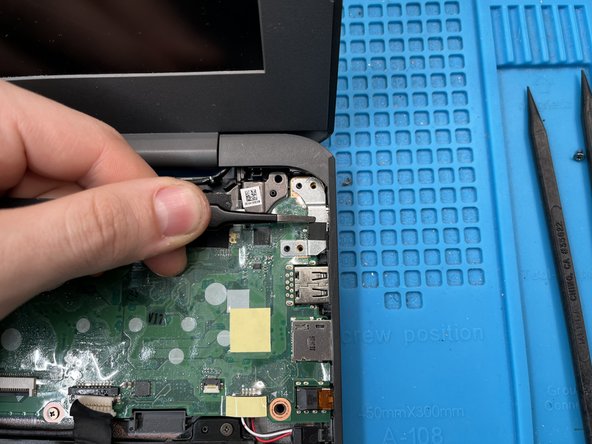
    • Peel back the tape covering the LVDS cable

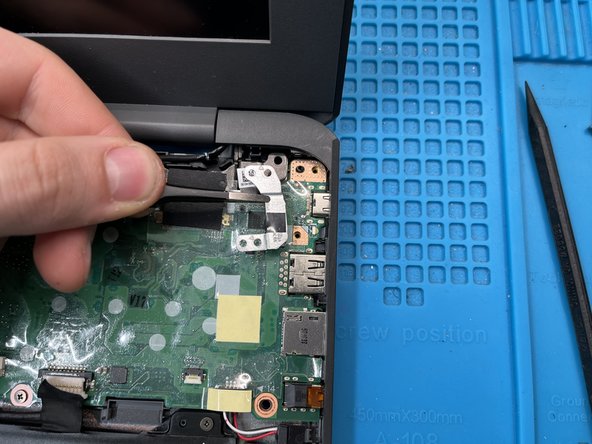
    • Grasp the cable with tweezers or your fingers and pull it gently toward the screen. Avoid pulling upward, as this connector can be fragile.

    • When reinserting, make sure it is seated all the way. If you're backlight doesn't work or you're not getting an image, check that you inserted this LVDS cable all the way.

  10. HP Chromebook 11 G6 EE Motherboard Replacement, Fold back protective plastic: passo 11, immagine 1 di 3 HP Chromebook 11 G6 EE Motherboard Replacement, Fold back protective plastic: passo 11, immagine 2 di 3 HP Chromebook 11 G6 EE Motherboard Replacement, Fold back protective plastic: passo 11, immagine 3 di 3
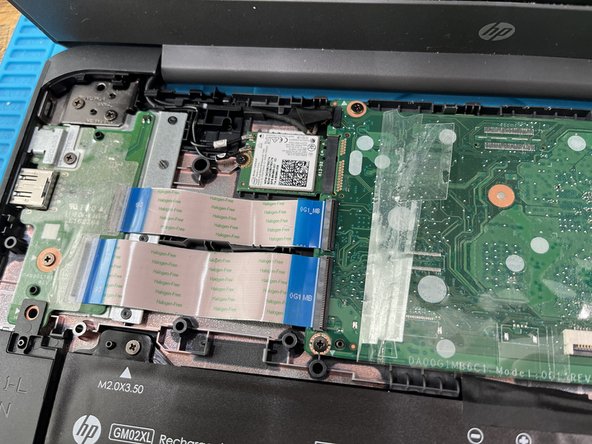
    • Use a plastic spudger to separate the protective plastic from the motherboard, which will make the next few steps much easier.

  11. HP Chromebook 11 G6 EE Motherboard Replacement, Disconnect daughterboard: passo 12, immagine 1 di 3 HP Chromebook 11 G6 EE Motherboard Replacement, Disconnect daughterboard: passo 12, immagine 2 di 3 HP Chromebook 11 G6 EE Motherboard Replacement, Disconnect daughterboard: passo 12, immagine 3 di 3
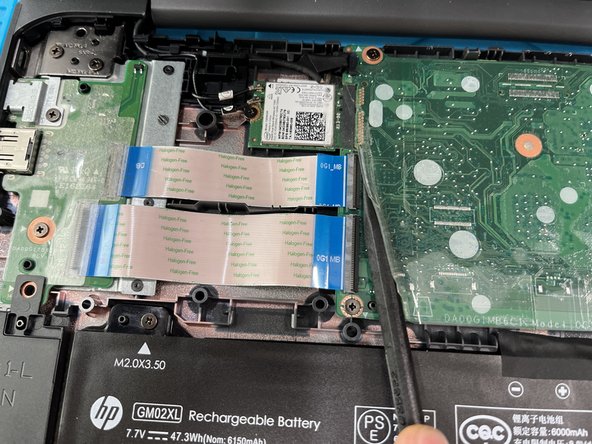
    • Lift up the arm on the back side of the ZIF connector holding the daughterboard ribbon cables in place.

    • If done correctly, the cables should pull out of their socket without any force.

    • When reinserting, make sure the white line on the connect is evenly parallel with the socket.

  12. HP Chromebook 11 G6 EE Motherboard Replacement, Disconnect antenna cables: passo 13, immagine 1 di 3 HP Chromebook 11 G6 EE Motherboard Replacement, Disconnect antenna cables: passo 13, immagine 2 di 3 HP Chromebook 11 G6 EE Motherboard Replacement, Disconnect antenna cables: passo 13, immagine 3 di 3
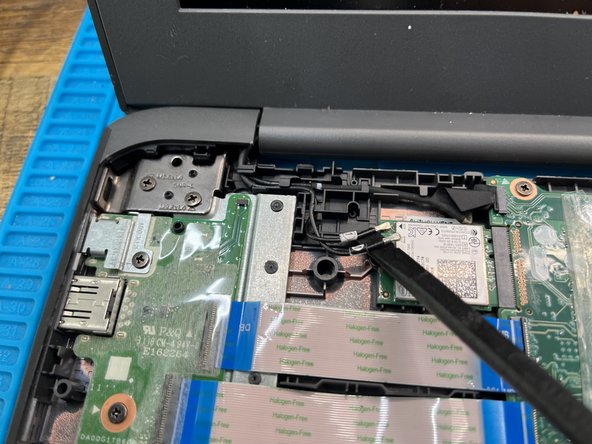
    • Gently use a spudger to lift the antenna cables out of their sockets.

  13. HP Chromebook 11 G6 EE Motherboard Replacement, Remove wifi card: passo 14, immagine 1 di 3 HP Chromebook 11 G6 EE Motherboard Replacement, Remove wifi card: passo 14, immagine 2 di 3 HP Chromebook 11 G6 EE Motherboard Replacement, Remove wifi card: passo 14, immagine 3 di 3
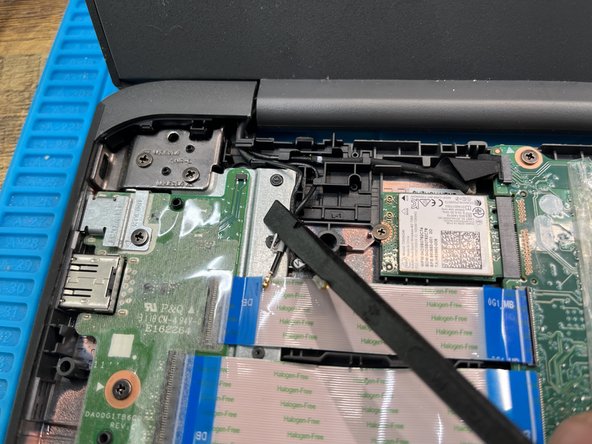
    • Remove the M2x2.5 PH0 screw holding the wifi card in place

    • Pull the wifi card straight away from the motherboard. Do not pull up on it.

    • Rocking the card from side to side may help

  14. HP Chromebook 11 G6 EE Motherboard Replacement, Disconnect speakers: passo 15, immagine 1 di 1
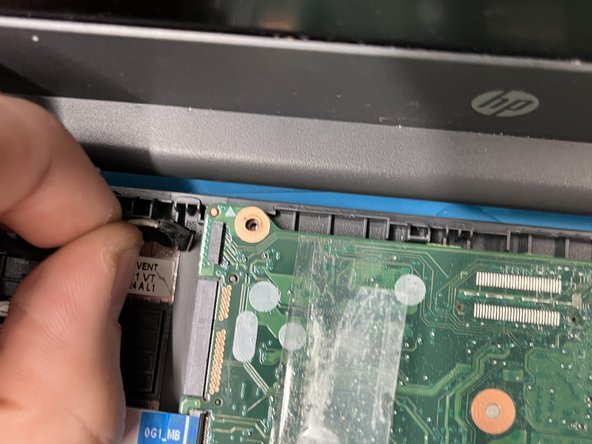
    • Fingernails tend to work best, as this connector doesn't like coming loose. A spudger theoretically should work too.

  15. HP Chromebook 11 G6 EE Motherboard Replacement, Remove motherboard screws: passo 16, immagine 1 di 1
    • Remove the four M2x3.5 PH1 screws.

  16. HP Chromebook 11 G6 EE Motherboard Replacement, Disconnect camera cable: passo 17, immagine 1 di 2 HP Chromebook 11 G6 EE Motherboard Replacement, Disconnect camera cable: passo 17, immagine 2 di 2
    • Pull on the cable straight away from the motherboard. Tools generally are not very effective on this connector, and have a high chance of damaging it. Pull gently, and all should be fine.

  17. HP Chromebook 11 G6 EE Motherboard Replacement, Remove the motherboard: passo 18, immagine 1 di 3 HP Chromebook 11 G6 EE Motherboard Replacement, Remove the motherboard: passo 18, immagine 2 di 3 HP Chromebook 11 G6 EE Motherboard Replacement, Remove the motherboard: passo 18, immagine 3 di 3
    • Grasp the motherboard by the wifi card socket and pull it out of the system.

    • When putting the new motherboard in, make sure to not trap any cables under it before you screw it down.

Conclusione

To reassemble your device, follow these instructions in reverse order.

Altre 2 persone hanno completato questa guida.

0 Commenti

Aggiungi Commento

Visualizza Statistiche:

Ultime 24 Ore: 0

Ultimi 7 Giorni: 5

Ultimi 30 Giorni: 34

Tutti i Tempi: 1,212