Questa versione può contenere modifiche errate. Passa all'ultima istantanea verificata.
Cosa ti serve
-
Questo passaggio è privo di traduzione. Aiuta a tradurlo
-
Using the T5 Torx Screwdriver, remove the T5x3mm screws located in all 4 corners.
-
-
Questo passaggio è privo di traduzione. Aiuta a tradurlo
-
Use the plastic opening tool to push in between the front and the back of the tablet.
-
Slide the plastic opening tool around all 4 sides of the tablet to separate the back cover.
-
-
Questo passaggio è privo di traduzione. Aiuta a tradurlo
-
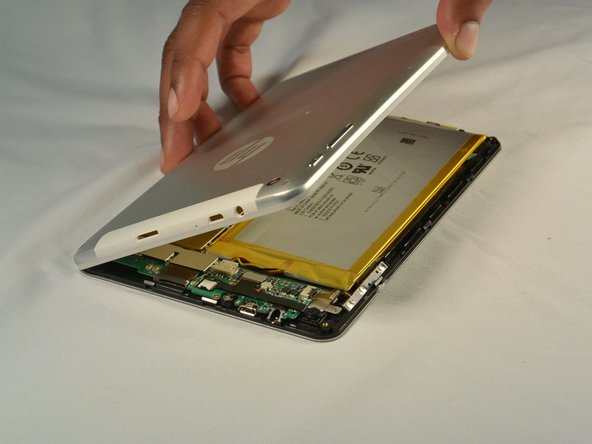
Continue sliding the plastic opening tool around the tablet until all 4 sides are separated from each other.
-
Remove the back cover.
-
-
-
Questo passaggio è privo di traduzione. Aiuta a tradurlo
-
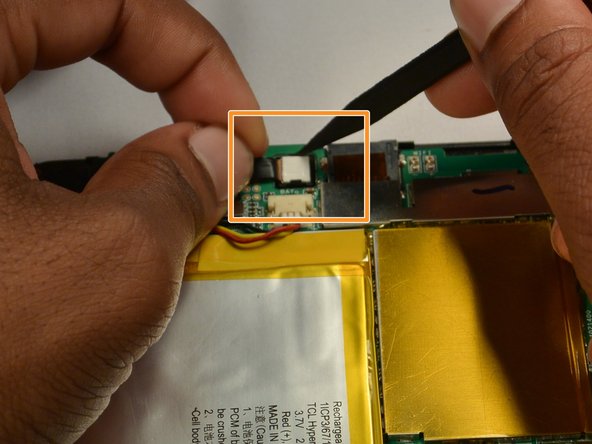
Locate the small grey connector near the top of the device. Using the Spudger tool, gently pull it away from the device until it releases its connection.
-
-
Questo passaggio è privo di traduzione. Aiuta a tradurlo
-
Next move to front facing camera. Using the plastic spudger, push the small tabs out of the way while lightly pulling up on the camera.
-
Then gently pull the camera up and away from the device.
-
-
Questo passaggio è privo di traduzione. Aiuta a tradurlo
-
Using the tweezers, gently pry the rear facing camera up out of its socket.
-
-
Questo passaggio è privo di traduzione. Aiuta a tradurlo
-
Lift the camera assembly away from the device to remove it.
-


Annulla: non ho completato questa guida.
Un'altra persona ha completato questa guida.
Team

IUPUI, Team 1-2, Renguette SU 2015 Membro di IUPUI, Team 1-2, Renguette SU 2015
IUPUI-RENGUETTE-SU15S1G2
5 Membri
8 Guide realizzate