Questa versione può contenere modifiche errate. Passa all'ultima istantanea verificata.
Cosa ti serve
-
Questo passaggio è privo di traduzione. Aiuta a tradurlo
-
Flip the device over and locate the battery compartment.
-
Slide the battery release latch to the left until the battery is detached from its slot.
-
A distinguishable pop will be heard when the battery is fully released.
-
-
Questo passaggio è privo di traduzione. Aiuta a tradurlo
-
Slowly pull the battery out of its slot, being careful not to damage any of the connectors in the process.
-
-
Questo passaggio è privo di traduzione. Aiuta a tradurlo
-
Loosen the Phillips #00 screw securing the RAM compartment cover.
-
-
-
Questo passaggio è privo di traduzione. Aiuta a tradurlo
-
Once the screw is sufficiently loosened, slowly unclip the RAM compartment cover from its slots in the plastic chassis.
-
When unclipped completely, pull the compartment door out and away from the chassis.
-
-
Questo passaggio è privo di traduzione. Aiuta a tradurlo
-
Loosen the two Phillips #00 screws that are securing the hard drive compartment.
-
Once the screws are sufficiently loosened, disconnect the clips holding the cover in place and slowly pull the cover away from the plastic chassis.
-
-
Questo passaggio è privo di traduzione. Aiuta a tradurlo
-
Using a spudger, disconnect the hard drive connecting cable. Use a slow, prying motion as if pulling a nail out of wood.
-
-
Questo passaggio è privo di traduzione. Aiuta a tradurlo
-
Using your fingers, grab the blue tab on the right side of the hard drive and slowly pull upwards.
-
Lift the hard drive out and away from its socket in the plastic chassis.
-
-
Questo passaggio è privo di traduzione. Aiuta a tradurlo
-
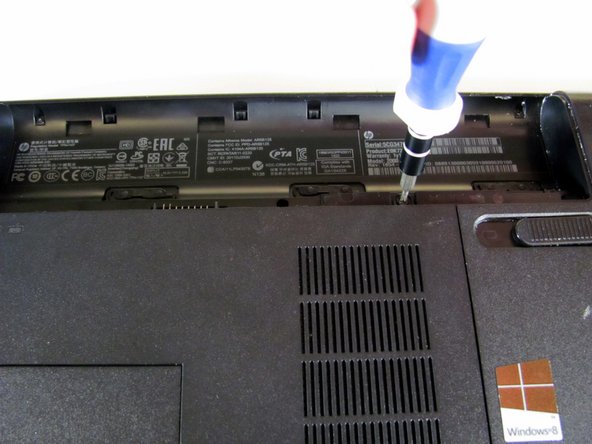
Locate the Phillips-head screw on the left side of the hard drive recess, indicated by a red circle.
-
Use a #00 Phillips head screwdriver to remove the small screw. Consider using a magnetized screwdriver.
-
-
Questo passaggio è privo di traduzione. Aiuta a tradurlo
-
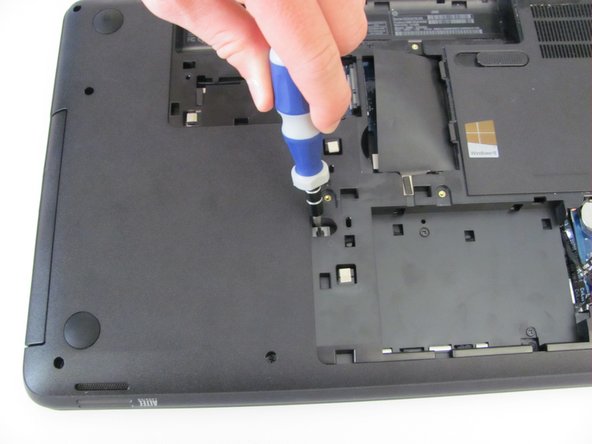
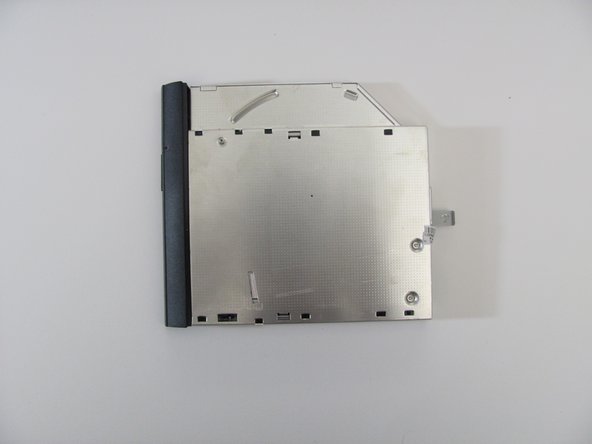
Once the securing screw is removed, the optical drive can be pulled from its slot easily.
-
Use your fingers to pull the optical drive away slowly from its position in the plastic chassis.
-


Annulla: non ho completato questa guida.
Altre 3 persone hanno completato questa guida.

Team

Cal Poly, Team 3-40, Maness Spring 2014 Membro di Cal Poly, Team 3-40, Maness Spring 2014
CPSU-MANESS-S14S3G40
4 Membri
6 Guide realizzate