Introduzione
In the case that the laptop does not respond to the adapter being plugged in, the power jack may be faulty. Follow this guide to replace the power jack.
Cosa ti serve
-
-
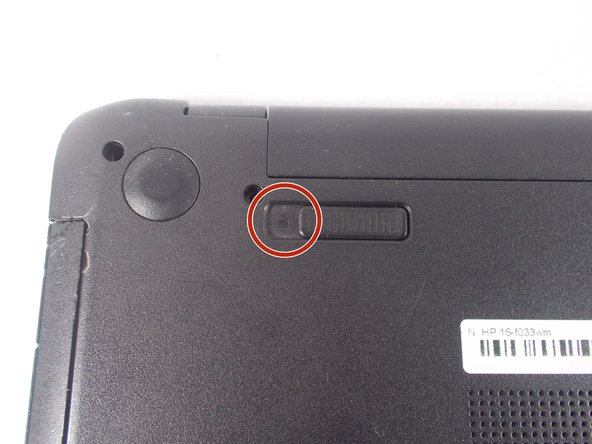
Turn power off using the power button located in the top left corner of the keyboard. Press and hold the power button for 3 seconds until it turns off.
-
-
-
-
Remove the thirteen 7 mm PH1 Phillips head screws from the bottom of the laptop.
You need three more screws, for a total of 16. The other three are inside the RAM module compartment (so I guess that's really 18 screws, counting what you need to do to get the compartment open).
-
-
-
Remove the keyboard connection from the laptop by flipping up the black tab on the ZIF connector.
You also need to disconnect the track pad (middle left) and power button connectors (top left). The tabs to lift on those are white, while with the keyboard, you lift the black part of the connector.
-
-
-
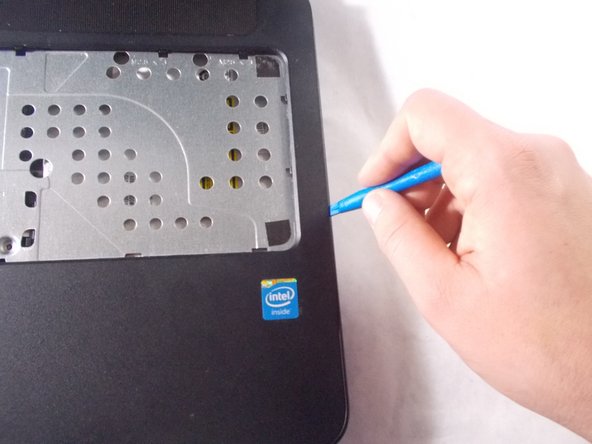
Remove the palm rest using the blue spudger tool.
This step is not even close to being descriptive enough. The keyboard underlayment will not easy detach from the palm rest. Damage to the USB port will occur.
Where is the removal of the ODD? There are three silver screws.
Neither one of these comments were very helpful. You cannot remove the metal keyboard tray and palm rest without popping out the DVD drive using a small pin or paperclip to force eject the drive. The three silver screws can be reached after the DVD drive is extracted, then go remove the five screws from the metal tray. You will also need to unplug the trackpad and power button cable ribbons by flipping the tabs up and gently pulling them out from the connector. After this is done, then you can remove the palm rest and tray as one unit.
Thanks everyone never been stump on opening a laptop
If you skip the three screws on the underside that are inside the RAM module compartment, the area around the track pad won't come loose, and this is the most fragile part of the case.
I cannot speak to the f033 but I have an f023wm with similar casing. However, beware the keyboard underlayment is riveted to the palmrest plastic framing and does not separate as the f033 model is showing it does. Lift the whole palmrest and underlayment up together. There was much trouble in freeing it from the bottom case especially around the hinge area but I found if I took a spudger to the back under the screen I could gently break loose the plastic latches and then the corners freed up too.
-
-
-
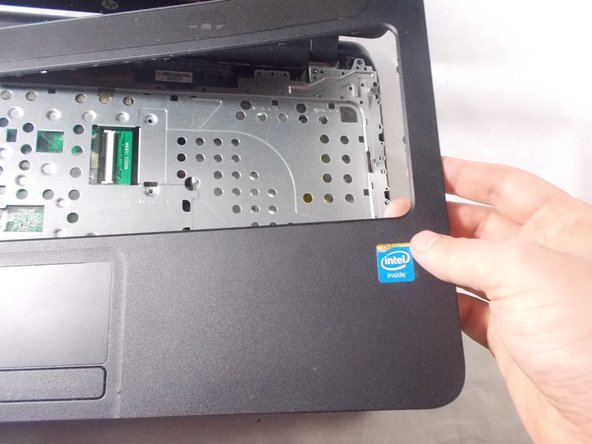
Remove metal keyboard underlayment.
All went good till this point, the keyboard area will not come up like something holding it around the dvd player
There are Three Screw that Holds the DVD and the Metel Keyboard Underlayment. You can See the Hole where the screws were removed in the next photo. In the PIC preceding this step, you can see the holes marked with a Black Marker. There are no instructions on how to remove these lard head screws. I was able to carefully remove 3 but have no chance to replace the middle one—absolutely lousy design.
-
-
-
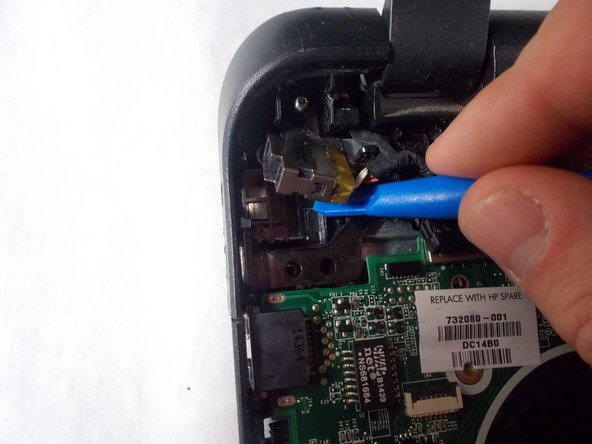
After removing the battery and the palm rest, remove the two 7 mm PH1 Phillips head screws holding in the small metal power jack holder.
-


To reassemble your device, follow these instructions in reverse order.
To reassemble your device, follow these instructions in reverse order.
Annulla: non ho completato questa guida.
Altre 4 persone hanno completato questa guida.
Team

UMass Dartmouth, Team S1-G4, Simcock Fall 2017 Membro di UMass Dartmouth, Team S1-G4, Simcock Fall 2017
UMASSD-SIMCOCK-F17S1G4
3 Membri
6 Guide realizzate
Un commento
I have hp pavilion 15xxxxxx i3 laptop. Its power jack was damaged. I replaced it. When I connected it with power, the light on the jack blinks one time then turned off. Every time I connect it with power, same thing happens. It is neither charging the batyery nor turning the laptop on. Can anyo e tell me what is the issue and how to solve.
Thanks.
AbdulHafeez.